1. Feature Overview
Journeys addresses sales planning and scheduling use cases like Beat Planning or Permanent Journey Planning (PJP) across industries. Sales representatives or teams are often assigned specific geographic areas or customer segments they are responsible for. Beat planning or PJP involves determining the most effective way to cover these areas to maximize sales opportunities. This includes considerations such as the location of potential clients, the density of businesses or customers in a given area, and the travel efficiency of the sales team.
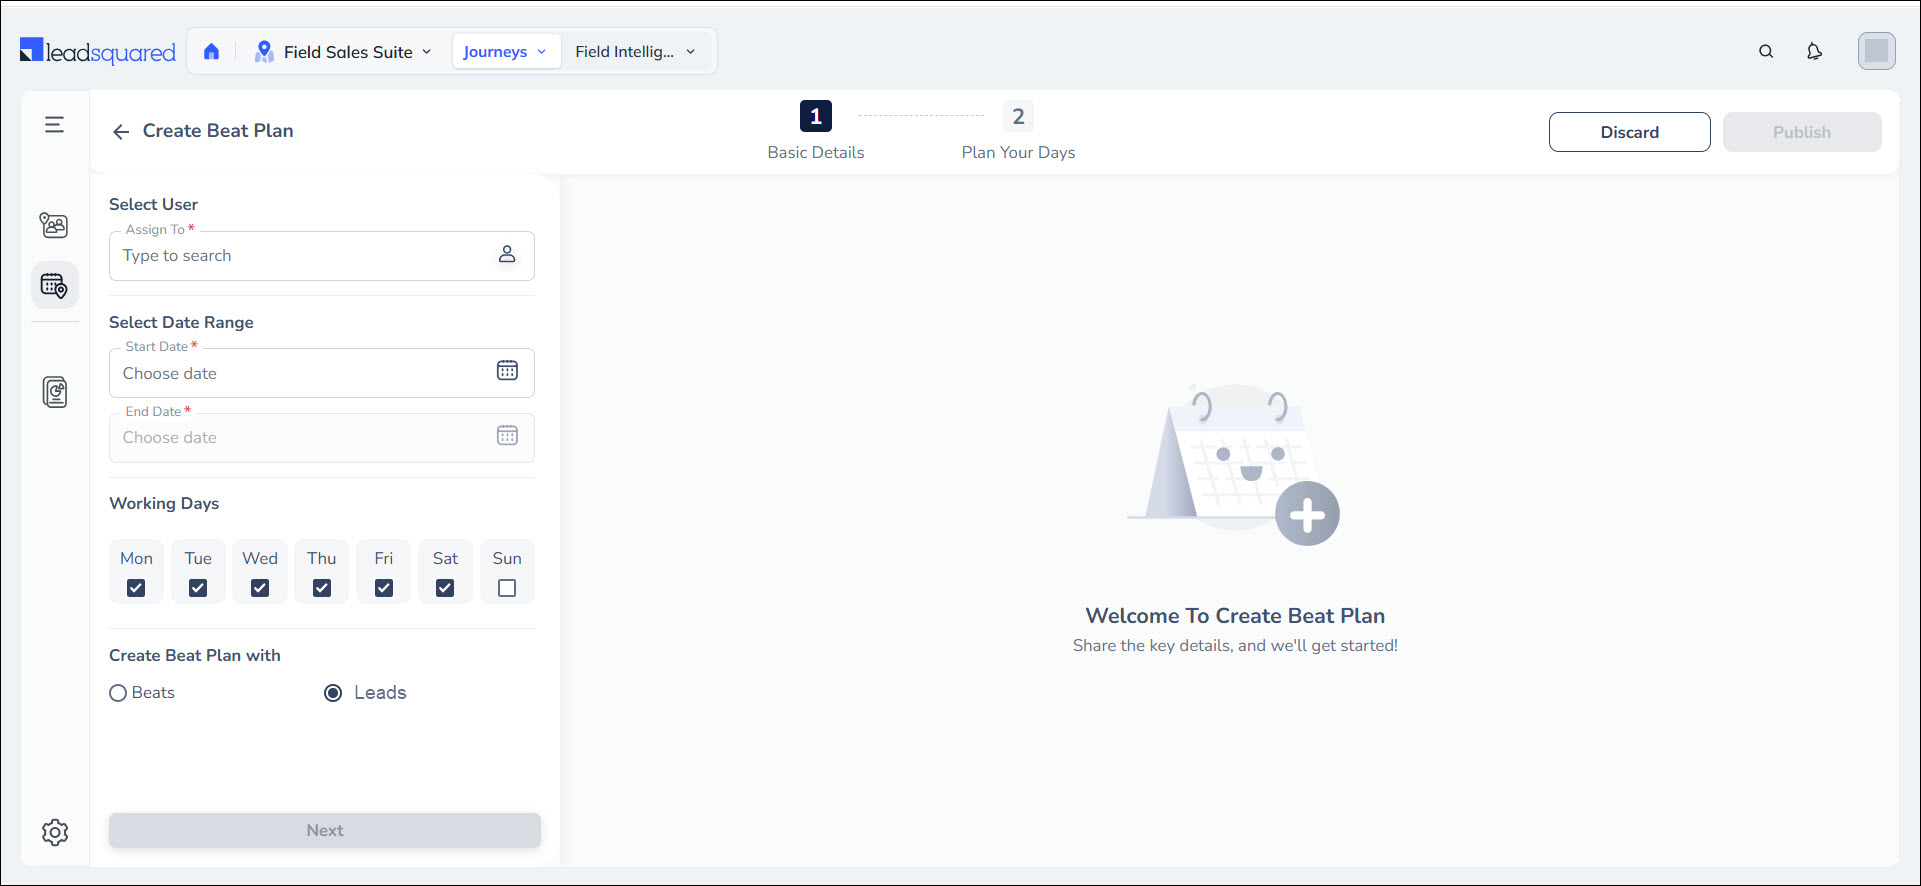
Journeys enables all sales users to create a Plan (Beat Plan, PJP etc.) in just two simple steps by defining the plan duration (i.e. Start Date & End Date) and adding the relevant leads/lead templates. Users can also send plans for approval to their respective managers if required. Once a plan is published or approved, the configured To-Dos will be created against the added leads.
Note: To know more about Journeys, refer to –
2. Prerequisites
3. How It Works
Admins must first enable and configure Journeys on the Web application. Once configured, sales users can create plans on the mobile app and submit them for approval to their managers, if required. Once managers approve the plans, they will be reflected on the following pages on the mobile app –
Users can then follow their plans while performing their assigned tasks.
Note: On the web platform, users have access based on their hierarchy. Admin users and Sales managers can view the plans made by all users. Certain sales users also have access to these plans based on their hierarchy. For example, if Sales Users A and B are reporting to Sales User C, C can view the plans of A and B but not anyone else. However, sales users A and B will only be able to view their own plans.
4. Journeys Settings
Settings on Journeys can only be configured by Admin users.
- From the main menu, navigate to Apps>Journeys and on the bottom left corner of the page, click
 .
.
- On the Settings page, click Journeys.
- Configure the following settings and once you’re done, click Confirm.
4.1 General Settings
The look of the map and lead icons on Journeys can be customized. On your LeadSquared Web App, navigate to Apps>Journeys>Settings>General to edit these settings.
To customize the Journeys map theme in your LeadSquared Web App, you need to be an Admin, Sales Manager, Sales Group Manager, or Reporting Manager. You can choose from seven pre-designed map color themes, and the selected theme will be applied across all users.

As an admin, you can customize the lead icons displayed in the Journeys feature. Assign distinct shapes and colors to represent different Lead Stages or Lead Lists, making it easy to quickly identify leads within the designated territories of the users.

4.2 Journeys Settings
-
Define Default To-Do Task Type
You must first define the default To-Do task type here. Alongside the setting, click the To-Do Task Type dropdown and select the relevant task type. Appointments are not supported as task types on Journeys since they require a specific start and end time which may clash with the other tasks of the day. Once you select a To-Do task type, you can set custom rules and define relevant task types for each lead stage/activity/territory. For example, if Lead A and Lead B are in different lead stages, they will be added to different To-Do task types based on your configuration even if they’re on the same Plan. To set custom rules –
- Click Add Custom Rule.
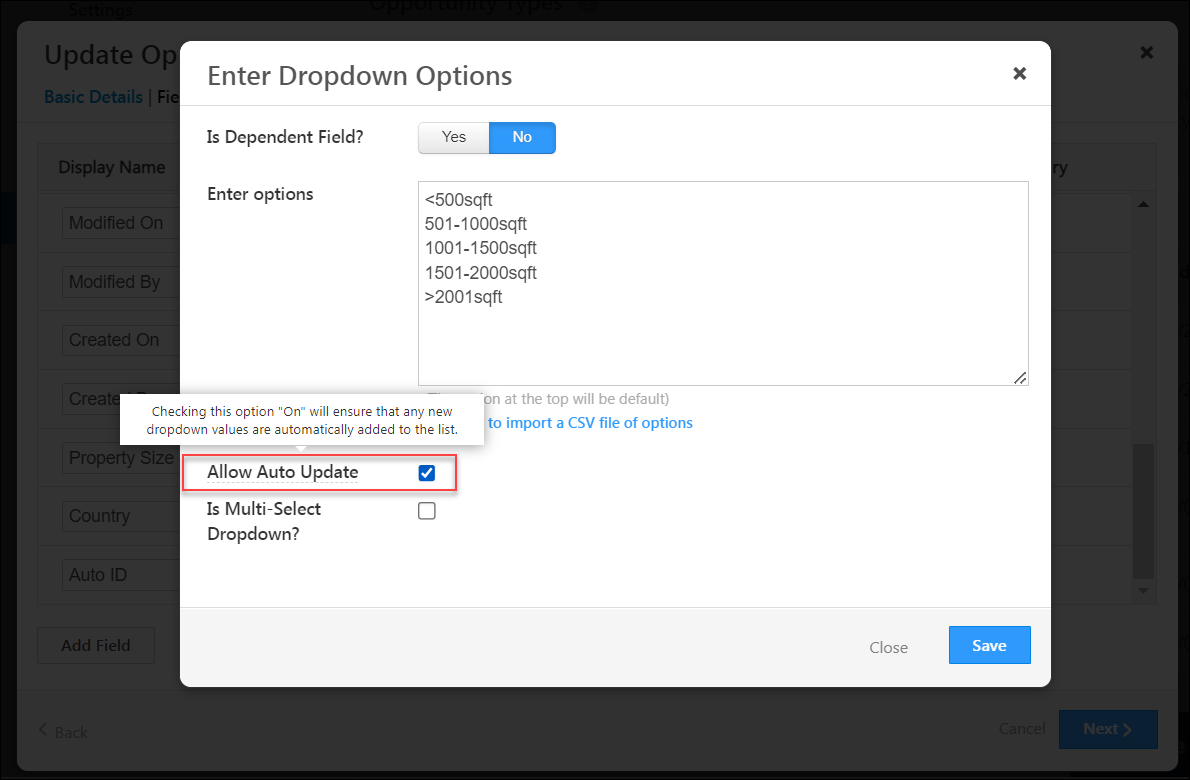
- Alongside Primary Lead Field, select the Lead Field you want to add conditions to. Only Mandatory Lead Fields of Dropdown Data Type lead fields will be displayed as options.
- Under Conditions, select the relevant value and under To-Do Task Type, select the task type you want to associate with this value.
- To add more rules, click Add Custom Rule.
- Click Save.
- Once you create custom rules-
- To delete them, click
 .
.
- To edit them, click
 .
.
Note:
- Plans cannot be published until a To-Do Task type is defined by the Admin.
- Ensure that the To-Do Task Type chosen here is not restricted for creation under Permission Templates for the Journey users. The task configured here must not be deleted from the platform settings as it may impact the task creation after plan approval.
- You can add a maximum of 5 custom rules.
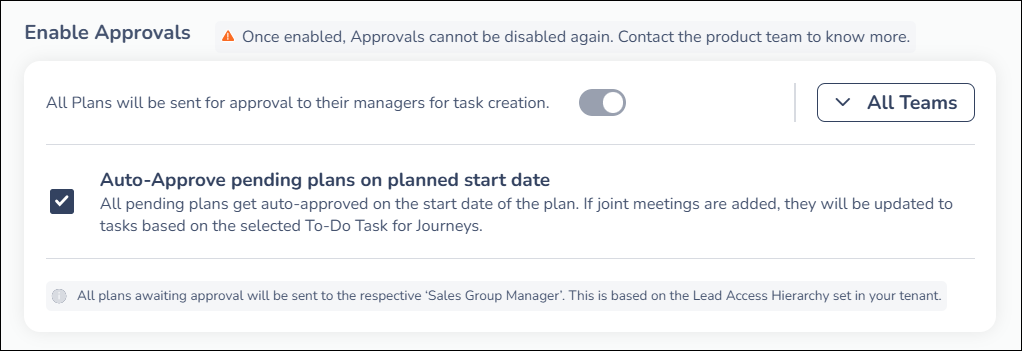
In the LeadSquared Web App, by navigating to Apps>Journeys>Settings>Journeys and selecting Templates and Approvals, admins can enable Approvals. If you enable this setting, all the plans created by users will be displayed to their respective managers for approval. Managers can approve or reject these plans. Only the approved plans will be added to the users’ tasks.
Additionally, admins can enable the Auto-Approve Pending Plans setting, which automatically updates plans to Approved status on both the My Plans and My Approvals pages for easy tracking. Auto-approved plans are marked with the “Auto-Approved” status, including the exact date and time of approval. Sales managers and admins can edit these auto-approved plans, with the editor’s name, date, and time of changes clearly displayed in the updated status. Joint Meetings are disabled by default in auto-approved plans to streamline workflow.
Note:
- Admin users and Sales Managers can approve or reject the plans made by all users. Sales users also have access to these plans based on their hierarchy. For example, if Sales User X is acting as a manager to two other sales users – User Y and User Z, X can approve or reject the plans of users Y and Z, but not anyone else.
- Approvals is an optional setting.
- To enable Joint Meetings, you must enable Approvals.
- Managers can only add leads to a plan if it’s a created using Lead Templates.
- Changing the user hierarchy after setting up Journeys will result in loss of data.
- While managers can be allowed to remove leads from plans, they cannot add leads to a plan.
- Once enabled, Approvals cannot be disabled again.
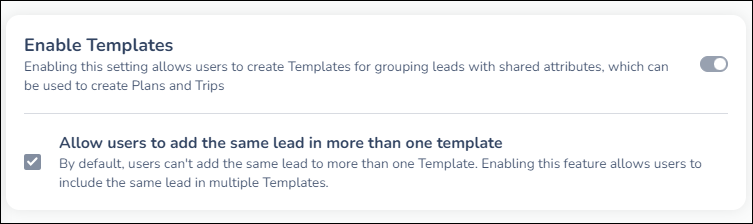
If you enable this setting, users will be able to create Templates by grouping leads with shared attributes, which can be used to create Plans and Trips. To also allow users to add the same lead to multiple templates, alongside Allow users to add the same lead in more than one template, click. Once enabled, Templates cannot be disabled again.
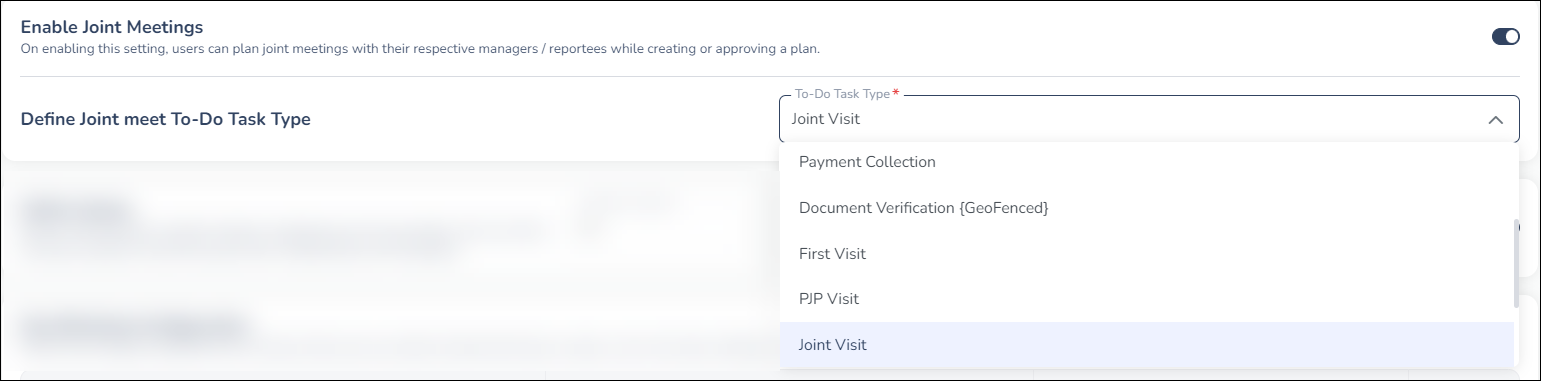
When this setting is enabled, users will be able to plan joint meetings with their respective managers/reportees while creating or approving a plan. To define the To-Do Task Type of this joint meeting, click the To-Do Task Type dropdown. Now, select your option.
Note: Approvals must be enabled to use this feature.
-
Define Quota & Force Minimum Quota
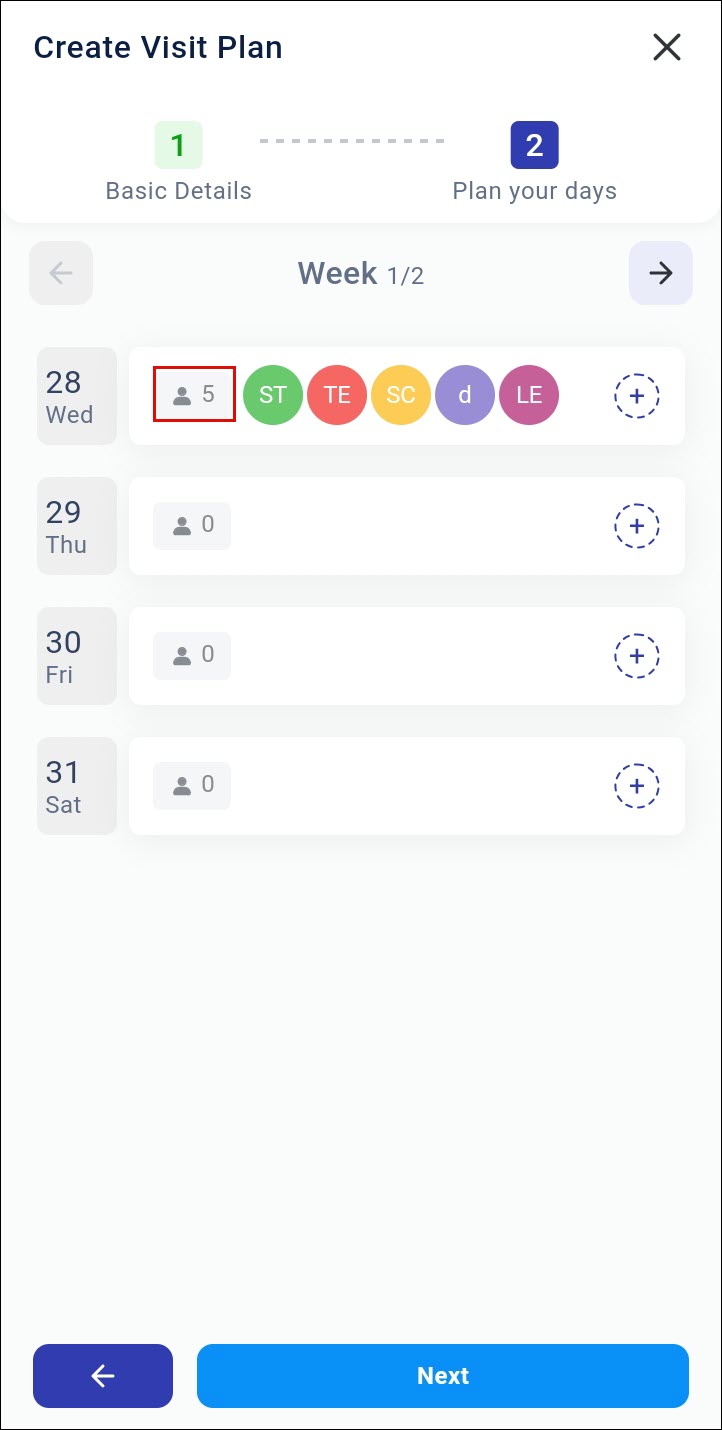
Within the Define Quota settings, administrators can specify the minimum number of leads a sales user must cover in a day. By default, this quota is set to 10 leads per day for all users. This flexible quota can range between 1 to 40 leads daily. Admins have the option to enforce a standard minimum lead requirement across users by enabling the Force Minimum Quota feature. The setting is disabled by default and can only be enabled once a quota is defined. While creating or editing a plan on the LeadSquared Mobile App, users can clearly see the number of leads they have added versus the minimum quota. While submitting a plan, if the users have not met the specified minimum lead quota, the system will block submission and notify the user of the shortcoming. Quotas are managed disregarding days designated as holidays or blocked.
Note: This is an optional setting.
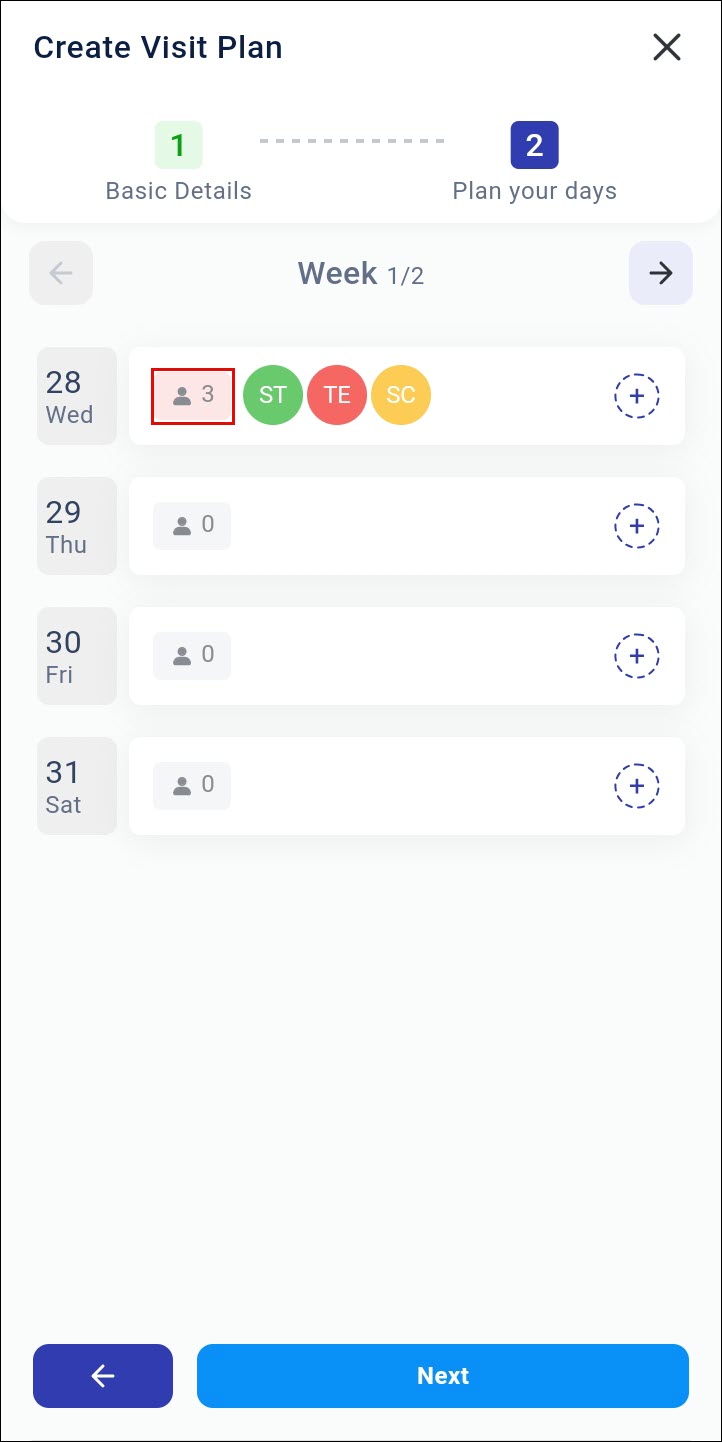
Users can view lead chips on planned days to easily track whether their quota is being met. Plans that have met the quota will display a grey lead chip, while plans where the lead quota has not been met will show a red lead chip. The user can add leads appropriately.
-
Day Blocking Configuration
With this setting, you can define and manage a predefined set of reasons that users can select to block their days in a plan, such as for leave, holidays, training or other purposes. You can add a maximum of 10 reasons for day blocking here. You can also associate a To-Do task with the day blocking reason. For example, if you’re blocking a day for a Sales Meeting, you can associate a Sales Meeting task to it. Upon blocking the day, the task will automatically be created against the relevant users. To know more about using this feature, refer to Manage Plans on the Mobile App.
-
Restrict Overlapping Plan Date Ranges
To prevent users from creating plans with date ranges that overlap plans already published, approved, or pending, alongside Restrict Overlapping Plan Date Ranges, click the toggle.
4.3 Process Compliance Settings
This feature allows Admins to set a plan submission window, default plan duration and working days for users while creating plans on the LeadSquared Web App. On your LeadSquared Dashboard, navigate to Apps>Journeys>Settings>Journeys to enable these settings.
- Set Monthly Plan Submission Window – By enabling this setting, the admins can specify a monthly time window during which users can submit their plans. The admins can select the start date and end date from the relevant dropdowns. This will reflect for all users. If this is enabled, any attempt to create a plan outside this window would not be acceptable.
- Setting Default Plan Duration & Force Duration – Admins can enable Default Plan Duration for users to configure the default number of days in a plan. This can be:
- Custom – Selecting a value between 1 to 31 days. For instance, if 10 is entered on March 1st, then the last date of the plan will be March 10th.
- Current Week – The default End Date would be the upcoming Sunday of the week containing the Start Date. If you select Sunday as the Start Date, the End Date will be the same.
- Current Month – The default End Date would be the last date of the month. If the selected Start Date is already the month’s last date, it will reflect as both Start and End Date.
When a user logs into the LeadSquared Mobile App and selects a start date, the app automatically displays the end date based on the duration enabled by the admin. The user can change the end date as per their requirement. However, if the Default Plan Duration and Force Duration are enabled, the end date becomes non-editable.
- Setting Working Days Template – Admins can enable force workday template on the LeadSquared Web App. When a user creates a plan, the app automatically displays the workday template assigned to the user and makes it non-editable. The users can modify the template if the setting is disabled.
Note: This setting is not honored when a user clones or edits a plan, allowing them to make changes to the working days template as needed.
- Set Lead Frequency Per Plan – Admins can set a maximum lead frequency count to restrict how many times the same lead can be added to a lead-based plan from My Plans and My Approvals. Once a lead has been added the maximum number of times allowed (as configured in Journeys Settings), the Add button for that lead will be disabled during the plan creation as well as edit process.
Note: While editing a plan created before the setting was enabled, if a lead has been added more times than the new limit, those entries will be retained. However, the plan cannot be updated until the user manually removes the extra instances to meet the new limit.

4.4 Advanced Settings
On your LeadSquared Web App, navigate to Apps>Journeys>Settings>Advanced.
To rename the Plan entity –
- On the Journeys page, click
 .
.
- On the left side of the screen, under Settings, select Advanced.
- Under Rename Modules, alongside Plans, click .
- Enter the relevant display name and the plural term for it.
- Once you’re done, click
 .
.
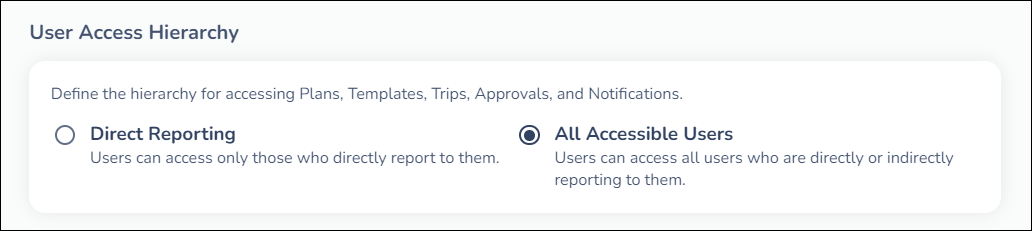
Previously, managers in the higher positions could access all the plans created by all users under them. Now, you can define the hierarchy for accessing Plans, Templates, Trips, Approvals, and Notifications. You can either choose Direct Reporting where you can access only those who directly report to you, or All Accessible Users where you can access all users who are directly or indirectly reporting to you. To toggle between this,
- Navigate to Apps>Journeys>Settings>Advanced.
- Under User Access Hierarchy, toggle between Direct Reporting or All Accessible Users as required.
- Once you make the change, click Confirm on the top-right corner of the page.
5. Add Lead Ownership Change Webhook
Create a webhook to update your pre-existing plans and lead templates according to lead ownership changes made on the LeadSquared platform. For example, if user A was assigned 10 leads and someone updates the lead owner of these leads to user B, you can automatically update this information on the platform by creating a webhook.
- Navigate to Settings>API and Webhooks>Webhooks and click Create.
- Enter the following details –
- Type – Webhook
- Event – Lead Ownership Change
- Webhook URL –
https://fieldsales-in21.leadsquared.com/api/journey/v1/(EnterOrgId)/lead/owner
- The orgid included in the URL refers to the organisation ID, which is the same as your LeadSquared Account Number. You can find this ID on the bottom of your screen.
- Content Type – application/json
- Execution Delay – 0 Seconds
- Custom Header Name – Authorization
- Custom Header Value –
- Navigate to Journeys>Settings>Advanced.
- Alongside Field Sales Token for Automation, click Copy.
- Paste that value under Custom Header Value.
- Enter a description for the webhook.
- Click Save.
6. Add Lead Deletion Webhook
Create a webhook to automatically update your pre-existing plans and lead templates when a lead gets deleted on the LeadSquared platform.
- Navigate to Settings>API and Webhooks>Webhooks and click Create.
- Enter the following details –
- Type – Webhook
- Event – Lead Delete
- Webhook URL –
https://fieldsales-in21.leadsquared.com/api/journey/v1/(EnterOrgID)/leads?eventType=delete
- The orgid included in the URL refers to the organisation ID, which is the same as your LeadSquared Account Number. You can find this ID on the bottom of your screen.
- Content Type – application/json
- Execution Delay – 0 Seconds
- Custom Header Name – Authorization
- Custom Header Value –
- Navigate to Journeys>Settings>Advanced.
- Alongside Field Sales Token for Automation, click Copy.
- Paste that value under Custom Header Value.
- Enter a description for the webhook.
- Click Save.
⚲
7. Add Journeys to Mobile App
Once you’re done configuring the Journeys settings, add it to the mobile app’s navigation menu.
- On the side panel of the CASA landing page, click
 . Then, alongside the menu you want to add Journeys to, click .
- On the right side of the page, click Side Navigation.
- To add Journeys to the mobile app’s navigation bar, under Available Menu Tabs, alongside Journeys, click
 .
.
- To rearrange the tabs, drag and drop them in the desired order.
- Once you’re done building the menu, click Publish.
Any Questions?
We’d love to answer your questions or hear your own unique use cases. Feel free to share your experiences in the comments section below.