1. Feature Overview
This article contains the data posted for LeadSquared webhook events.
2. Lead Webhook Triggers
2.1 Lead Creation Webhook
{"ProspectID":"e4954e47-ea2c-49e1-b3c3-1fb58e77bd92","ProspectAutoId":"1811","FirstName":"Jack","LastName":"Reynor","EmailAddress":"jackreynor@example.com","Origin":"Lead Add Form","Phone":"+91-9876556789","Mobile":null,"Source":null,"SourceMedium":null,"SourceCampaign":null,"DoNotEmail":"0","DoNotCall":"0","ProspectStage":"Prospect","Score":"0","EngagementScore":"0","ProspectActivityName_Max":null,"ProspectActivityDate_Max":null,"FirstLandingPageSubmissionDate":null,"OwnerId":"1a50c565-8525-11ea-a93b-0aa4c559f4ca","CreatedBy":"1a50c565-8525-11ea-a93b-0aa4c559f4ca","CreatedOn":"2024-09-20 13:35:25","ModifiedBy":"1a50c565-8525-11ea-a93b-0aa4c559f4ca","ModifiedOn":"2024-09-20 13:35:25","LeadConversionDate":"2024-09-20 13:35:25","StatusCode":"0","StatusReason":"0","IsLead":"1","mx_Country":null,"LastModifiedOn":"2024-09-20 13:35:25","mx_Do_You_Have_a_Co_Applicant":"Yes","mx_Identification_Documents":"{\"Status\":\"Pending\",\"mx_CustomObject_1\":\"\",\"mx_CustomObject_2\":\"\",\"mx_CustomObject_3\":\"\",\"mx_CustomObject_4\":\"\"}","mx_Doctors":"Hippocrates","mx_WhatsApp_Opt_Out":"0","mx_Products":"{\"Status\":\"Pending\",\"mx_CustomObject_1\":\"\"}","mx_Docs":"{\"Status\":\"Pending\",\"mx_CustomObject_1\":\"\",\"mx_CustomObject_2\":\"\",\"mx_CustomObject_3\":\"\",\"mx_CustomObject_4\":\"\",\"mx_CustomObject_5\":\"On Going\"}","mx_Video_KYC":"{\"Status\":\"Pending\",\"mx_CustomObject_1\":\"\"}","mx_Degree":"MA Psychology","mx_Documentation":"{\"Status\":\"Pending\",\"mx_CustomObject_1\":\"\",\"mx_CustomObject_2\":\"\",\"mx_CustomObject_3\":\"\",\"mx_CustomObject_4\":\"\"}","mx_Options":"Option 1","mx_Course":"BTech","mx_Payment_Status":"Paid","mx_Payment_Mode":"Offline","mx_Course_Family":"Masters","NotableEvent":"Created","NotableEventdate":"2024-09-20 13:35:25","SourceReferrer":"","LastVisitDate":null,"CurrentOptInStatus":"Unknown","QualityScore01":null,"ConversionReferrerURL":null,"IsPrimaryContact":"0","SourceIPAddress":null,"SourceReferrerURL":null,"mx_Address_Proof":"Aadhaar","mx_Disposition":"Issue Resolved","mx_Identification_Type":"Passport","LeadLastModifiedOn":"2024-09-20 13:35:25","OwnerIdName":"Sri Sudhan","OwnerIdEmailAddress":"sri.sudhan@leadsquared.com","CreatedByName":"Sri Sudhan","ModifiedByName":"Sri Sudhan","Account_CompanyName":"Education 101","Account_ShortName":"t20170817174751","Account_TimeZone":"Asia/Kolkata","Account_Website":"lshelp.staging.wpengine.com","Account_Street1":"123 Street","Account_City":"Bengaluru","Account_State":"Karnataka","Account_Country":"India","Account_Phone":"+91-8556010497","Owner_FirstName":"Sri Sudhan","Owner_EmailAddress":"sri.sudhan@leadsquared.com","Owner_FullName":"Sri Sudhan","Owner_TimeZone":"Asia/Kolkata","Owner_AssociatedPhoneNumbers":"+91-9000000000","Org_ShortCode":"22824","Account_Address":"Education 101{mxnewline}123 Street,{mxnewline},Bengaluru,Karnataka{mxnewline} {mxnewline}India.","CreatedByEmail":"sri.sudhan@leadsquared.com","ModifiedByEmail":"sri.sudhan@leadsquared.com","CanUpdate":"true"}
2.2 Lead Delete
[{"ProspectID":"0b153d3c-0c4e-40e7-8183-3fd128074196","ProspectAutoId":"1105","FirstName":"Han","LastName":"Solo","EmailAddress":null,"Company":"Example Company","Origin":"API","Phone":null,"Mobile":null,"Website":null,"TimeZone":null,"Source":"","SourceMedium":"","Notes":null,"SourceCampaign":"","SourceContent":"","DoNotEmail":"0","DoNotCall":"0","ProspectStage":"Prospect","Score":"0","Revenue":null,"EngagementScore":"0","TotalVisits":"0","PageViewsPerVisit":"0","AvgTimePerVisit":"0","RelatedProspectId":null,"ProspectActivityId_Min":"6a741d35-7e54-4cb6-8f62-efcfddc10aaf","ProspectActivityDate_Min":"2019-05-07 10:40:10","Web_Referrer":"","Web_RefKeyword":"","ProspectActivityId_Max":"6a741d35-7e54-4cb6-8f62-efcfddc10aaf","ProspectActivityName_Max":"Lead Capture","ProspectActivityDate_Max":"2019-05-07 10:40:10","ImportTransactionId":null,"RelatedLandingPageId":null,"FirstLandingPageSubmissionId":null,"FirstLandingPageSubmissionDate":null,"OwnerId":"3b1041fb-8374-11e7-8758-0a106ee76b21","CreatedBy":"3b1041fb-8374-11e7-8758-0a106ee76b21","CreatedOn":"2019-05-07 10:40:10","ModifiedBy":"3b1041fb-8374-11e7-8758-0a106ee76b21","ModifiedOn":"2023-08-01 11:08:10","LeadConversionDate":"2019-05-07 10:40:10","StatusCode":"0","StatusReason":"0","DeletionStatusCode":"0","IsLead":"1","mx_Street1":null,"mx_Street2":null,"mx_City":"Bangalore","mx_State":null,"mx_Country":"Afghanistan","mx_Zip":null,"LastModifiedOn":"2023-08-01 11:08:44","mx_Weight_Division":null,"mx_Gym":null,"mx_Athlete_Age":null,"mx_Secondary_Email_Address":null,"mx_Secondary_Email":null,"mx_Custom_Score":null,"mx_Age":null,"mx_12th_Grade_Results":null,"JobTitle":null,"mx_Co_Applicant_First_Name":null,"mx_Co_Applicant_Last_Name":null,"mx_Co_Applicant_Email":null,"mx_Permanent_Address_1":null,"mx_Permanent_Address_2":null,"mx_Do_You_Have_a_Co_Applicant":null,"mx_Is_Permanent_Address_Same_as_Current_Address":null,"mx_Renewal_Date":null,"mx_Identification":null,"mx_Identification_Documents":null,"mx_Doctors":null,"mx_Product":null,"mx_WhatsApp_Opt_Out":null,"mx_Date_of_Birth":null,"mx_PAN_Number":null,"mx_Fathers_Name":null,"mx_Product_Price":null,"mx_Product_Specification":null,"mx_Products":null,"mx_Docs":null,"mx_Retype_Password":null,"mx_Donation_Amount":null,"mx_Course_Type":null,"mx_Application_Submitted_On":null,"mx_Video_KYC":null,"mx_Company":null,"mx_Aadhaar_Number":null,"mx_Degree":null,"mx_Documentation":null,"mx_Options":null,"mx_Passport_Number":null,"mx_SSN":null,"mx_Course":"MBA","mx_Payment_Status":"Paid","mx_Payment_Mode":"Debit Card","mx_Course_Family":"Masters","mx_Payment_Amount":"230451","NotableEvent":"Modified","NotableEventdate":"2023-08-01 11:08:10","SourceReferrer":"","LastVisitDate":"2019-05-07 10:40:10","LeadAge":"1963","CurrentOptInStatus":null,"LastOptInEmailSentDate":null,"MailingPreferences":null,"OptInDate":null,"OptInDetails":null,"mx_Portal_IsPortalUser":null,"QualityScore01":null,"FacebookId":null,"GooglePlusId":null,"GTalkId":null,"LinkedInId":null,"PhotoUrl":null,"SkypeId":null,"TwitterId":null,"CompanyType":null,"ConversionReferrerURL":null,"DoNotTrack":null,"IsPrimaryContact":"0","Latitude":null,"Longitude":null,"RelatedCompanyId":null,"SourceIPAddress":null,"SourceReferrerURL":null,"mx_Address_Proof":null,"mx_Disposition":null,"mx_Identification_Type":null,"mx_Malfunction_error_example":null,"mx_Pan_Card_Number":null,"mx_Rate_of_Interest":null,"mx_School":null,"RelatedCompanyIdName":null,"RelatedCompanyOwnerId":null,"CompanyTypeName":null,"CompanyTypePluralName":null,"LeadLastModifiedOn":"2023-08-01 11:08:44","OwnerIdName":"Vir Singh","OwnerIdEmailAddress":"virkdsingh@gmail.com","Groups":"","CreatedByName":"Vir Singh","ModifiedByName":"Vir Singh","Account_CompanyName":"Education 101","Account_ShortName":"t20170817174751","Account_TimeZone":"Asia/Kolkata","Account_Website":"lshelp.staging.wpengine.com","Account_Street1":"123 Street","Account_Street2":"","Account_City":"Bengaluru","Account_State":"Karnataka","Account_Country":"India","Account_Zip":"","Account_Fax":"","Account_Phone":"+91-8556010497","Owner_FirstName":"Vir","Owner_MiddleName":"","Owner_LastName":"Singh","Owner_EmailAddress":"virkdsingh@gmail.com","Owner_FullName":"Vir Singh","Owner_TimeZone":"Asia/Kolkata","Owner_AssociatedPhoneNumbers":"+91-999988888","Org_ShortCode":"22824","Account_Address":"Education 101{mxnewline}123 Street,{mxnewline},Bengaluru,Karnataka{mxnewline} {mxnewline}India.","Total":"1","CanUpdate":"true"}]
2.3 Lead Field Value Change
{"Before":{"ProspectID":"9e6ec6de-5a2a-4833-98c2-53145d6222f1","ProspectAutoId":"1770","FirstName":"Shamar","LastName":"Joseph","EmailAddress":"srisudhanr@gmail.com","Phone":null,"Mobile":null,"Source":null,"SourceMedium":null,"SourceCampaign":null,"ProspectStage":"Prospect","Score":"1","EngagementScore":"0","ProspectActivityName_Max":"Email Opened","ProspectActivityDate_Max":"2024-07-09 11:23:12","OwnerId":"1a50c565-8525-11ea-a93b-0aa4c559f4ca","ModifiedOn":"2024-07-09 07:31:55","mx_Country":null,"LastModifiedOn":"2024-08-09 03:55:12","NotableEvent":"Email Opened","NotableEventdate":"2024-07-09 11:23:12","QualityScore01":null,"ConversionReferrerURL":null,"SourceIPAddress":null,"SourceReferrerURL":null,"LeadLastModifiedOn":"2024-08-09 03:55:12","OwnerIdEmailAddress":"sri.sudhan@leadsquared.com"},"After":{"ProspectID":"9e6ec6de-5a2a-4833-98c2-53145d6222f1","ProspectAutoId":"1770","FirstName":"Shamar","LastName":"Joseph","EmailAddress":"srisudhanr@gmail.com","Phone":null,"Mobile":null,"Source":null,"SourceMedium":null,"SourceCampaign":null,"ProspectStage":"Prospect","Score":"1","EngagementScore":"0","ProspectActivityName_Max":"Email Opened","ProspectActivityDate_Max":"2024-07-09 11:23:12","OwnerId":"1a50c565-8525-11ea-a93b-0aa4c559f4ca","ModifiedOn":"2024-09-20 14:23:43","mx_Country":"Guyana","LastModifiedOn":"2024-09-20 14:23:43","NotableEvent":"Modified","NotableEventdate":"2024-09-20 14:23:43","QualityScore01":null,"ConversionReferrerURL":null,"SourceIPAddress":null,"SourceReferrerURL":null,"LeadLastModifiedOn":"2024-09-20 14:23:43","OwnerIdEmailAddress":"sri.sudhan@leadsquared.com"}}
2.4 Lead Merge
{"Parent":[{"ProspectID":"e9783ae9-6767-4387-acc3-25b2d3c9222e","ProspectAutoId":"1768","FirstName":"Oshin","LastName":"Anand","EmailAddress":"oshinranand@gmail.com","Company":null,"Origin":"Lead Add Form","Phone":null,"Mobile":null,"Website":null,"TimeZone":null,"Source":null,"SourceMedium":null,"Notes":null,"SourceCampaign":null,"SourceContent":null,"DoNotEmail":"1","DoNotCall":"0","ProspectStage":"Prospect","Score":"-30","Revenue":null,"EngagementScore":"0","TotalVisits":null,"PageViewsPerVisit":null,"AvgTimePerVisit":null,"RelatedProspectId":null,"ProspectActivityId_Min":"88cb90e4-3dc4-11ef-a77e-0ac989580241","ProspectActivityDate_Min":"2024-07-09 07:21:49","Web_Referrer":null,"Web_RefKeyword":null,"ProspectActivityId_Max":"88cb90e4-3dc4-11ef-a77e-0ac989580241","ProspectActivityName_Max":"Email Bounced","ProspectActivityDate_Max":"2024-07-09 12:51:51","ImportTransactionId":null,"RelatedLandingPageId":null,"FirstLandingPageSubmissionId":null,"FirstLandingPageSubmissionDate":null,"OwnerId":"1a50c565-8525-11ea-a93b-0aa4c559f4ca","CreatedBy":"1a50c565-8525-11ea-a93b-0aa4c559f4ca","CreatedOn":"2024-07-09 12:51:47","ModifiedBy":"1a50c565-8525-11ea-a93b-0aa4c559f4ca","ModifiedOn":"2024-07-09 12:51:47","LeadConversionDate":"2024-07-09 12:51:47","StatusCode":"0","StatusReason":"6","DeletionStatusCode":"0","IsLead":"1","mx_Street1":null,"mx_Street2":null,"mx_City":null,"mx_State":null,"mx_Country":null,"mx_Zip":null,"LastModifiedOn":"2024-07-09 07:26:18","mx_Weight_Division":null,"mx_Gym":null,"mx_Athlete_Age":null,"mx_Secondary_Email_Address":null,"mx_Secondary_Email":null,"mx_Custom_Score":null,"mx_Age":null,"mx_12th_Grade_Results":null,"JobTitle":null,"mx_Co_Applicant_First_Name":null,"mx_Co_Applicant_Last_Name":null,"mx_Co_Applicant_Email":null,"mx_Permanent_Address_1":null,"mx_Permanent_Address_2":null,"mx_Do_You_Have_a_Co_Applicant":null,"mx_Is_Permanent_Address_Same_as_Current_Address":null,"mx_Renewal_Date":null,"mx_Identification":null,"mx_Identification_Documents":"{\"Status\":\"Pending\",\"mx_CustomObject_1\":\"\",\"mx_CustomObject_2\":\"\",\"mx_CustomObject_3\":\"\",\"mx_CustomObject_4\":\"\"}","mx_Doctors":"Hippocrates","mx_Product":null,"mx_WhatsApp_Opt_Out":"0","mx_Date_of_Birth":null,"mx_PAN_Number":null,"mx_Fathers_Name":null,"mx_Product_Price":null,"mx_Product_Specification":null,"mx_Products":"{\"Status\":\"Pending\",\"mx_CustomObject_1\":\"\"}","mx_Docs":"{\"Status\":\"Pending\",\"mx_CustomObject_1\":\"\",\"mx_CustomObject_2\":\"\",\"mx_CustomObject_3\":\"\",\"mx_CustomObject_4\":\"\",\"mx_CustomObject_5\":\"On Going\"}","mx_Retype_Password":null,"mx_Donation_Amount":null,"mx_Course_Type":null,"mx_Application_Submitted_On":null,"mx_Video_KYC":"{\"Status\":\"Pending\",\"mx_CustomObject_1\":\"\"}","mx_Company":null,"mx_Aadhaar_Number":null,"mx_Degree":"MA Psychology","mx_Documentation":"{\"Status\":\"Pending\",\"mx_CustomObject_1\":\"\",\"mx_CustomObject_2\":\"\",\"mx_CustomObject_3\":\"\",\"mx_CustomObject_4\":\"\"}","mx_Options":"Option 1","mx_Passport_Number":null,"mx_SSN":null,"mx_Course":null,"mx_Payment_Status":null,"mx_Payment_Mode":null,"mx_Course_Family":null,"mx_Payment_Amount":null,"NotableEvent":"Email Bounced","NotableEventdate":"2024-07-09 12:51:51","SourceReferrer":"","LastVisitDate":"2024-07-09 12:51:51","LeadAge":"73","CurrentOptInStatus":"Unknown","LastOptInEmailSentDate":null,"MailingPreferences":null,"OptInDate":null,"OptInDetails":null,"mx_Portal_IsPortalUser":null,"QualityScore01":null,"FacebookId":null,"GooglePlusId":null,"GTalkId":null,"LinkedInId":null,"PhotoUrl":null,"SkypeId":null,"TwitterId":null,"CompanyType":null,"ConversionReferrerURL":null,"DoNotTrack":null,"IsPrimaryContact":"0","Latitude":null,"Longitude":null,"RelatedCompanyId":null,"SourceIPAddress":null,"SourceReferrerURL":null,"mx_Address_Proof":null,"mx_Disposition":null,"mx_Identification_Type":null,"mx_Malfunction_error_example":null,"mx_Pan_Card_Number":null,"mx_Rate_of_Interest":null,"mx_School":null,"RelatedCompanyIdName":null,"RelatedCompanyOwnerId":null,"CompanyTypeName":null,"CompanyTypePluralName":null,"LeadLastModifiedOn":"2024-07-09 12:56:18","OwnerIdName":"Sri Sudhan","OwnerIdEmailAddress":"sri.sudhan@leadsquared.com","Groups":"","CreatedByName":"Sri Sudhan","ModifiedByName":"Sri Sudhan","Account_CompanyName":"Education 101","Account_ShortName":"t20170817174751","Account_TimeZone":"Asia/Kolkata","Account_Website":"lshelp.staging.wpengine.com","Account_Street1":"123 Street","Account_Street2":"","Account_City":"Bengaluru","Account_State":"Karnataka","Account_Country":"India","Account_Zip":"","Account_Fax":"","Account_Phone":"+91-8556010497","Owner_FirstName":"Sri Sudhan","Owner_MiddleName":"","Owner_LastName":"","Owner_EmailAddress":"sri.sudhan@leadsquared.com","Owner_FullName":"Sri Sudhan","Owner_TimeZone":"Asia/Kolkata","Owner_AssociatedPhoneNumbers":"+91-9000000000","Org_ShortCode":"22824","Account_Address":"Education 101{mxnewline}123 Street,{mxnewline},Bengaluru,Karnataka{mxnewline} {mxnewline}India.","CanUpdate":"true"}],"Child":[{"ProspectID":"6f591974-cb0e-4c8d-9505-1d491f68e8b6","ProspectAutoId":"1769","FirstName":"Oshin","LastName":null,"EmailAddress":"oshinanandmedia@gmail.com","Company":null,"Origin":"Lead Add Form","Phone":null,"Mobile":null,"Website":null,"TimeZone":null,"Source":null,"SourceMedium":null,"Notes":null,"SourceCampaign":null,"SourceContent":null,"DoNotEmail":"0","DoNotCall":"0","ProspectStage":"Prospect","Score":"1","Revenue":null,"EngagementScore":"0","TotalVisits":null,"PageViewsPerVisit":null,"AvgTimePerVisit":null,"RelatedProspectId":null,"ProspectActivityId_Min":"f163a84a-d4fd-4214-bb1a-f325fc0c54c8","ProspectActivityDate_Min":"2024-07-09 07:25:40","Web_Referrer":null,"Web_RefKeyword":null,"ProspectActivityId_Max":"b62711bd-9ce2-4ac4-ab34-e4d4ef8fc777","ProspectActivityName_Max":"Email Opened","ProspectActivityDate_Max":"2024-07-09 13:23:09","ImportTransactionId":null,"RelatedLandingPageId":null,"FirstLandingPageSubmissionId":null,"FirstLandingPageSubmissionDate":null,"OwnerId":"1a50c565-8525-11ea-a93b-0aa4c559f4ca","CreatedBy":"1a50c565-8525-11ea-a93b-0aa4c559f4ca","CreatedOn":"2024-07-09 12:55:38","ModifiedBy":"1a50c565-8525-11ea-a93b-0aa4c559f4ca","ModifiedOn":"2024-07-09 12:55:38","LeadConversionDate":"2024-07-09 12:55:38","StatusCode":"0","StatusReason":"0","DeletionStatusCode":"0","IsLead":"1","mx_Street1":null,"mx_Street2":null,"mx_City":null,"mx_State":null,"mx_Country":null,"mx_Zip":null,"LastModifiedOn":"2024-08-09 03:55:12","mx_Weight_Division":null,"mx_Gym":null,"mx_Athlete_Age":null,"mx_Secondary_Email_Address":null,"mx_Secondary_Email":null,"mx_Custom_Score":null,"mx_Age":null,"mx_12th_Grade_Results":null,"JobTitle":null,"mx_Co_Applicant_First_Name":null,"mx_Co_Applicant_Last_Name":null,"mx_Co_Applicant_Email":null,"mx_Permanent_Address_1":null,"mx_Permanent_Address_2":null,"mx_Do_You_Have_a_Co_Applicant":"Yes","mx_Is_Permanent_Address_Same_as_Current_Address":null,"mx_Renewal_Date":null,"mx_Identification":null,"mx_Identification_Documents":"{\"Status\":\"Pending\",\"mx_CustomObject_1\":\"\",\"mx_CustomObject_2\":\"\",\"mx_CustomObject_3\":\"\",\"mx_CustomObject_4\":\"\"}","mx_Doctors":"Hippocrates","mx_Product":null,"mx_WhatsApp_Opt_Out":"0","mx_Date_of_Birth":null,"mx_PAN_Number":null,"mx_Fathers_Name":null,"mx_Product_Price":null,"mx_Product_Specification":null,"mx_Products":"{\"Status\":\"Pending\",\"mx_CustomObject_1\":\"\"}","mx_Docs":"{\"Status\":\"Pending\",\"mx_CustomObject_1\":\"\",\"mx_CustomObject_2\":\"\",\"mx_CustomObject_3\":\"\",\"mx_CustomObject_4\":\"\",\"mx_CustomObject_5\":\"On Going\"}","mx_Retype_Password":null,"mx_Donation_Amount":null,"mx_Course_Type":null,"mx_Application_Submitted_On":null,"mx_Video_KYC":"{\"Status\":\"Pending\",\"mx_CustomObject_1\":\"\"}","mx_Company":null,"mx_Aadhaar_Number":null,"mx_Degree":"MA Psychology","mx_Documentation":"{\"Status\":\"Pending\",\"mx_CustomObject_1\":\"\",\"mx_CustomObject_2\":\"\",\"mx_CustomObject_3\":\"\",\"mx_CustomObject_4\":\"\"}","mx_Options":"Option 1","mx_Passport_Number":null,"mx_SSN":null,"mx_Course":"BTech","mx_Payment_Status":"Paid","mx_Payment_Mode":"Offline","mx_Course_Family":"Masters","mx_Payment_Amount":null,"NotableEvent":"Email Opened","NotableEventdate":"2024-07-09 13:23:09","SourceReferrer":"","LastVisitDate":"2024-07-09 13:23:09","LeadAge":"73","CurrentOptInStatus":"Unknown","LastOptInEmailSentDate":null,"MailingPreferences":null,"OptInDate":null,"OptInDetails":null,"mx_Portal_IsPortalUser":null,"QualityScore01":null,"FacebookId":null,"GooglePlusId":null,"GTalkId":null,"LinkedInId":null,"PhotoUrl":null,"SkypeId":null,"TwitterId":null,"CompanyType":null,"ConversionReferrerURL":null,"DoNotTrack":null,"IsPrimaryContact":"0","Latitude":null,"Longitude":null,"RelatedCompanyId":null,"SourceIPAddress":null,"SourceReferrerURL":null,"mx_Address_Proof":"Aadhaar","mx_Disposition":"Issue Resolved","mx_Identification_Type":"Passport","mx_Malfunction_error_example":null,"mx_Pan_Card_Number":null,"mx_Rate_of_Interest":null,"mx_School":null,"RelatedCompanyIdName":null,"RelatedCompanyOwnerId":null,"CompanyTypeName":null,"CompanyTypePluralName":null,"LeadLastModifiedOn":"2024-08-09 09:25:12","OwnerIdName":"Sri Sudhan","OwnerIdEmailAddress":"sri.sudhan@leadsquared.com","Groups":"","CreatedByName":"Sri Sudhan","ModifiedByName":"Sri Sudhan","Account_CompanyName":"Education 101","Account_ShortName":"t20170817174751","Account_TimeZone":"Asia/Kolkata","Account_Website":"lshelp.staging.wpengine.com","Account_Street1":"123 Street","Account_Street2":"","Account_City":"Bengaluru","Account_State":"Karnataka","Account_Country":"India","Account_Zip":"","Account_Fax":"","Account_Phone":"+91-8556010497","Owner_FirstName":"Sri Sudhan","Owner_MiddleName":"","Owner_LastName":"","Owner_EmailAddress":"sri.sudhan@leadsquared.com","Owner_FullName":"Sri Sudhan","Owner_TimeZone":"Asia/Kolkata","Owner_AssociatedPhoneNumbers":"+91-9000000000","Org_ShortCode":"22824","Account_Address":"Education 101{mxnewline}123 Street,{mxnewline},Bengaluru,Karnataka{mxnewline} {mxnewline}India.","CanUpdate":"true"}],"CreatedBy":"1a50c565-8525-11ea-a93b-0aa4c559f4ca","CreatedOn":"2024-09-20 14:31:00","CreatedByName":"Sri Sudhan","CreatedByEmail":"sri.sudhan@leadsquared.com"}
2.5 Lead Ownership Change
{"Before":{"ProspectID":"9e6ec6de-5a2a-4833-98c2-53145d6222f1","ProspectAutoId":"1770","FirstName":"Shamar","LastName":"Joseph","EmailAddress":"srisudhanr@gmail.com","Phone":null,"Mobile":null,"Source":null,"SourceMedium":null,"SourceCampaign":null,"ProspectStage":"Prospect","Score":"1","EngagementScore":"0","ProspectActivityName_Max":"Email Opened","ProspectActivityDate_Max":"2024-07-09 11:23:12","OwnerId":"1a50c565-8525-11ea-a93b-0aa4c559f4ca","ModifiedOn":"2024-09-20 14:23:43","LastModifiedOn":"2024-09-20 14:23:43","NotableEventdate":"2024-09-20 14:23:43","QualityScore01":null,"ConversionReferrerURL":null,"SourceIPAddress":null,"SourceReferrerURL":null,"LeadLastModifiedOn":"2024-09-20 14:23:43","OwnerIdName":"Sri Sudhan","OwnerIdEmailAddress":"sri.sudhan@leadsquared.com","Owner_FirstName":"Sri Sudhan","Owner_MiddleName":"","Owner_LastName":"","Owner_EmailAddress":"sri.sudhan@leadsquared.com","Owner_FullName":"Sri Sudhan","Owner_AssociatedPhoneNumbers":"+91-9000000000"},"After":{"ProspectID":"9e6ec6de-5a2a-4833-98c2-53145d6222f1","ProspectAutoId":"1770","FirstName":"Shamar","LastName":"Joseph","EmailAddress":"srisudhanr@gmail.com","Phone":null,"Mobile":null,"Source":null,"SourceMedium":null,"SourceCampaign":null,"ProspectStage":"Prospect","Score":"1","EngagementScore":"0","ProspectActivityName_Max":"Email Opened","ProspectActivityDate_Max":"2024-07-09 11:23:12","OwnerId":"a443f7b7-d1fd-11ec-993a-06f221480cd8","ModifiedOn":"2024-09-20 14:33:46","LastModifiedOn":"2024-09-20 14:33:46","NotableEventdate":"2024-09-20 14:33:46","QualityScore01":null,"ConversionReferrerURL":null,"SourceIPAddress":null,"SourceReferrerURL":null,"LeadLastModifiedOn":"2024-09-20 14:33:46","OwnerIdName":"Joseph","OwnerIdEmailAddress":"vir.singh@leadsquared.com","Owner_FirstName":"Joseph","Owner_MiddleName":null,"Owner_LastName":null,"Owner_EmailAddress":"vir.singh@leadsquared.com","Owner_FullName":"Joseph","Owner_AssociatedPhoneNumbers":""}}
2.6 Lead Score Change
{"ProspectID":"0723558d-af29-44cf-bf91-72b4c9a39b19","ProspectAutoId":"1812","FirstName":"Joe","LastName":"Davola","EmailAddress":"crazyjoedavola@yopmail.com","Origin":"Lead Add Form","Phone":null,"Mobile":null,"Source":null,"SourceMedium":null,"SourceCampaign":null,"DoNotEmail":"0","DoNotCall":"0","ProspectStage":"Upsell","Score":"1","Revenue":"55","EngagementScore":"0","ProspectActivityId_Min":"03b4f0ab-3725-43fc-9a05-71c47daba76b","ProspectActivityDate_Min":"2024-09-20 14:42:16","ProspectActivityId_Max":"66fe40f6-3c9b-4e6a-93d6-90fc31cf0dcd","ProspectActivityName_Max":"Chat Conversation","ProspectActivityDate_Max":"2024-09-20 14:42:44","FirstLandingPageSubmissionDate":null,"OwnerId":"7903affd-4ff4-11ef-a77e-0ac989580241","CreatedBy":"1a50c565-8525-11ea-a93b-0aa4c559f4ca","CreatedOn":"2024-09-20 14:38:29","ModifiedBy":"1a50c565-8525-11ea-a93b-0aa4c559f4ca","ModifiedOn":"2024-09-20 14:42:26","LeadConversionDate":"2024-09-20 14:38:29","StatusCode":"0","StatusReason":"0","IsLead":"1","mx_Country":null,"LastModifiedOn":"2024-09-20 14:42:45","mx_Do_You_Have_a_Co_Applicant":"Yes","mx_Identification_Documents":"{\"Status\":\"Pending\",\"mx_CustomObject_1\":\"\",\"mx_CustomObject_2\":\"\",\"mx_CustomObject_3\":\"\",\"mx_CustomObject_4\":\"\"}","mx_Doctors":"Hippocrates","mx_WhatsApp_Opt_Out":"0","mx_Products":"{\"Status\":\"Pending\",\"mx_CustomObject_1\":\"\"}","mx_Docs":"{\"Status\":\"Pending\",\"mx_CustomObject_1\":\"\",\"mx_CustomObject_2\":\"\",\"mx_CustomObject_3\":\"\",\"mx_CustomObject_4\":\"\",\"mx_CustomObject_5\":\"On Going\"}","mx_Video_KYC":"{\"Status\":\"Pending\",\"mx_CustomObject_1\":\"\"}","mx_Degree":"MA Psychology","mx_Documentation":"{\"Status\":\"Pending\",\"mx_CustomObject_1\":\"\",\"mx_CustomObject_2\":\"\",\"mx_CustomObject_3\":\"\",\"mx_CustomObject_4\":\"\"}","mx_Options":"Option 1","mx_Course":"BTech","mx_Payment_Status":"Paid","mx_Payment_Mode":"Offline","mx_Course_Family":"Masters","NotableEvent":"Chat Conversation","NotableEventdate":"2024-09-20 14:42:44","SourceReferrer":"","LastVisitDate":"2024-09-20 14:42:44","CurrentOptInStatus":"Unknown","QualityScore01":null,"ConversionReferrerURL":null,"IsPrimaryContact":"0","SourceIPAddress":null,"SourceReferrerURL":null,"mx_Address_Proof":"Aadhaar","mx_Disposition":"Issue Resolved","mx_Identification_Type":"Passport","LeadLastModifiedOn":"2024-09-20 14:42:45","OwnerIdName":"Chris Harris","OwnerIdEmailAddress":"charrisharris@lsq.in","CreatedByName":"Sri Sudhan","ModifiedByName":"Sri Sudhan","Account_CompanyName":"Education 101","Account_ShortName":"t20170817174751","Account_TimeZone":"Asia/Kolkata","Account_Website":"lshelp.staging.wpengine.com","Account_Street1":"123 Street","Account_City":"Bengaluru","Account_State":"Karnataka","Account_Country":"India","Account_Phone":"+91-8556010497","Owner_FirstName":"Chris","Owner_LastName":"Harris","Owner_EmailAddress":"charrisharris@lsq.in","Owner_FullName":"Chris Harris","Owner_TimeZone":"Asia/Kolkata","Owner_AssociatedPhoneNumbers":"+91-8888888888","Org_ShortCode":"22824","Account_Address":"Education 101{mxnewline}123 Street,{mxnewline},Bengaluru,Karnataka{mxnewline} {mxnewline}India.","CreatedByEmail":"sri.sudhan@leadsquared.com","ModifiedByEmail":"sri.sudhan@leadsquared.com","CanUpdate":"true","OldScore":"0"}
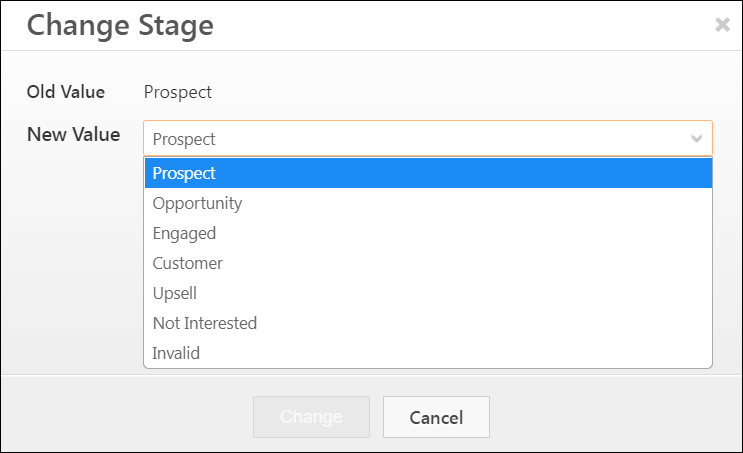
2.7 Lead Stage Change
{"Before":{"ProspectID":"0723558d-af29-44cf-bf91-72b4c9a39b19","ProspectAutoId":"1812","FirstName":"Joe","LastName":"Davola","EmailAddress":"crazyjoedavola@yopmail.com","Phone":null,"Mobile":null,"Source":null,"SourceMedium":null,"SourceCampaign":null,"ProspectStage":"Upsell","Score":"1","EngagementScore":"0","ProspectActivityName_Max":"Chat Conversation","ProspectActivityDate_Max":"2024-09-20 14:42:44","OwnerId":"7903affd-4ff4-11ef-a77e-0ac989580241","ModifiedOn":"2024-09-20 14:42:26","mx_Country":null,"LastModifiedOn":"2024-09-20 14:42:45","NotableEvent":"Chat Conversation","NotableEventdate":"2024-09-20 14:42:44","QualityScore01":null,"ConversionReferrerURL":null,"SourceIPAddress":null,"SourceReferrerURL":null,"LeadLastModifiedOn":"2024-09-20 14:42:45","OwnerIdEmailAddress":"charrisharris@lsq.in"},"After":{"ProspectID":"0723558d-af29-44cf-bf91-72b4c9a39b19","ProspectAutoId":"1812","FirstName":"Joe","LastName":"Davola","EmailAddress":"crazyjoedavola@yopmail.com","Phone":null,"Mobile":null,"Source":null,"SourceMedium":null,"SourceCampaign":null,"ProspectStage":"Warm","Score":"1","EngagementScore":"0","ProspectActivityName_Max":"Chat Conversation","ProspectActivityDate_Max":"2024-09-20 14:42:44","OwnerId":"7903affd-4ff4-11ef-a77e-0ac989580241","ModifiedOn":"2024-09-20 14:47:11","mx_Country":"Afghanistan","LastModifiedOn":"2024-09-20 14:47:11","NotableEvent":"Modified","NotableEventdate":"2024-09-20 14:47:11","QualityScore01":null,"ConversionReferrerURL":null,"SourceIPAddress":null,"SourceReferrerURL":null,"LeadLastModifiedOn":"2024-09-20 14:47:11","OwnerIdEmailAddress":"charrisharris@lsq.in"}}
2.8 Lead Update
{"Before":{"ProspectID":"0723558d-af29-44cf-bf91-72b4c9a39b19","ProspectAutoId":"1812","FirstName":"Joe","LastName":"Davola","EmailAddress":"crazyjoedavola@yopmail.com","Phone":null,"Mobile":null,"Source":null,"SourceMedium":null,"SourceCampaign":null,"ProspectStage":"Warm","Score":"1","EngagementScore":"0","ProspectActivityName_Max":"Chat Conversation","ProspectActivityDate_Max":"2024-09-20 14:42:44","OwnerId":"7903affd-4ff4-11ef-a77e-0ac989580241","ModifiedOn":"2024-09-20 14:47:14","mx_Country":"Afghanistan","LastModifiedOn":"2024-09-20 14:47:14","JobTitle":null,"NotableEventdate":"2024-09-20 14:47:14","QualityScore01":null,"ConversionReferrerURL":null,"SourceIPAddress":null,"SourceReferrerURL":null,"LeadLastModifiedOn":"2024-09-20 14:47:14","OwnerIdEmailAddress":"charrisharris@lsq.in"},"After":{"ProspectID":"0723558d-af29-44cf-bf91-72b4c9a39b19","ProspectAutoId":"1812","FirstName":"Craz","LastName":"Joe Davola","EmailAddress":"crazyjoedavola@yopmail.com","Phone":"+91-9877899878","Mobile":null,"Source":null,"SourceMedium":null,"SourceCampaign":null,"ProspectStage":"Warm","Score":"1","EngagementScore":"0","ProspectActivityName_Max":"Chat Conversation","ProspectActivityDate_Max":"2024-09-20 14:42:44","OwnerId":"7903affd-4ff4-11ef-a77e-0ac989580241","ModifiedOn":"2024-09-20 14:48:55","mx_Country":"United States","LastModifiedOn":"2024-09-20 14:48:55","JobTitle":"Clown","NotableEventdate":"2024-09-20 14:48:55","QualityScore01":null,"ConversionReferrerURL":null,"SourceIPAddress":null,"SourceReferrerURL":null,"LeadLastModifiedOn":"2024-09-20 14:48:55","OwnerIdEmailAddress":"charrisharris@lsq.in"}}
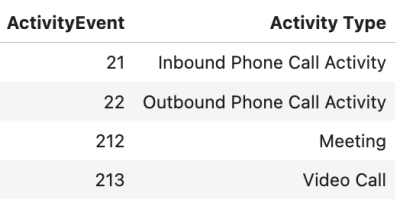
2.9 Lead Activity Creation
[{"ProspectActivityId":"8fe79a96-1943-41ba-ad74-943db43a2748","RelatedProspectId":"f82768f0-02b2-4d5d-8371-20547d3741de","ActivityEvent":"167","ActivityEventName":"Document Collection","ActivityType":"2","CreatedBy":"1a50c565-8525-11ea-a93b-0aa4c559f4ca","CreatedOn":"2024-09-20 16:17:02","Score":10.0,"Data":{"Status":"","mx_Custom_8":"","mx_Custom_9":"","Owner":"","mx_Custom_6":"","mx_Custom_7":"{\"Status\":\"Pending\"}","mx_Custom_4":"{\"Status\":\"Pending\",\"mx_CustomObject_1\":\"Approved\"}","mx_Custom_2":"{\"Status\":\"Pending\",\"mx_CustomObject_4\":\"Pending\"}","Note":null,"mx_Custom_3":"","ActivityEvent_Note":"","mx_Custom_1":"null"}}]
2.10 Lead Activity Update
[{"Before":{"ProspectActivityId":"8fe79a96-1943-41ba-ad74-943db43a2748","ProspectId":"f82768f0-02b2-4d5d-8371-20547d3741de","ProspectAutoId":"1610","ActivityEvent":"167","ActivityType":"2","CreatedOn":"2024-09-20 16:17:02","CreatedBy":"1a50c565-8525-11ea-a93b-0aa4c559f4ca","CreatedByName":"Sri Sudhan ","ModifiedOn":"2024-09-20 16:17:03","ModifiedBy":"1a50c565-8525-11ea-a93b-0aa4c559f4ca","ModifiedByName":"Sri Sudhan","Status":"","mx_Custom_2":"{\"Status\":\"Pending\",\"mx_CustomObject_1\":\"\",\"mx_CustomObject_2\":\"\",\"mx_CustomObject_3\":\"\",\"mx_CustomObject_4\":\"Pending\"}","mx_Custom_4":"{\"Status\":\"Pending\",\"mx_CustomObject_1\":\"Approved\"}","mx_Custom_7":"{\"Status\":\"Pending\",\"mx_CustomObject_1\":\"\",\"mx_CustomObject_2\":\"\",\"mx_CustomObject_3\":\"\",\"mx_CustomObject_4\":\"\"}"},"After":{"ProspectActivityId":"8fe79a96-1943-41ba-ad74-943db43a2748","ProspectId":"f82768f0-02b2-4d5d-8371-20547d3741de","ProspectAutoId":"1610","ActivityEvent":"167","ActivityType":"2","CreatedOn":"2024-09-20 16:17:02","CreatedBy":"1a50c565-8525-11ea-a93b-0aa4c559f4ca","CreatedByName":"Sri Sudhan ","ModifiedOn":"2024-09-20 16:20:28","ModifiedBy":"1a50c565-8525-11ea-a93b-0aa4c559f4ca","ModifiedByName":"Sri Sudhan","Status":"Active","mx_Custom_2":"{\"Status\":\"Approved\",\"mx_CustomObject_1\":\"\",\"mx_CustomObject_2\":\"\",\"mx_CustomObject_3\":\"\",\"mx_CustomObject_4\":\"Completed\"}","mx_Custom_4":"{\"Status\":\"Approved\",\"mx_CustomObject_1\":\"Approved\"}","mx_Custom_7":"{\"Status\":\"Pending\",\"mx_CustomObject_1\":\"\",\"mx_CustomObject_2\":\"\",\"mx_CustomObject_3\":\"\",\"mx_CustomObject_4\":\"85a70cfc.png\"}"}}]
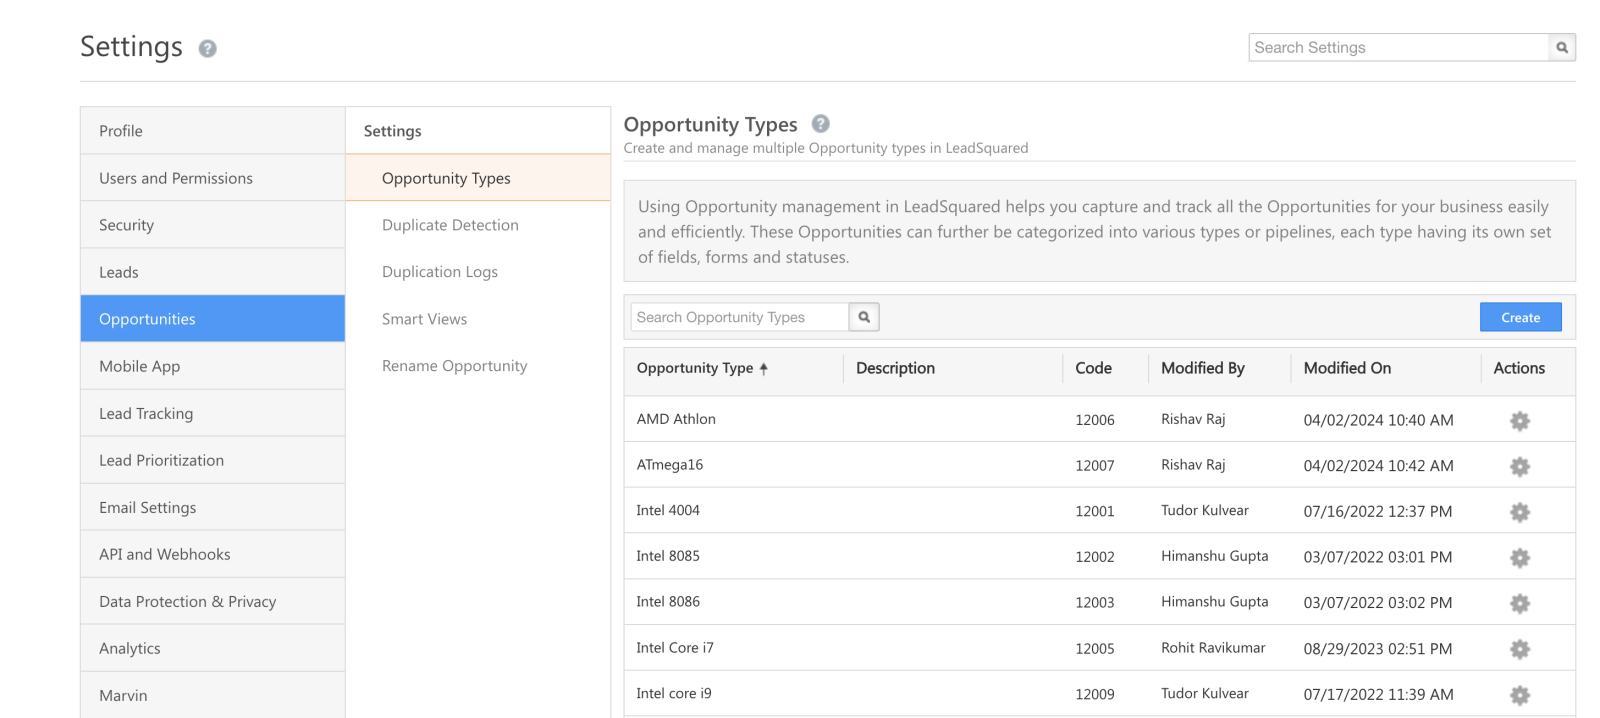
3. Opportunity Webhook Triggers
3.1 Opportunity Create
{"ProspectActivityId":"e4d8e7f7-ec0f-432c-aeea-dab3046484e1","RelatedProspectId":"986ab43c-5a0e-4512-8c4e-982f387bead3","ActivityEvent":"12003","ActivityType":"2","CreatedOn":"2024-09-20 16:01:00","CreatedBy":"d5d08e32-5ca9-11ea-8dd7-029e1407a868","CreatedByName":"Srisudhan ","ModifiedOn":"2024-09-20 16:01:00","ModifiedBy":"d5d08e32-5ca9-11ea-8dd7-029e1407a868","ModifiedByName":"Srisudhan ","Status":"Open","Owner":"d5d08e32-5ca9-11ea-8dd7-029e1407a868","mx_Custom_1":"Kenny Bania - Automobile Loan","mx_Custom_2":"Prospecting","mx_Custom_3":"","mx_Custom_20":"","mx_Custom_21":"","mx_Custom_22":"","mx_Custom_23":"","mx_Custom_5":"","mx_Custom_6":"350000","mx_Custom_7":"","mx_Custom_8":"","mx_Custom_9":"","mx_Custom_10":"","mx_Custom_11":"","mx_Custom_19":"","mx_Custom_4":"[{\"SchemaName\":\"mx_CustomObject_1\",\"Value\":\"\"},{\"SchemaName\":\"mx_CustomObject_2\",\"Value\":\"66a03568.png\"},{\"SchemaName\":\"mx_CustomObject_3\",\"Value\":\"\"},{\"SchemaName\":\"mx_CustomObject_4\",\"Value\":\"\"}]","ActivityEvent_Note":""}
3.2 Opportunity Delete
{"ProspectActivityId":"e4d8e7f7-ec0f-432c-aeea-dab3046484e1","RelatedProspectId":"986ab43c-5a0e-4512-8c4e-982f387bead3","ActivityEvent":"12003","ActivityType":"2","CreatedOn":"2024-09-20 16:01:00","CreatedBy":"d5d08e32-5ca9-11ea-8dd7-029e1407a868","CreatedByName":"Srisudhan ","ModifiedOn":"2024-09-20 16:11:06","ModifiedBy":"d5d08e32-5ca9-11ea-8dd7-029e1407a868","ModifiedByName":"Srisudhan ","ActivityEvent_Note":"","Owner":"64abc64f-8344-11ec-a0ca-0a2d147548fe","Status":"Open","mx_Custom_1":"Kenny Bania - Automobile Loan","mx_Custom_2":"Negotiation","mx_Custom_3":"","mx_Custom_20":"","mx_Custom_21":"","mx_Custom_22":"","mx_Custom_23":"","mx_Custom_5":"","mx_Custom_6":"450000","mx_Custom_7":"","mx_Custom_8":"2024-10-04 16:10:00","mx_Custom_9":"","mx_Custom_10":"f7e7cd59-10a5-43e4-b415-75d3d270cbb4","mx_Custom_11":"","mx_Custom_19":"","mx_Custom_4":"[{\"SchemaName\":\"mx_CustomObject_1\",\"Value\":\"\"},{\"SchemaName\":\"mx_CustomObject_2\",\"Value\":\"66a03568.png\"},{\"SchemaName\":\"mx_CustomObject_3\",\"Value\":\"\"},{\"SchemaName\":\"mx_CustomObject_4\",\"Value\":\"\"}]"}
3.3 Opportunity Field Value Change
[{"Before":{"ProspectActivityId":"e4d8e7f7-ec0f-432c-aeea-dab3046484e1","ProspectId":"986ab43c-5a0e-4512-8c4e-982f387bead3","ProspectAutoId":"1057","ActivityEvent":"12003","ActivityType":"2","CreatedOn":"2024-09-20 16:01:00","CreatedBy":"d5d08e32-5ca9-11ea-8dd7-029e1407a868","CreatedByName":"Srisudhan ","ModifiedOn":"2024-09-20 16:02:37","ModifiedBy":"d5d08e32-5ca9-11ea-8dd7-029e1407a868","ModifiedByName":"Srisudhan","RelatedOpportunityEvent":"","RelatedOpportunityId":"","mx_Custom_6":"350000"},"After":{"ProspectActivityId":"e4d8e7f7-ec0f-432c-aeea-dab3046484e1","ProspectId":"986ab43c-5a0e-4512-8c4e-982f387bead3","ProspectAutoId":"1057","ActivityEvent":"12003","ActivityType":"2","CreatedOn":"2024-09-20 16:01:00","CreatedBy":"d5d08e32-5ca9-11ea-8dd7-029e1407a868","CreatedByName":"Srisudhan ","ModifiedOn":"2024-09-20 16:08:31","ModifiedBy":"d5d08e32-5ca9-11ea-8dd7-029e1407a868","ModifiedByName":"Srisudhan","RelatedOpportunityEvent":"","RelatedOpportunityId":"","mx_Custom_6":"420000"}}]
3.4 Opportunity Stage/Status Change
[{"Before":{"ProspectActivityId":"e4d8e7f7-ec0f-432c-aeea-dab3046484e1","ProspectId":"986ab43c-5a0e-4512-8c4e-982f387bead3","ProspectAutoId":"1057","ActivityEvent":"12003","ActivityType":"2","CreatedOn":"2024-09-20 16:01:00","CreatedBy":"d5d08e32-5ca9-11ea-8dd7-029e1407a868","CreatedByName":"Srisudhan ","ModifiedOn":"2024-09-20 16:08:31","ModifiedBy":"d5d08e32-5ca9-11ea-8dd7-029e1407a868","ModifiedByName":"Srisudhan","RelatedOpportunityEvent":"","RelatedOpportunityId":"","mx_Custom_2":"Prospecting"},"After":{"ProspectActivityId":"e4d8e7f7-ec0f-432c-aeea-dab3046484e1","ProspectId":"986ab43c-5a0e-4512-8c4e-982f387bead3","ProspectAutoId":"1057","ActivityEvent":"12003","ActivityType":"2","CreatedOn":"2024-09-20 16:01:00","CreatedBy":"d5d08e32-5ca9-11ea-8dd7-029e1407a868","CreatedByName":"Srisudhan ","ModifiedOn":"2024-09-20 16:09:53","ModifiedBy":"d5d08e32-5ca9-11ea-8dd7-029e1407a868","ModifiedByName":"Srisudhan","RelatedOpportunityEvent":"","RelatedOpportunityId":"","mx_Custom_2":"Negotiation"}}]
3.5 Opportunity Update
[{"Before":{"ProspectActivityId":"e4d8e7f7-ec0f-432c-aeea-dab3046484e1","ProspectId":"986ab43c-5a0e-4512-8c4e-982f387bead3","ProspectAutoId":"1057","ActivityEvent":"12003","ActivityType":"2","CreatedOn":"2024-09-20 16:01:00","CreatedBy":"d5d08e32-5ca9-11ea-8dd7-029e1407a868","CreatedByName":"Srisudhan ","ModifiedOn":"2024-09-20 16:09:53","ModifiedBy":"d5d08e32-5ca9-11ea-8dd7-029e1407a868","ModifiedByName":"Srisudhan","RelatedOpportunityEvent":"","RelatedOpportunityId":"","Owner":"d5d08e32-5ca9-11ea-8dd7-029e1407a868","mx_Custom_6":"420000","mx_Custom_8":"","mx_Custom_10":""},"After":{"ProspectActivityId":"e4d8e7f7-ec0f-432c-aeea-dab3046484e1","ProspectId":"986ab43c-5a0e-4512-8c4e-982f387bead3","ProspectAutoId":"1057","ActivityEvent":"12003","ActivityType":"2","CreatedOn":"2024-09-20 16:01:00","CreatedBy":"d5d08e32-5ca9-11ea-8dd7-029e1407a868","CreatedByName":"Srisudhan ","ModifiedOn":"2024-09-20 16:11:06","ModifiedBy":"d5d08e32-5ca9-11ea-8dd7-029e1407a868","ModifiedByName":"Srisudhan","RelatedOpportunityEvent":"","RelatedOpportunityId":"","Owner":"64abc64f-8344-11ec-a0ca-0a2d147548fe","mx_Custom_6":"450000","mx_Custom_8":"2024-10-04 16:10:00","mx_Custom_10":"f7e7cd59-10a5-43e4-b415-75d3d270cbb4"}}]
4. Leave Management
4.1 Leave Create
{"LeaveId":"062df7b8-776d-11ef-a77e-0ac989580241","UserId":"1a50c565-8525-11ea-a93b-0aa4c559f4ca","UserName":"Sri Sudhan","EmailAddress":"sri.sudhan@leadsquared.com","LeaveStart":"2024-09-22 18:30:00","LeaveEnd":"2024-09-23 18:29:59","Reason":"Leave","CreatedById":"1a50c565-8525-11ea-a93b-0aa4c559f4ca","CreatedByName":"Sri Sudhan","CreatedByEmailAddress":"sri.sudhan@leadsquared.com","CreatedOn":"2024-09-20 16:26:01"}
4.2 Leave Update
{"LeaveId":"062df7b8-776d-11ef-a77e-0ac989580241","UserId":"1a50c565-8525-11ea-a93b-0aa4c559f4ca","UserName":"Sri Sudhan","EmailAddress":"sri.sudhan@leadsquared.com","Before":{"LeaveStart":"2024-09-22 18:30:00","LeaveEnd":"2024-09-23 18:29:59","Reason":"Leave","ModifiedById":"1a50c565-8525-11ea-a93b-0aa4c559f4ca","ModifiedByName":"Sri Sudhan","ModifiedByEmailAddress":"sri.sudhan@leadsquared.com","ModifiedOn":"2024-09-20 16:26:01"},"After":{"LeaveStart":"2024-09-23 18:30:00","LeaveEnd":"2024-09-24 18:29:59","Reason":"Had to reschedule","ModifiedById":"1a50c565-8525-11ea-a93b-0aa4c559f4ca","ModifiedByName":"Sri Sudhan","ModifiedByEmailAddress":"sri.sudhan@leadsquared.com","ModifiedOn":"2024-09-20 16:26:58"}}
4.3 Leave Delete
{"LeaveId":"062df7b8-776d-11ef-a77e-0ac989580241","UserId":"1a50c565-8525-11ea-a93b-0aa4c559f4ca","UserName":"Sri Sudhan","EmailAddress":"sri.sudhan@leadsquared.com","LeaveStart":"2024-09-23 18:30:00","LeaveEnd":"2024-09-24 18:29:59","Reason":"Had to reschedule","DeletedById":"1a50c565-8525-11ea-a93b-0aa4c559f4ca","DeletedByName":"Sri Sudhan ","DeletedByEmailAddress":"sri.sudhan@leadsquared.com","DeletedOn":"2024-09-20 16:27:52"}
5. Task Management
5.1 Task Create
{"Event":"Task_Creation","Data":{"TaskId":"0a83afb0-781b-11ef-a77e-0ac989580241","TaskName":"Meeting: Craz Joe Davola","TaskType":"3c8c1a5b-8374-11e7-ab78-02de49b06427","TaskTypeConfiguration":"{\"Id\":\"3c8c1a5b-8374-11e7-ab78-02de49b06427\",\"Name\":\"Meeting\",\"TaskTypeConfiguration\":{\"CalenderInvite\":{\"Organiser\":{\"IsEnabled\":false,\"TemplateContent\":null,\"Subject\":null,\"IsSent\":false},\"Owner\":{\"IsEnabled\":false,\"TemplateContent\":null,\"Subject\":null,\"IsSent\":false},\"Lead\":{\"IsEnabled\":false,\"TemplateContent\":null,\"Subject\":null,\"IsSent\":false},\"ParticipantUsers\":{\"IsEnabled\":false,\"TemplateContent\":null,\"Subject\":null,\"IsSent\":null}},\"Location\":{\"IsEnabled\":true,\"IsMandatory\":true,\"LocationValue\":null,\"GeofenceLocation\":false,\"GeofenceRange\":100},\"BusinessWorkFlow\":{\"IsEnabled\":false,\"Status\":{\"Label\":null,\"Values\":[]}},\"Duration\":{\"IsEnabled\":false,\"Value\":\"30\",\"Values\":null},\"Priority\":{\"IsEnabled\":false,\"Value\":null,\"Values\":null},\"TaskCompleted\":{\"IsEnabled\":false},\"EffortEstimate\":{\"IsEnabled\":false,\"Value\":null,\"ValueUnit\":null,\"Values\":null}},\"PreventConflict\":false,\"Sequence\":2,\"IsDefault\":false,\"IsEditable\":true,\"IsDeleteable\":true,\"IsTimerEnabled\":false,\"Status\":1,\"CreatedBy\":\"System\",\"CreatedOn\":\"2017-08-17T17:48:11Z\",\"ModifiedBy\":\"Sri Sudhan\",\"ModifiedByEmail\":\"sri.sudhan@leadsquared.com\",\"ModifiedOn\":\"2021-11-24T07:07:06Z\",\"ShowOrganiserCalendarInvite\":true,\"ShowOwnerCalendarInvite\":true,\"ShowLeadCalendarInvite\":true,\"ShowParticipantCalendarInvite\":null,\"ReminderConfiguration\":{\"IsEnable\":false},\"ColumnConfiguration\":[],\"FormLayout\":\"{\\\"Sections\\\":[{\\\"DisplayName\\\":\\\"Task Details\\\",\\\"Fields\\\":[{\\\"SchemaName\\\":\\\"OwnerId\\\",\\\"Disabled\\\":\\\"False\\\",\\\"Colspan\\\":2},{\\\"SchemaName\\\":\\\"RelatedEntityId\\\",\\\"Disabled\\\":\\\"False\\\",\\\"Colspan\\\":2},{\\\"SchemaName\\\":\\\"Name\\\",\\\"Disabled\\\":\\\"False\\\",\\\"Colspan\\\":2},{\\\"SchemaName\\\":\\\"Location\\\",\\\"Disabled\\\":\\\"False\\\",\\\"Colspan\\\":1},{\\\"SchemaName\\\":\\\"DueDate\\\",\\\"Disabled\\\":\\\"False\\\",\\\"Colspan\\\":2},{\\\"SchemaName\\\":\\\"Reminder\\\",\\\"Disabled\\\":\\\"False\\\",\\\"Colspan\\\":2},{\\\"SchemaName\\\":\\\"Description\\\",\\\"Disabled\\\":\\\"False\\\",\\\"Colspan\\\":2},{\\\"SchemaName\\\":\\\"CreatedBy\\\",\\\"Disabled\\\":\\\"False\\\",\\\"Colspan\\\":2},{\\\"SchemaName\\\":\\\"mx_Custom_1\\\",\\\"Disabled\\\":\\\"False\\\",\\\"Colspan\\\":1}]}],\\\"AvailableFields\\\":[{\\\"SchemaName\\\":\\\"Priority\\\",\\\"Disabled\\\":\\\"False\\\",\\\"Colspan\\\":1},{\\\"SchemaName\\\":\\\"EffortEstimate\\\",\\\"Disabled\\\":\\\"True\\\",\\\"Colspan\\\":1},{\\\"SchemaName\\\":\\\"PercentCompleted\\\",\\\"Disabled\\\":\\\"True\\\",\\\"Colspan\\\":1}]}\",\"Color\":\"#EFBAE7\",\"Category\":0,\"OpenCompletedTasks\":true}","TaskDescription":"","LeadId":"0723558d-af29-44cf-bf91-72b4c9a39b19","RelatedEntityId":"0723558d-af29-44cf-bf91-72b4c9a39b19","RelatedEntityType":"Lead","DueDateUTCTime":"2024-09-21 13:30:00","DueDateLocalTime":"2024-09-21 19:00:00","ReminderInMinutes":"15","ReminderBeforeDays":"","ReminderTime":"","OwnerId":"1a50c565-8525-11ea-a93b-0aa4c559f4ca","CreatedBy":"1a50c565-8525-11ea-a93b-0aa4c559f4ca","CreatedByEmail":"sri.sudhan@leadsquared.com","CreatedOn":"2024-09-21 13:11:40","EndDateUTCTime":"2024-09-21 14:00:00","EndDateLocalTime":"2024-09-21 19:30:00","EffortEstimate":"","EffortEstimateUnit":"","Location":"New York","Latitude":"0.00000000","Longitude":"0.00000000","PercentCompleted":"0","Priority":"","mx_Custom_1":""}}
5.2 Task Update
{"Event":"Task_Update","Before":{"TaskId":"1fe38704-781c-11ef-a77e-0ac989580241","TaskName":"Meeting: Craz Joe Davola","TaskType":"3c8c1a5b-8374-11e7-ab78-02de49b06427","TaskTypeConfiguration":"{\"Id\":\"3c8c1a5b-8374-11e7-ab78-02de49b06427\",\"Name\":\"Meeting\",\"TaskTypeConfiguration\":{\"CalenderInvite\":{\"Organiser\":{\"IsEnabled\":false,\"TemplateContent\":null,\"Subject\":null,\"IsSent\":false},\"Owner\":{\"IsEnabled\":false,\"TemplateContent\":null,\"Subject\":null,\"IsSent\":false},\"Lead\":{\"IsEnabled\":false,\"TemplateContent\":null,\"Subject\":null,\"IsSent\":false},\"ParticipantUsers\":{\"IsEnabled\":false,\"TemplateContent\":null,\"Subject\":null,\"IsSent\":null}},\"Location\":{\"IsEnabled\":true,\"IsMandatory\":true,\"LocationValue\":null,\"GeofenceLocation\":false,\"GeofenceRange\":100},\"BusinessWorkFlow\":{\"IsEnabled\":false,\"Status\":{\"Label\":null,\"Values\":[]}},\"Duration\":{\"IsEnabled\":false,\"Value\":\"30\",\"Values\":null},\"Priority\":{\"IsEnabled\":false,\"Value\":null,\"Values\":null},\"TaskCompleted\":{\"IsEnabled\":false},\"EffortEstimate\":{\"IsEnabled\":false,\"Value\":null,\"ValueUnit\":null,\"Values\":null}},\"PreventConflict\":false,\"Sequence\":2,\"IsDefault\":false,\"IsEditable\":true,\"IsDeleteable\":true,\"IsTimerEnabled\":false,\"Status\":1,\"CreatedBy\":\"System\",\"CreatedOn\":\"2017-08-17T17:48:11Z\",\"ModifiedBy\":\"Sri Sudhan\",\"ModifiedByEmail\":\"sri.sudhan@leadsquared.com\",\"ModifiedOn\":\"2021-11-24T07:07:06Z\",\"ShowOrganiserCalendarInvite\":true,\"ShowOwnerCalendarInvite\":true,\"ShowLeadCalendarInvite\":true,\"ShowParticipantCalendarInvite\":null,\"ReminderConfiguration\":{\"IsEnable\":false},\"ColumnConfiguration\":[],\"FormLayout\":\"{\\\"Sections\\\":[{\\\"DisplayName\\\":\\\"Task Details\\\",\\\"Fields\\\":[{\\\"SchemaName\\\":\\\"OwnerId\\\",\\\"Disabled\\\":\\\"False\\\",\\\"Colspan\\\":2},{\\\"SchemaName\\\":\\\"RelatedEntityId\\\",\\\"Disabled\\\":\\\"False\\\",\\\"Colspan\\\":2},{\\\"SchemaName\\\":\\\"Name\\\",\\\"Disabled\\\":\\\"False\\\",\\\"Colspan\\\":2},{\\\"SchemaName\\\":\\\"Location\\\",\\\"Disabled\\\":\\\"False\\\",\\\"Colspan\\\":1},{\\\"SchemaName\\\":\\\"DueDate\\\",\\\"Disabled\\\":\\\"False\\\",\\\"Colspan\\\":2},{\\\"SchemaName\\\":\\\"Reminder\\\",\\\"Disabled\\\":\\\"False\\\",\\\"Colspan\\\":2},{\\\"SchemaName\\\":\\\"Description\\\",\\\"Disabled\\\":\\\"False\\\",\\\"Colspan\\\":2},{\\\"SchemaName\\\":\\\"CreatedBy\\\",\\\"Disabled\\\":\\\"False\\\",\\\"Colspan\\\":2},{\\\"SchemaName\\\":\\\"mx_Custom_1\\\",\\\"Disabled\\\":\\\"False\\\",\\\"Colspan\\\":1}]}],\\\"AvailableFields\\\":[{\\\"SchemaName\\\":\\\"Priority\\\",\\\"Disabled\\\":\\\"False\\\",\\\"Colspan\\\":1},{\\\"SchemaName\\\":\\\"EffortEstimate\\\",\\\"Disabled\\\":\\\"True\\\",\\\"Colspan\\\":1},{\\\"SchemaName\\\":\\\"PercentCompleted\\\",\\\"Disabled\\\":\\\"True\\\",\\\"Colspan\\\":1}]}\",\"Color\":\"#EFBAE7\",\"Category\":0,\"OpenCompletedTasks\":true}","TaskDescription":"","LeadId":"0723558d-af29-44cf-bf91-72b4c9a39b19","DueDateUTCTime":"2024-09-21 13:40:00","DueDateLocalTime":"2024-09-21 19:10:00","ReminderInMinutes":"15","ReminderBeforeDays":"0","ReminderTime":null,"NotifyBy":"1000","OwnerId":"1a50c565-8525-11ea-a93b-0aa4c559f4ca","OwnerName":"Sri Sudhan","OwnerEmailAddress":"sri.sudhan@leadsquared.com","CreatedBy":"1a50c565-8525-11ea-a93b-0aa4c559f4ca","CreatedByName":"Sri Sudhan","CreatedOn":"2024-09-21 13:19:26","ModifiedBy":"1a50c565-8525-11ea-a93b-0aa4c559f4ca","ModifiedByName":"Sri Sudhan","ModifiedOn":"2024-09-21 13:19:26","CompletedOnUTCTime":"0001-01-01 00:00:00","CompletedOnLocalTime":"0001-01-01 00:00:00","EndDateUTCTime":"2024-09-21 14:10:00","EndDateLocalTime":"2024-09-21 19:40:00","EffortEstimate":null,"EffortEstimateUnit":"","TaskAutoId":"T588","Validate":false,"Status":0,"Location":"New York","PercentCompleted":"0","Priority":""},"After":{"TaskId":"1fe38704-781c-11ef-a77e-0ac989580241","TaskName":"Meeting: Craz Joe Davola","TaskType":"3c8c1a5b-8374-11e7-ab78-02de49b06427","TaskTypeConfiguration":"{\"Id\":\"3c8c1a5b-8374-11e7-ab78-02de49b06427\",\"Name\":\"Meeting\",\"TaskTypeConfiguration\":{\"CalenderInvite\":{\"Organiser\":{\"IsEnabled\":false,\"TemplateContent\":null,\"Subject\":null,\"IsSent\":false},\"Owner\":{\"IsEnabled\":false,\"TemplateContent\":null,\"Subject\":null,\"IsSent\":false},\"Lead\":{\"IsEnabled\":false,\"TemplateContent\":null,\"Subject\":null,\"IsSent\":false},\"ParticipantUsers\":{\"IsEnabled\":false,\"TemplateContent\":null,\"Subject\":null,\"IsSent\":null}},\"Location\":{\"IsEnabled\":true,\"IsMandatory\":true,\"LocationValue\":null,\"GeofenceLocation\":false,\"GeofenceRange\":100},\"BusinessWorkFlow\":{\"IsEnabled\":false,\"Status\":{\"Label\":null,\"Values\":[]}},\"Duration\":{\"IsEnabled\":false,\"Value\":\"30\",\"Values\":null},\"Priority\":{\"IsEnabled\":false,\"Value\":null,\"Values\":null},\"TaskCompleted\":{\"IsEnabled\":false},\"EffortEstimate\":{\"IsEnabled\":false,\"Value\":null,\"ValueUnit\":null,\"Values\":null}},\"PreventConflict\":false,\"Sequence\":2,\"IsDefault\":false,\"IsEditable\":true,\"IsDeleteable\":true,\"IsTimerEnabled\":false,\"Status\":1,\"CreatedBy\":\"System\",\"CreatedOn\":\"2017-08-17T17:48:11Z\",\"ModifiedBy\":\"Sri Sudhan\",\"ModifiedByEmail\":\"sri.sudhan@leadsquared.com\",\"ModifiedOn\":\"2021-11-24T07:07:06Z\",\"ShowOrganiserCalendarInvite\":true,\"ShowOwnerCalendarInvite\":true,\"ShowLeadCalendarInvite\":true,\"ShowParticipantCalendarInvite\":null,\"ReminderConfiguration\":{\"IsEnable\":false},\"ColumnConfiguration\":[],\"FormLayout\":\"{\\\"Sections\\\":[{\\\"DisplayName\\\":\\\"Task Details\\\",\\\"Fields\\\":[{\\\"SchemaName\\\":\\\"OwnerId\\\",\\\"Disabled\\\":\\\"False\\\",\\\"Colspan\\\":2},{\\\"SchemaName\\\":\\\"RelatedEntityId\\\",\\\"Disabled\\\":\\\"False\\\",\\\"Colspan\\\":2},{\\\"SchemaName\\\":\\\"Name\\\",\\\"Disabled\\\":\\\"False\\\",\\\"Colspan\\\":2},{\\\"SchemaName\\\":\\\"Location\\\",\\\"Disabled\\\":\\\"False\\\",\\\"Colspan\\\":1},{\\\"SchemaName\\\":\\\"DueDate\\\",\\\"Disabled\\\":\\\"False\\\",\\\"Colspan\\\":2},{\\\"SchemaName\\\":\\\"Reminder\\\",\\\"Disabled\\\":\\\"False\\\",\\\"Colspan\\\":2},{\\\"SchemaName\\\":\\\"Description\\\",\\\"Disabled\\\":\\\"False\\\",\\\"Colspan\\\":2},{\\\"SchemaName\\\":\\\"CreatedBy\\\",\\\"Disabled\\\":\\\"False\\\",\\\"Colspan\\\":2},{\\\"SchemaName\\\":\\\"mx_Custom_1\\\",\\\"Disabled\\\":\\\"False\\\",\\\"Colspan\\\":1}]}],\\\"AvailableFields\\\":[{\\\"SchemaName\\\":\\\"Priority\\\",\\\"Disabled\\\":\\\"False\\\",\\\"Colspan\\\":1},{\\\"SchemaName\\\":\\\"EffortEstimate\\\",\\\"Disabled\\\":\\\"True\\\",\\\"Colspan\\\":1},{\\\"SchemaName\\\":\\\"PercentCompleted\\\",\\\"Disabled\\\":\\\"True\\\",\\\"Colspan\\\":1}]}\",\"Color\":\"#EFBAE7\",\"Category\":0,\"OpenCompletedTasks\":true}","TaskDescription":"","LeadId":"0723558d-af29-44cf-bf91-72b4c9a39b19","DueDateUTCTime":"2024-09-21 13:40:00","DueDateLocalTime":"2024-09-21 19:10:00","ReminderInMinutes":"15","ReminderBeforeDays":"0","ReminderTime":null,"NotifyBy":"1100","OwnerId":"1a50c565-8525-11ea-a93b-0aa4c559f4ca","OwnerName":"Sri Sudhan","OwnerEmailAddress":"sri.sudhan@leadsquared.com","CreatedBy":"1a50c565-8525-11ea-a93b-0aa4c559f4ca","CreatedByName":"Sri Sudhan","CreatedOn":"2024-09-21 13:19:26","ModifiedBy":"1a50c565-8525-11ea-a93b-0aa4c559f4ca","ModifiedByName":"Sri Sudhan","ModifiedOn":"2024-09-21 13:20:40","CompletedOnUTCTime":"0001-01-01 00:00:00","CompletedOnLocalTime":"0001-01-01 00:00:00","EndDateUTCTime":"2024-09-21 14:10:00","EndDateLocalTime":"2024-09-21 19:40:00","EffortEstimate":null,"EffortEstimateUnit":"","TaskAutoId":"T588","Validate":false,"Status":0,"Location":"New York","PercentCompleted":"0","Priority":""}}
5.3 Task Reminder
{"Event":"Task_ReminderSent","Data":{"TaskId":"74d9b8eb-798c-11ef-a77e-0ac989580241","TaskName":"Follow-Up: George Costanza","TaskType":"{\"Id\":\"3c8c1673-8374-11e7-ab78-02de49b06427\",\"Name\":\"Follow-Up\",\"TaskTypeConfiguration\":{\"CalenderInvite\":{\"Organiser\":{\"IsEnabled\":false,\"TemplateContent\":null,\"Subject\":null,\"IsSent\":false},\"Owner\":{\"IsEnabled\":false,\"TemplateContent\":null,\"Subject\":null,\"IsSent\":false},\"Lead\":{\"IsEnabled\":false,\"TemplateContent\":null,\"Subject\":null,\"IsSent\":false},\"ParticipantUsers\":{\"IsEnabled\":false,\"TemplateContent\":null,\"Subject\":null,\"IsSent\":null}},\"Location\":{\"IsEnabled\":true,\"IsMandatory\":false,\"LocationValue\":null,\"GeofenceLocation\":false,\"GeofenceRange\":100},\"BusinessWorkFlow\":{\"IsEnabled\":false,\"Status\":{\"Label\":null,\"Values\":[]}},\"Duration\":{\"IsEnabled\":false,\"Value\":\"30\",\"Values\":null},\"Priority\":{\"IsEnabled\":false,\"Value\":null,\"Values\":null},\"TaskCompleted\":{\"IsEnabled\":false},\"EffortEstimate\":{\"IsEnabled\":false,\"Value\":null,\"ValueUnit\":null,\"Values\":null}},\"PreventConflict\":true,\"Sequence\":1,\"IsDefault\":true,\"IsEditable\":true,\"IsDeleteable\":true,\"IsTimerEnabled\":false,\"Status\":1,\"CreatedBy\":\"System\",\"CreatedOn\":\"2017-08-17T17:48:11Z\",\"ModifiedBy\":\"Vir Singh\",\"ModifiedByEmail\":\"virkdsingh@gmail.com\",\"ModifiedOn\":\"2024-02-22T08:07:44Z\",\"ShowOrganiserCalendarInvite\":false,\"ShowOwnerCalendarInvite\":false,\"ShowLeadCalendarInvite\":false,\"ShowParticipantCalendarInvite\":null,\"ReminderConfiguration\":{\"IsEnable\":false},\"ColumnConfiguration\":[],\"FormLayout\":\"{\\\"Sections\\\":[{\\\"DisplayName\\\":\\\"Task Details\\\",\\\"Fields\\\":[{\\\"SchemaName\\\":\\\"OwnerId\\\",\\\"DisplayName\\\":null,\\\"Colspan\\\":2,\\\"Disabled\\\":false},{\\\"SchemaName\\\":\\\"RelatedEntityId\\\",\\\"DisplayName\\\":null,\\\"Colspan\\\":2,\\\"Disabled\\\":false},{\\\"SchemaName\\\":\\\"Name\\\",\\\"DisplayName\\\":null,\\\"Colspan\\\":2,\\\"Disabled\\\":false},{\\\"SchemaName\\\":\\\"DueDate\\\",\\\"DisplayName\\\":null,\\\"Colspan\\\":2,\\\"Disabled\\\":false},{\\\"SchemaName\\\":\\\"Reminder\\\",\\\"DisplayName\\\":null,\\\"Colspan\\\":2,\\\"Disabled\\\":false},{\\\"SchemaName\\\":\\\"Description\\\",\\\"DisplayName\\\":null,\\\"Colspan\\\":2,\\\"Disabled\\\":false},{\\\"SchemaName\\\":\\\"CreatedBy\\\",\\\"DisplayName\\\":null,\\\"Colspan\\\":2,\\\"Disabled\\\":false}]}],\\\"AvailableFields\\\":[{\\\"SchemaName\\\":\\\"Location\\\",\\\"DisplayName\\\":null,\\\"Colspan\\\":1,\\\"Disabled\\\":false},{\\\"SchemaName\\\":\\\"Priority\\\",\\\"DisplayName\\\":null,\\\"Colspan\\\":1,\\\"Disabled\\\":false},{\\\"SchemaName\\\":\\\"EffortEstimate\\\",\\\"DisplayName\\\":null,\\\"Colspan\\\":1,\\\"Disabled\\\":true},{\\\"SchemaName\\\":\\\"PercentCompleted\\\",\\\"DisplayName\\\":null,\\\"Colspan\\\":1,\\\"Disabled\\\":true},{\\\"SchemaName\\\":\\\"mx_Custom_1\\\",\\\"DisplayName\\\":null,\\\"Colspan\\\":1,\\\"Disabled\\\":false},{\\\"SchemaName\\\":\\\"EndDate\\\",\\\"DisplayName\\\":\\\"End Date\\\",\\\"Colspan\\\":1,\\\"Disabled\\\":false},{\\\"SchemaName\\\":\\\"EffortEstimateUnit\\\",\\\"DisplayName\\\":\\\"Effort Estimate Unit\\\",\\\"Colspan\\\":1,\\\"Disabled\\\":false}]}\",\"Color\":\"#F8BBD0\",\"Category\":0,\"OpenCompletedTasks\":true}","TaskDescription":"","LeadId":"185b45a7-a5e8-402d-8cf0-d0d26f808dbe","RelatedEntityId":"185b45a7-a5e8-402d-8cf0-d0d26f808dbe","RelatedEntityType":"Lead","RelatedOpportunityId":"[{MXVAR_TaskAssociatedOpportunityId}]","RelatedOpportunityType":"[{MXVAR_TaskAssociatedOpportunityType}]","DueDateUTCTime":"2024-09-23 09:35:00","DueDateLocalTime":"2024-09-23 15:05:00","ReminderInMinutes":"15","ReminderBeforeDays":"","ReminderTimeUTC":"","OwnerId":"1a50c565-8525-11ea-a93b-0aa4c559f4ca","EndDateUTCTime":"2024-09-23 10:05:00","EndDateLocalTime":"2024-09-23 15:35:00","EffortEstimate":"","EffortEstimateUnit":"","Location":"","PercentCompleted":"0","Priority":"","mx_Custom_1":"","mx_Custom_2":"","mx_Custom_3":"","mx_Custom_4":"","mx_Custom_5":"","mx_Custom_6":"","mx_Custom_7":"","mx_Custom_8":"","mx_Custom_9":"","mx_Custom_10":"","mx_Custom_11":"","mx_Custom_12":"","mx_Custom_13":"","mx_Custom_14":"","mx_Custom_15":"","mx_Custom_16":"","mx_Custom_17":"","mx_Custom_18":"","mx_Custom_19":"","mx_Custom_20":""}}
5.4 Task Complete
{"Event":"Task_Complete","Data":{"TaskId":"04901f02-4d0c-11ec-993a-06f221480cd8","TaskName":"Document Collection","TaskType":"0500cfd9-4cf5-11ec-993a-06f221480cd8","TaskTypeConfiguration":"{\"Id\":\"0500cfd9-4cf5-11ec-993a-06f221480cd8\",\"Name\":\"Document Collection\",\"TaskTypeConfiguration\":{\"CalenderInvite\":{\"Organiser\":{\"IsEnabled\":false,\"TemplateContent\":null,\"Subject\":null,\"IsSent\":false},\"Owner\":{\"IsEnabled\":false,\"TemplateContent\":null,\"Subject\":null,\"IsSent\":false},\"Lead\":{\"IsEnabled\":false,\"TemplateContent\":null,\"Subject\":null,\"IsSent\":false},\"ParticipantUsers\":{\"IsEnabled\":false,\"TemplateContent\":null,\"Subject\":null,\"IsSent\":null}},\"Location\":{\"IsEnabled\":false,\"IsMandatory\":false,\"LocationValue\":null,\"GeofenceLocation\":false,\"GeofenceRange\":100},\"BusinessWorkFlow\":{\"IsEnabled\":false,\"Status\":{\"Label\":null,\"Values\":[]}},\"Duration\":{\"IsEnabled\":false,\"Value\":\"tomorrow\",\"Values\":null},\"Priority\":{\"IsEnabled\":false,\"Value\":null,\"Values\":null},\"TaskCompleted\":{\"IsEnabled\":false},\"EffortEstimate\":{\"IsEnabled\":false,\"Value\":\"30\",\"ValueUnit\":\"Minute\",\"Values\":null}},\"PreventConflict\":false,\"Sequence\":9,\"IsDefault\":false,\"IsEditable\":true,\"IsDeleteable\":true,\"IsTimerEnabled\":false,\"Status\":1,\"CreatedBy\":\"Srisudhan R\",\"CreatedOn\":\"2021-11-24T07:06:17Z\",\"ModifiedBy\":\"Srisudhan R\",\"ModifiedByEmail\":null,\"ModifiedOn\":\"2021-11-24T07:06:44Z\",\"ShowOrganiserCalendarInvite\":null,\"ShowOwnerCalendarInvite\":null,\"ShowLeadCalendarInvite\":null,\"ShowParticipantCalendarInvite\":null,\"ReminderConfiguration\":{\"IsEnable\":false},\"ColumnConfiguration\":[],\"FormLayout\":\"{\\\"Sections\\\":[{\\\"DisplayName\\\":\\\"Task Details\\\",\\\"Fields\\\":[{\\\"SchemaName\\\":\\\"OwnerId\\\",\\\"Disabled\\\":\\\"False\\\",\\\"Colspan\\\":2},{\\\"SchemaName\\\":\\\"RelatedEntityId\\\",\\\"Disabled\\\":\\\"False\\\",\\\"Colspan\\\":2},{\\\"SchemaName\\\":\\\"Name\\\",\\\"Disabled\\\":\\\"False\\\",\\\"Colspan\\\":2},{\\\"SchemaName\\\":\\\"DueDate\\\",\\\"Disabled\\\":\\\"False\\\",\\\"Colspan\\\":2},{\\\"SchemaName\\\":\\\"Reminder\\\",\\\"Disabled\\\":\\\"False\\\",\\\"Colspan\\\":2},{\\\"SchemaName\\\":\\\"Description\\\",\\\"Disabled\\\":\\\"False\\\",\\\"Colspan\\\":2},{\\\"SchemaName\\\":\\\"CreatedBy\\\",\\\"Disabled\\\":\\\"False\\\",\\\"Colspan\\\":2},{\\\"SchemaName\\\":\\\"mx_Custom_1\\\",\\\"Disabled\\\":\\\"False\\\",\\\"Colspan\\\":1}]}],\\\"AvailableFields\\\":[{\\\"SchemaName\\\":\\\"Location\\\",\\\"Disabled\\\":\\\"True\\\",\\\"Colspan\\\":1},{\\\"SchemaName\\\":\\\"Priority\\\",\\\"Disabled\\\":\\\"False\\\",\\\"Colspan\\\":1},{\\\"SchemaName\\\":\\\"EffortEstimate\\\",\\\"Disabled\\\":\\\"False\\\",\\\"Colspan\\\":1},{\\\"SchemaName\\\":\\\"PercentCompleted\\\",\\\"Disabled\\\":\\\"True\\\",\\\"Colspan\\\":1}]}\",\"Color\":\"\",\"Category\":1,\"OpenCompletedTasks\":true}","TaskDescription":"I'm assigning a new task","LeadId":"6f75b09d-0187-45d6-86dd-f848bd5a0aca","DueDateUTCTime":"2022-10-10 10:11:23","DueDateLocalTime":"2022-10-10 15:41:23","ReminderInMinutes":"30","ReminderBeforeDays":"0","ReminderTime":"03:30:00","OwnerId":"1a50c565-8525-11ea-a93b-0aa4c559f4ca","CompletedBy":"Sri Sudhan","CompletedByEmail":"sri.sudhan@leadsquared.com","CreatedOn":"2021-11-24 09:50:55","EndDateUTCTime":"2025-06-27 13:15:00","EndDateLocalTime":"2025-06-27 18:45:00","EffortEstimate":null,"EffortEstimateUnit":null,"CompletedOnUTCTime":"2024-09-21 13:21:45","CompletedOnLocalTime":"2024-09-21 18:51:45","Location":"","PercentCompleted":"0","Priority":"","RelatedEntityId":"6f75b09d-0187-45d6-86dd-f848bd5a0aca","RelatedEntityType":"Lead","mx_Custom_1":"None"}}
5.5 Task Cancel
{"Event":"Task_Cancel","Data":[{"TaskId":"0a83afb0-781b-11ef-a77e-0ac989580241","TaskName":"Meeting: Craz Joe Davola","TaskType":"3c8c1a5b-8374-11e7-ab78-02de49b06427","TaskDescription":"","LeadId":"0723558d-af29-44cf-bf91-72b4c9a39b19","DueDateUTCTime":"2024-09-21 13:30:00","ReminderInMinutes":"15","ReminderBeforeDays":"0","ReminderTime":null,"NotifyBy":"1100","OwnerId":"1a50c565-8525-11ea-a93b-0aa4c559f4ca","OwnerName":"Sri Sudhan","OwnerEmailAddress":"sri.sudhan@leadsquared.com","CreatedBy":"1a50c565-8525-11ea-a93b-0aa4c559f4ca","CreatedByName":"Sri Sudhan","CreatedOn":"2024-09-21 13:11:40","ModifiedBy":"1a50c565-8525-11ea-a93b-0aa4c559f4ca","ModifiedByName":"Sri Sudhan","ModifiedOn":"2024-09-21 13:17:26","CompletedOnUTCTime":"0001-01-01 00:00:00","EndDateUTCTime":"2024-09-21 14:00:00","EffortEstimate":null,"EffortEstimateUnit":"","TaskAutoId":"T587","Status":2,"Location":"New York","PercentCompleted":"0","Priority":""}]}
5.6 Task Delete
{"Event":"Task_Delete","Data":[{"TaskId":"0a83afb0-781b-11ef-a77e-0ac989580241","TaskName":"Meeting: Craz Joe Davola","TaskType":"3c8c1a5b-8374-11e7-ab78-02de49b06427","TaskDescription":"","LeadId":"0723558d-af29-44cf-bf91-72b4c9a39b19","DueDateUTCTime":"2024-09-21 13:30:00","ReminderInMinutes":"15","ReminderBeforeDays":"0","ReminderTime":null,"NotifyBy":"1100","OwnerId":"1a50c565-8525-11ea-a93b-0aa4c559f4ca","OwnerName":"Sri Sudhan","OwnerEmailAddress":"sri.sudhan@leadsquared.com","CreatedBy":"1a50c565-8525-11ea-a93b-0aa4c559f4ca","CreatedByName":"Sri Sudhan","CreatedOn":"2024-09-21 13:11:40","ModifiedBy":"1a50c565-8525-11ea-a93b-0aa4c559f4ca","ModifiedByName":"Sri Sudhan ","ModifiedOn":"2024-09-21 13:18:09","CompletedOnUTCTime":"0001-01-01 00:00:00","EndDateUTCTime":"2024-09-21 14:00:00","EffortEstimate":null,"EffortEstimateUnit":"","TaskAutoId":"T587","Status":2,"Location":"New York","PercentCompleted":"0","Priority":""}]}
6. User Management
6.1 User Create
[{"UserId":"87e34381-78b1-11ef-a77e-0ac989580241","FirstName":"Richard","LastName":"Pryor","EmailAddress":"richardpryor@example.com","Role":"Administrator","StatusCode":"0","AssociatedPhoneNumbers":"","DateFormat":"mm/dd/yy","TimeZone":"Asia/Kolkata","IsPhoneCallAgent":"0","UserType":"0","CreatedById":"1a50c565-8525-11ea-a93b-0aa4c559f4ca","CreatedOnUTC":"2024-09-22 07:08:55","ModifiedBy":"3b10421d-8374-11e7-8758-0a106ee76b21","ModifiedOn":"2024-09-22 07:08:58","ManagerUserId":null,"Designation":null,"Team":null,"Department":null,"SalesRegions":null,"Skills":null,"OfficeLocationName":null,"Address":null,"City":null,"State":null,"Country":null,"ZipCode":null,"TelephonyAgentId":null,"IsAdministrator":"true","CreatedByName":"Sri Sudhan","ModifiedByName":"System","PhoneMain":null,"PhoneMobile":null,"PhoneOthers":null,"IsCheckinEnabled":"true","IsCheckedIn":"false","WorkDayTemplateId":"","WorkDayTemplateName":"","HolidayCalendarId":"","HolidayCalendarName":"","TeamId":"8bfc8586-0f53-11e8-871e-02bf1924461c","TeamName":"Education 101","IsWorkingToday":null,"GroupId":null,"IsSuperAdmin":"false","IsSoftPhoneEnabled":null,"IsEmployee":null,"EmployeeId":null,"DateOfBirth":null,"DateOfJoining":null,"DateOfResignation":null,"ImportId":null,"CreatedByEmail":"sri.sudhan@leadsquared.com","ModifiedByEmail":"t20170817174751@leadsquared.com","ManagerEmail":"","CustomAppRole":null}]
6.2 User Activate/Deactivate
[{"Before":"{\"CustomAppRole\":\"service-admin\",\"Availability\":null,\"IsSoftPhoneEnabled\":\"false\",\"IsEmployee\":\"true\",\"EmployeeId\":\"1010\",\"DateOfBirth\":\"1981-01-01\",\"DateOfJoining\":\"2015-02-13\",\"DateOfResignation\":null,\"ImportId\":null,\"IsWorkingToday\":null,\"WorkDayTemplateId\":\"\",\"HolidayCalendarId\":\"\",\"TeamId\":\"8bfc8586-0f53-11e8-871e-02bf1924461c\",\"LastCheckedIpAddress\":\"49.205.35.13\",\"LastCheckedOn\":\"2024-09-20 16:15:19\",\"IsCheckInEnabled\":\"true\",\"IsCheckedIn\":\"true\",\"CheckinCheckoutHistoryId\":null,\"PhoneOthers\":null,\"PhoneMobile\":null,\"PhoneMain\":null,\"IsEmailSender\":\"true\",\"Groups\":null,\"PhotoUrl\":null,\"Designation\":null,\"Team\":null,\"Department\":null,\"SalesRegions\":null,\"Skills\":\"Telecommunications\",\"AvailabilityStatus\":\"online\",\"OfficeLocationName\":\"Bangalore\",\"Address\":null,\"City\":\"Galle\",\"State\":null,\"Country\":\"India\",\"ZipCode\":\"560001\",\"TelephonyAgentId\":null,\"TemplateNames\":null,\"UserID\":\"1a50c565-8525-11ea-a93b-0aa4c559f4ca\",\"FirstName\":\"Sri Sudhan\",\"MiddleName\":null,\"LastName\":\"\",\"EmailAddress\":\"sri.sudhan@leadsquared.com\",\"TMP_ForgotPassword\":null,\"SessionID\":null,\"IsDefaultOwner\":null,\"IsAdministrator\":\"true\",\"IsAgencyUser\":null,\"IsBillingUser\":\"false\",\"TimeZone\":\"Asia/Kolkata\",\"DateFormat\":\"mm/dd/yy\",\"ManagerUserId\":null,\"AssociatedPhoneNumbers\":\"+91-9000000000\",\"StatusCode\":\"0\",\"StatusReason\":null,\"DeletionStatusCode\":null,\"CreatedBy\":\"3b1041fb-8374-11e7-8758-0a106ee76b21\",\"CreatedOn\":\"2020-04-23 05:41:39\",\"ModifiedBy\":\"1a50c565-8525-11ea-a93b-0aa4c559f4ca\",\"ModifiedOn\":\"2024-09-20 16:15:21\",\"Role\":\"Administrator\",\"IsPhoneCallAgent\":\"0\",\"UserType\":\"9\",\"WorkdayTemplateName\":\"\",\"IsWorkDayTemplateDerived\":\"true\",\"WorkDayTemplateDerivedFromTeamID\":\"8bfc8586-0f53-11e8-871e-02bf1924461c\",\"HolidayCalendarName\":\"\",\"IsHolidayCalendarDerived\":\"true\",\"HolidayCalendarDerivedFromTeamID\":\"8bfc8586-0f53-11e8-871e-02bf1924461c\",\"TeamName\":\"Education 101\",\"ManagerName\":\"\",\"CreatedByName\":\"Vir Singh\",\"ModifiedByName\":\"Sri Sudhan\",\"IsSuperAdmin\":\"false\"}","After":"{\"CustomAppRole\":\"service-admin\",\"Availability\":null,\"IsSoftPhoneEnabled\":\"false\",\"IsEmployee\":\"true\",\"EmployeeId\":\"1010\",\"DateOfBirth\":\"1981-01-01\",\"DateOfJoining\":\"2015-02-13\",\"DateOfResignation\":null,\"ImportId\":null,\"IsWorkingToday\":null,\"WorkDayTemplateId\":\"\",\"HolidayCalendarId\":\"\",\"TeamId\":\"8bfc8586-0f53-11e8-871e-02bf1924461c\",\"LastCheckedIpAddress\":\"49.205.35.13\",\"LastCheckedOn\":\"2024-09-20 16:15:19\",\"IsCheckInEnabled\":\"true\",\"IsCheckedIn\":\"true\",\"CheckinCheckoutHistoryId\":null,\"PhoneOthers\":null,\"PhoneMobile\":null,\"PhoneMain\":null,\"IsEmailSender\":\"true\",\"Groups\":null,\"PhotoUrl\":null,\"Designation\":null,\"Team\":null,\"Department\":null,\"SalesRegions\":null,\"Skills\":\"Telecommunications\",\"AvailabilityStatus\":\"away\",\"OfficeLocationName\":\"Bangalore\",\"Address\":null,\"City\":\"Galle\",\"State\":null,\"Country\":\"India\",\"ZipCode\":\"560001\",\"TelephonyAgentId\":null,\"TemplateNames\":null,\"UserID\":\"1a50c565-8525-11ea-a93b-0aa4c559f4ca\",\"FirstName\":\"Sri Sudhan\",\"MiddleName\":null,\"LastName\":\"\",\"EmailAddress\":\"sri.sudhan@leadsquared.com\",\"TMP_ForgotPassword\":null,\"SessionID\":null,\"IsDefaultOwner\":null,\"IsAdministrator\":\"true\",\"IsAgencyUser\":null,\"IsBillingUser\":\"false\",\"TimeZone\":\"Asia/Kolkata\",\"DateFormat\":\"mm/dd/yy\",\"ManagerUserId\":null,\"AssociatedPhoneNumbers\":\"+91-9000000000\",\"StatusCode\":\"0\",\"StatusReason\":null,\"DeletionStatusCode\":null,\"CreatedBy\":\"3b1041fb-8374-11e7-8758-0a106ee76b21\",\"CreatedOn\":\"2020-04-23 05:41:39\",\"ModifiedBy\":\"1a50c565-8525-11ea-a93b-0aa4c559f4ca\",\"ModifiedOn\":\"2024-09-22 07:12:33\",\"Role\":\"Administrator\",\"IsPhoneCallAgent\":\"0\",\"UserType\":\"9\",\"WorkdayTemplateName\":\"\",\"IsWorkDayTemplateDerived\":\"true\",\"WorkDayTemplateDerivedFromTeamID\":\"8bfc8586-0f53-11e8-871e-02bf1924461c\",\"HolidayCalendarName\":\"\",\"IsHolidayCalendarDerived\":\"true\",\"HolidayCalendarDerivedFromTeamID\":\"8bfc8586-0f53-11e8-871e-02bf1924461c\",\"TeamName\":\"Education 101\",\"ManagerName\":\"\",\"CreatedByName\":\"Vir Singh\",\"ModifiedByName\":\"Sri Sudhan\",\"IsSuperAdmin\":\"false\"}"}]
6.3 User Update
[{"Before":"{\"CustomAppRole\":null,\"Availability\":null,\"IsSoftPhoneEnabled\":null,\"IsEmployee\":null,\"EmployeeId\":null,\"DateOfBirth\":null,\"DateOfJoining\":null,\"DateOfResignation\":null,\"ImportId\":null,\"IsWorkingToday\":null,\"WorkDayTemplateId\":\"\",\"HolidayCalendarId\":\"\",\"TeamId\":\"8bfc8586-0f53-11e8-871e-02bf1924461c\",\"LastCheckedIpAddress\":null,\"LastCheckedOn\":null,\"IsCheckInEnabled\":\"true\",\"IsCheckedIn\":\"false\",\"CheckinCheckoutHistoryId\":null,\"PhoneOthers\":null,\"PhoneMobile\":null,\"PhoneMain\":null,\"IsEmailSender\":\"true\",\"Groups\":null,\"PhotoUrl\":null,\"Designation\":null,\"Team\":null,\"Department\":null,\"SalesRegions\":null,\"Skills\":null,\"AvailabilityStatus\":\"offline\",\"OfficeLocationName\":null,\"Address\":null,\"City\":null,\"State\":null,\"Country\":null,\"ZipCode\":null,\"TelephonyAgentId\":null,\"TemplateNames\":null,\"UserID\":\"87e34381-78b1-11ef-a77e-0ac989580241\",\"FirstName\":\"Richard\",\"MiddleName\":null,\"LastName\":\"Pryor\",\"EmailAddress\":\"richardpryor@example.com\",\"TMP_ForgotPassword\":null,\"SessionID\":null,\"IsDefaultOwner\":null,\"IsAdministrator\":\"true\",\"IsAgencyUser\":null,\"IsBillingUser\":\"false\",\"TimeZone\":\"Asia/Kolkata\",\"DateFormat\":\"mm/dd/yy\",\"ManagerUserId\":null,\"AssociatedPhoneNumbers\":\"\",\"StatusCode\":\"0\",\"StatusReason\":null,\"DeletionStatusCode\":null,\"CreatedBy\":\"1a50c565-8525-11ea-a93b-0aa4c559f4ca\",\"CreatedOn\":\"2024-09-22 07:08:55\",\"ModifiedBy\":\"3b10421d-8374-11e7-8758-0a106ee76b21\",\"ModifiedOn\":\"2024-09-22 07:08:58\",\"Role\":\"Administrator\",\"IsPhoneCallAgent\":\"0\",\"UserType\":\"0\",\"WorkdayTemplateName\":\"\",\"IsWorkDayTemplateDerived\":\"true\",\"WorkDayTemplateDerivedFromTeamID\":\"8bfc8586-0f53-11e8-871e-02bf1924461c\",\"HolidayCalendarName\":\"\",\"IsHolidayCalendarDerived\":\"true\",\"HolidayCalendarDerivedFromTeamID\":\"8bfc8586-0f53-11e8-871e-02bf1924461c\",\"TeamName\":\"Education 101\",\"ManagerName\":\"\",\"CreatedByName\":\"Sri Sudhan\",\"ModifiedByName\":\"System\",\"IsSuperAdmin\":\"false\"}","After":"{\"CustomAppRole\":null,\"Availability\":null,\"IsSoftPhoneEnabled\":null,\"IsEmployee\":null,\"EmployeeId\":null,\"DateOfBirth\":\"1940-12-01\",\"DateOfJoining\":null,\"DateOfResignation\":null,\"ImportId\":null,\"IsWorkingToday\":null,\"WorkDayTemplateId\":\"\",\"HolidayCalendarId\":\"\",\"TeamId\":\"8bfc8586-0f53-11e8-871e-02bf1924461c\",\"LastCheckedIpAddress\":null,\"LastCheckedOn\":null,\"IsCheckInEnabled\":\"true\",\"IsCheckedIn\":\"false\",\"CheckinCheckoutHistoryId\":null,\"PhoneOthers\":null,\"PhoneMobile\":null,\"PhoneMain\":null,\"IsEmailSender\":\"true\",\"Groups\":null,\"PhotoUrl\":null,\"Designation\":null,\"Team\":null,\"Department\":null,\"SalesRegions\":null,\"Skills\":null,\"AvailabilityStatus\":\"offline\",\"OfficeLocationName\":null,\"Address\":null,\"City\":null,\"State\":null,\"Country\":null,\"ZipCode\":null,\"TelephonyAgentId\":null,\"TemplateNames\":null,\"UserID\":\"87e34381-78b1-11ef-a77e-0ac989580241\",\"FirstName\":\"Richard\",\"MiddleName\":null,\"LastName\":\"Pryor\",\"EmailAddress\":\"richardpryor@example.com\",\"TMP_ForgotPassword\":null,\"SessionID\":null,\"IsDefaultOwner\":null,\"IsAdministrator\":\"true\",\"IsAgencyUser\":null,\"IsBillingUser\":\"false\",\"TimeZone\":\"Asia/Kolkata\",\"DateFormat\":\"mm/dd/yy\",\"ManagerUserId\":\"42d6fb6a-81d8-11ed-b7fd-0218d8753a48\",\"AssociatedPhoneNumbers\":\"\",\"StatusCode\":\"0\",\"StatusReason\":null,\"DeletionStatusCode\":null,\"CreatedBy\":\"1a50c565-8525-11ea-a93b-0aa4c559f4ca\",\"CreatedOn\":\"2024-09-22 07:08:55\",\"ModifiedBy\":\"1a50c565-8525-11ea-a93b-0aa4c559f4ca\",\"ModifiedOn\":\"2024-09-22 07:10:11\",\"Role\":\"Administrator\",\"IsPhoneCallAgent\":\"0\",\"UserType\":\"0\",\"WorkdayTemplateName\":\"\",\"IsWorkDayTemplateDerived\":\"true\",\"WorkDayTemplateDerivedFromTeamID\":\"8bfc8586-0f53-11e8-871e-02bf1924461c\",\"HolidayCalendarName\":\"\",\"IsHolidayCalendarDerived\":\"true\",\"HolidayCalendarDerivedFromTeamID\":\"8bfc8586-0f53-11e8-871e-02bf1924461c\",\"TeamName\":\"Education 101\",\"ManagerName\":\"Dharshana\",\"CreatedByName\":\"Sri Sudhan\",\"ModifiedByName\":\"Sri Sudhan\",\"IsSuperAdmin\":\"false\"}"}]
6.4 User Availability Status Change
{"Type":"AvailabilityStatusChange","UserId":"1a50c565-8525-11ea-a93b-0aa4c559f4ca","UserEmail":"sri.sudhan@leadsquared.com","Reason":"","Before":{"AvailabilityStatus":"online","Location":"","Latitude":"0.00000000","Longitude":"0.00000000","IpAddress":"49.205.35.13","CreatedByName":"Sri Sudhan","CreatedByEmail":"sri.sudhan@leadsquared.com","CreatedOn":"2024-09-20 16:15:26","Source":"WebApp","Availability":"0","OtherDetails":{"Source":"WebApp","IpAddress":"49.205.35.13"}},"After":{"AvailabilityStatus":"away","Location":"","Latitude":"0.00000000","Longitude":"0.00000000","IpAddress":"49.205.35.13","CreatedByName":"Sri Sudhan ","CreatedByEmail":"sri.sudhan@leadsquared.com","CreatedOn":"2024-09-22 07:12:36","Source":"WebApp","Availability":"0","OtherDetails":{"Source":"WebApp","IpAddress":"49.205.35.13"}}}
7. Account Management
7.1 Account Create
{"Address1":"Colorado","Address2":null,"AlternateName":null,"AnnualRevenue":"5600000","City":null,"EmailAddress":null,"CompanyIdentifier":null,"CompanyName":"Greendale Community College","CompanyNumber":null,"Origin":null,"OwnerId":"1a50c565-8525-11ea-a93b-0aa4c559f4ca","Source":null,"Stage":"Prospect","Country":null,"CreatedBy":"1a50c565-8525-11ea-a93b-0aa4c559f4ca","CreatedDate":"2024-09-22 06:49:51","CreatedOn":"2024-09-22 06:49:50","Currency":null,"Description":null,"DoNotCall":"0","DoNotEmail":"0","Employees":null,"FacebookUrl":null,"Industry":null,"Language":null,"LinkedInUrl":null,"ModifiedBy":"1a50c565-8525-11ea-a93b-0aa4c559f4ca","ModifiedOn":"2024-09-22 06:49:50","Notes":null,"Phone":null,"State":null,"TimeZone":null,"TwitterUrl":null,"Website":null,"ZipCode":null,"Custom_1":"Tier 1","OwnerName":"Sri Sudhan ","CreatedByName":"Sri Sudhan ","ModifiedByName":"Sri Sudhan ","OwnerEmail":"sri.sudhan@leadsquared.com","CompanyId":"f80e843f-312b-4792-aecf-21e0fa3d7d37","CompanyAutoId":"15"}
7.2 Account Update
{"Before":{"CompanyIdentifier":null,"CompanyName":"Greendale Community College","OwnerId":"1a50c565-8525-11ea-a93b-0aa4c559f4ca","Source":null,"Stage":"Prospect","Employees":null,"Industry":null,"ModifiedBy":"1a50c565-8525-11ea-a93b-0aa4c559f4ca","ModifiedOn":"2024-09-22 06:49:50","Phone":null,"Website":null,"Custom_1":"Tier 1","OwnerName":"Sri Sudhan ","ModifiedByName":"Sri Sudhan ","OwnerEmail":"sri.sudhan@leadsquared.com","CompanyId":"f80e843f-312b-4792-aecf-21e0fa3d7d37","CompanyAutoId":"15"},"After":{"CompanyIdentifier":null,"CompanyName":"Greendale Community College","OwnerId":"a443f7b7-d1fd-11ec-993a-06f221480cd8","Source":"Inbound Phone Call","Stage":"Prospect","Employees":"550","Industry":"Leisure Goods","ModifiedBy":"1a50c565-8525-11ea-a93b-0aa4c559f4ca","ModifiedOn":"2024-09-22 06:54:57","Phone":null,"Website":null,"Custom_1":"Tier 2","OwnerName":"Joseph ","ModifiedByName":"Sri Sudhan ","OwnerEmail":"vir.singh@leadsquared.com","CompanyId":"f80e843f-312b-4792-aecf-21e0fa3d7d37","CompanyAutoId":"15"}}
7.3 Account Delete
{"Address1":"Colorado","Address2":null,"AlternateName":null,"AnnualRevenue":"5600000","City":null,"EmailAddress":null,"CompanyIdentifier":null,"CompanyName":"Greendale Community College","CompanyNumber":null,"Origin":null,"OwnerId":"a443f7b7-d1fd-11ec-993a-06f221480cd8","Source":"Inbound Phone Call","Stage":"Prospect","Country":"Albania","CreatedBy":"1a50c565-8525-11ea-a93b-0aa4c559f4ca","CreatedDate":"2024-09-22 06:49:51","CreatedOn":"2024-09-22 06:49:50","Currency":null,"Description":null,"DoNotCall":"0","DoNotEmail":"0","Employees":"550","FacebookUrl":null,"Industry":"Leisure Goods","Language":null,"LinkedInUrl":null,"ModifiedBy":"3b10421d-8374-11e7-8758-0a106ee76b21","ModifiedOn":"2024-09-22 06:57:43","Notes":null,"Phone":null,"State":null,"TimeZone":null,"TwitterUrl":null,"Website":null,"ZipCode":null,"Custom_1":"Tier 2","OwnerName":"Joseph ","CreatedByName":"Sri Sudhan ","ModifiedByName":"System ","OwnerEmail":"vir.singh@leadsquared.com","CompanyId":"f80e843f-312b-4792-aecf-21e0fa3d7d37","CompanyAutoId":"15"}
7.4 Account Activity Create
[{"CompanyActivityId":"3a3a6d0d-c416-4e18-bd61-a58339165621","RelatedCompanyId":"f80e843f-312b-4792-aecf-21e0fa3d7d37","ActivityEvent":10001,"ActivityEventName":"Contract Signed","ActivityType":2,"Score":0,"CreatedBy":"1a50c565-8525-11ea-a93b-0aa4c559f4ca","CreatedOn":"2024-09-22 06:57:41","Data":{"Owner":"1a50c565-8525-11ea-a93b-0aa4c559f4ca","Status":"Active","mx_Custom_1":"2024-09-22 06:56:00","ActivityEvent_Note":"Signed a one year contract"}}]
7.5 Account Activity Update
[{"Before":{"CompanyActivityId":"3a3a6d0d-c416-4e18-bd61-a58339165621","CompanyId":"f80e843f-312b-4792-aecf-21e0fa3d7d37","ActivityEvent":"10001","ActivityType":"2","CreatedOn":"2024-09-22 06:56:00","CreatedBy":"1a50c565-8525-11ea-a93b-0aa4c559f4ca","CreatedByName":"Sri Sudhan ","ActivityEvent_Note":"Signed a one year contract","ModifiedOn":"2024-09-22 06:57:41","ModifiedBy":"1a50c565-8525-11ea-a93b-0aa4c559f4ca","ModifiedByName":"Sri Sudhan","Owner":"1a50c565-8525-11ea-a93b-0aa4c559f4ca","CompanyTypeId":"5003"},"After":{"CompanyActivityId":"3a3a6d0d-c416-4e18-bd61-a58339165621","CompanyId":"f80e843f-312b-4792-aecf-21e0fa3d7d37","ActivityEvent":"10001","ActivityType":"2","CreatedOn":"2024-09-22 06:56:00","CreatedBy":"1a50c565-8525-11ea-a93b-0aa4c559f4ca","CreatedByName":"Sri Sudhan ","ActivityEvent_Note":"Extended existing contract by 6 months, and singed a 18-month contract","ModifiedOn":"2024-09-22 06:58:36","ModifiedBy":"1a50c565-8525-11ea-a93b-0aa4c559f4ca","ModifiedByName":"Sri Sudhan ","Owner":"","CompanyTypeId":"5003"}}]
8. Product Management
8.1 Product Create
{"ProductId":"a7729eb6-3876-4b5c-be8d-5c74ff865bda","ProductAutoId":9,"ProductSku":"1020","Name":"Rome","Description":"Holiday package to Rome","StatusCode":0,"CreatedBy":"d5d08e32-5ca9-11ea-8dd7-029e1407a868","CreatedByName":"Srisudhan ","CreatedOn":"2024-09-22 08:07:02","ModifiedBy":"d5d08e32-5ca9-11ea-8dd7-029e1407a868","ModifiedByName":"Srisudhan ","ModifiedOn":"2024-09-22 08:07:02","ImageUrl":"","Category":"","Fields":[],"Price":0.0}
8.2 Product Update
{"Before":{"ProductId":"a7729eb6-3876-4b5c-be8d-5c74ff865bda","ProductAutoId":9,"ProductSku":"1020","Name":"Rome","Description":"Holiday package to Rome","StatusCode":0,"CreatedBy":"d5d08e32-5ca9-11ea-8dd7-029e1407a868","CreatedByName":"Srisudhan ","CreatedOn":"2024-09-22 08:07:02","ModifiedBy":"d5d08e32-5ca9-11ea-8dd7-029e1407a868","ModifiedByName":"Srisudhan ","ModifiedOn":"2024-09-22 08:07:02","ImageUrl":"","Category":"","Fields":[],"Price":0.0},"After":{"ProductId":"a7729eb6-3876-4b5c-be8d-5c74ff865bda","ProductAutoId":9,"ProductSku":"1018","Name":"Rome","Description":"Holiday package to Rome","StatusCode":0,"CreatedBy":"d5d08e32-5ca9-11ea-8dd7-029e1407a868","CreatedByName":"Srisudhan ","CreatedOn":"2024-09-22 08:07:02","ModifiedBy":"d5d08e32-5ca9-11ea-8dd7-029e1407a868","ModifiedByName":"Srisudhan ","ModifiedOn":"2024-09-22 08:08:25","ImageUrl":"","Category":"","Fields":[],"Price":0.0}}
8.3 Product Delete
{"ProductId":"a7729eb6-3876-4b5c-be8d-5c74ff865bda","ProductAutoId":9,"ProductSku":"1018","Name":"Rome","Description":"Holiday package to Rome","StatusCode":0,"CreatedBy":"d5d08e32-5ca9-11ea-8dd7-029e1407a868","CreatedByName":"Srisudhan ","CreatedOn":"2024-09-22 08:07:02","ModifiedBy":"d5d08e32-5ca9-11ea-8dd7-029e1407a868","ModifiedByName":"Srisudhan ","ModifiedOn":"2024-09-22 08:08:25","ImageUrl":"","Category":"","Fields":[],"Price":0.0}
9. Landing Page Submission
{"mx_Renewal_Date":"2024-09-22 00:00:00","mx_Application_Submitted_On":"2024-09-23 00:00:00","IPAddress":"14.143.245.30","LandingPageURL":"https://leadsquared59.viewpage.co/Landing-Page-02","LandingPageId":"a889a1d5-4ebb-11e8-b16e-02bf1924461c","mx_Country":"India","mx_State":"Karnataka","mx_City":"Bengaluru","UserAgent":"Mozilla/5.0 (Windows NT 10.0; Win64; x64) AppleWebKit/537.36 (KHTML, like Gecko) Chrome/129.0.0.0 Safari/537.36","Attachments":"[]","ProspectID":"6371c709-a28c-4539-bcbd-4947f10ca8f0","ProspectStage":"Prospect","Source":"Referral Sites","SourceMedium":"","SourceCampaign":"","Score":"6","EngagementScore":"0","OwnerId":"3b1041fb-8374-11e7-8758-0a106ee76b21","OwnerIdEmailAddress":"t20170817174751@leadsquared.com","EmailAddress":"peggycarter@example.com","FirstName":"Peggy","LastName":"","Phone":"+91-9988776611","Mobile":"","QualityScore01":"","ProspectActivityName_Max":"Form Submitted on Website","ProspectActivityDate_Max":"2024-09-23 09:20:21","StageRottingFlagLevel":"","StageRottingFlagStatus":"","StageRottingFlagMessage":"","StageRottingFlagModifiedOn":"","ProspectAutoId":"1813","ConversionReferrerURL":"https://in21.leadsquared.com/","SourceReferrerURL":"https://in21.leadsquared.com/","SourceIPAddress":"14.143.245.30","LeadLastModifiedOn":""}
Any Questions?
Did you find this article helpful? Please let us know your feedback in the comments section below. We’d love to hear from you and help you out!


 , and under Actions, click Go To.


 . This will clear the current session, along with the existing emulator logs.
 .
.

 .
.
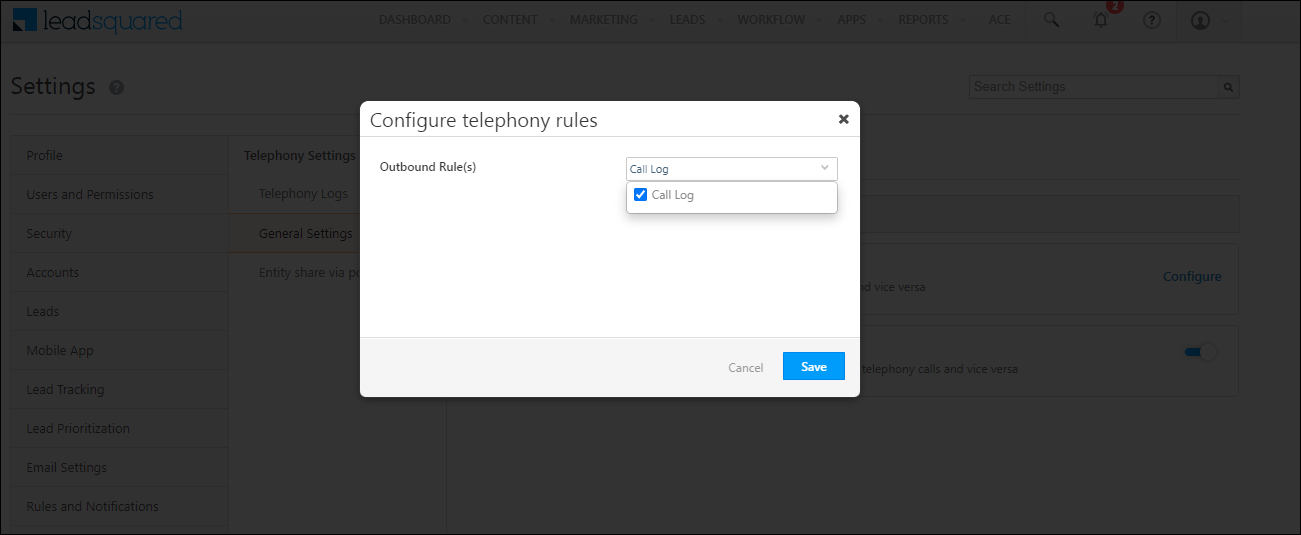
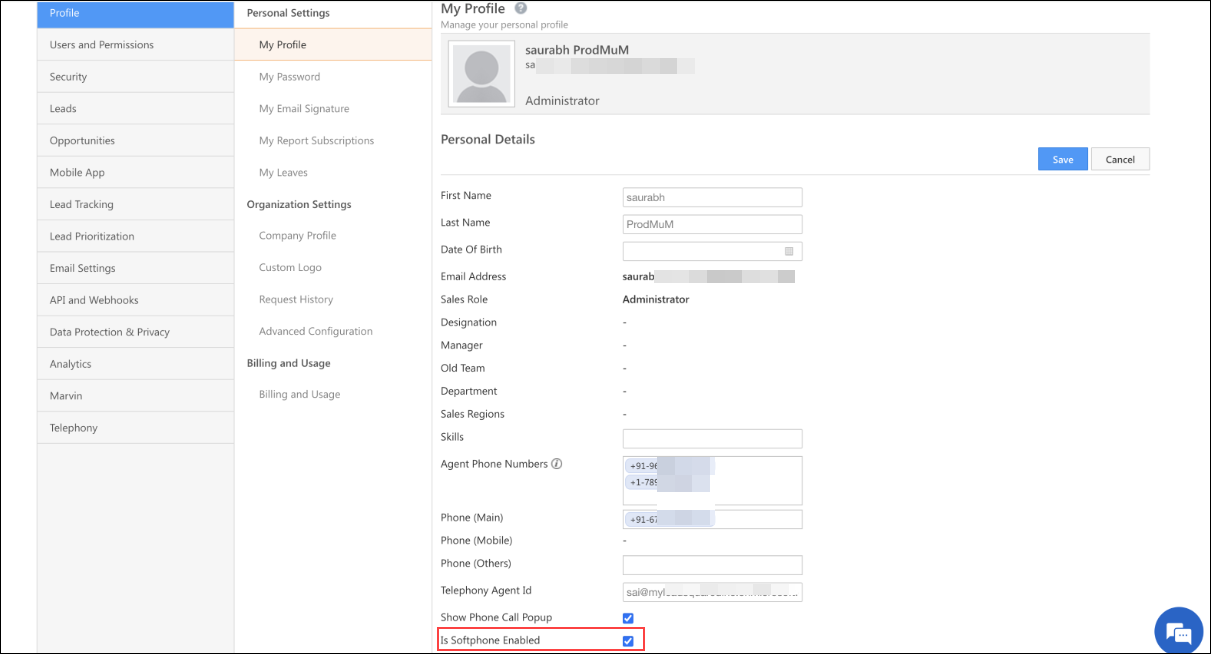
 checkbox.


 , and click Clone.