1. Feature Overview
LeadSquared Converse is an omni channel engagement platform that enables you to have real-time conversations with leads. Converse currently supports the following channels –
- SMS (currently available only in the United States)
- WhatsApp
- Carter (LeadSquared’s in-app reminder and notifications system)
Using Converse, you’ll be able to –
- Send and receive images, videos, GIFs, etc.
- View conversations in the context of a lead.
- Eliminate the need to switch between multiple applications to converse with your leads.
- Get real-time notifications for messages sent by leads.
- Send content-rich messages, with multi-language and emoji support.
2. Prerequisite
To enable LeadSquared Converse in your account, please write to support@leadsquared.com.
Note: We will be integrating LeadSquared Converse with other platforms in the near future. Check out
Product Updates to know more.
3. Agent Availability
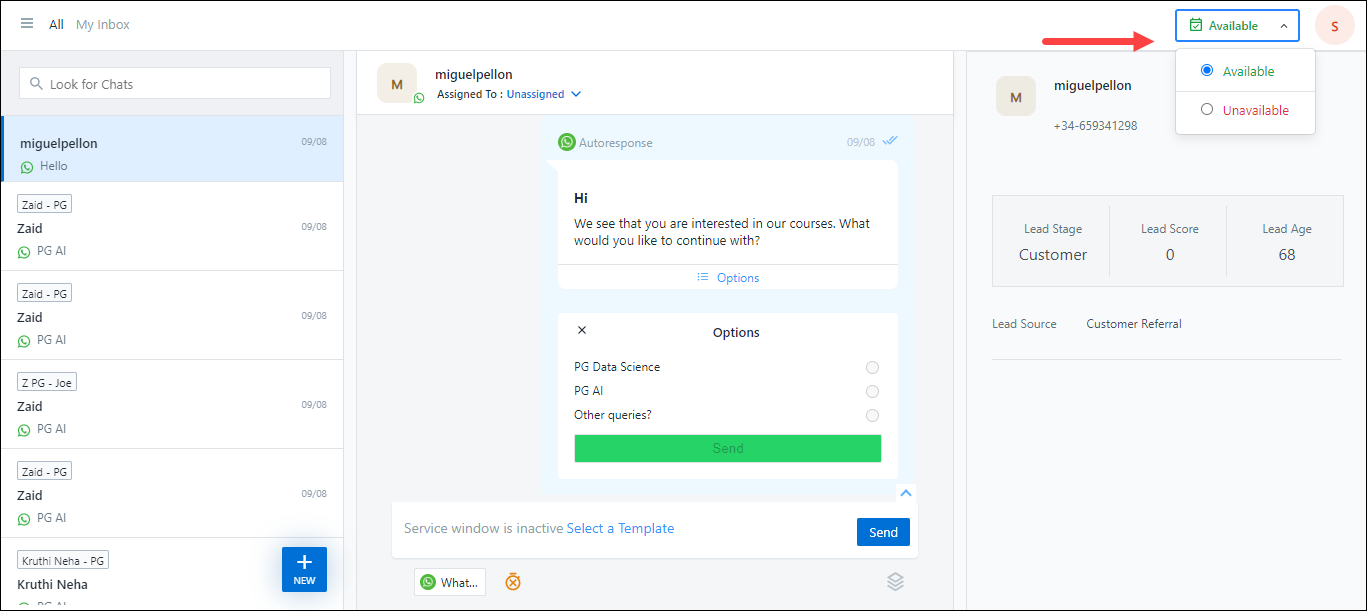
As an Admin, you can allow users to set their availability status. Based on their availability, a chat gets assigned to them. If no user is available, chats will remain unassigned.
Once any user marks themselves as available, and only if a lead sends another message, the chat gets assigned to this user.
To grant users permission to set their status –
- Navigate to My Profile>Settings>Converse, and click Agent Availability.
- On the Agent Availability screen, enable the checkbox alongside Allow agents to set availability status, and click Save.
Note: Here are a few points to note regarding this setting –
- When this setting is enabled, users must manually set their availability status. If a user forgets to switch from Available to Unavailable before logging out, chats will still be assigned to them.
- Activation of this setting adds an additional layer to your existing Routing Rules. If you’ve configured Routing Rules, agents must mark their status as Available for a chat to be assigned to them.
- If this setting is not enabled, chats are assigned to users based solely on the Routing Rules configured in your account (irrespective of a user’s availability).
- If a user marks themselves as Unavailable, chats initiated before the status change will still be routed to them. However, new chats after they’re marked Unavailable will not be assigned to them.
4. Conversing with Leads via SMS
After LeadSquared Converse is enabled on your account –
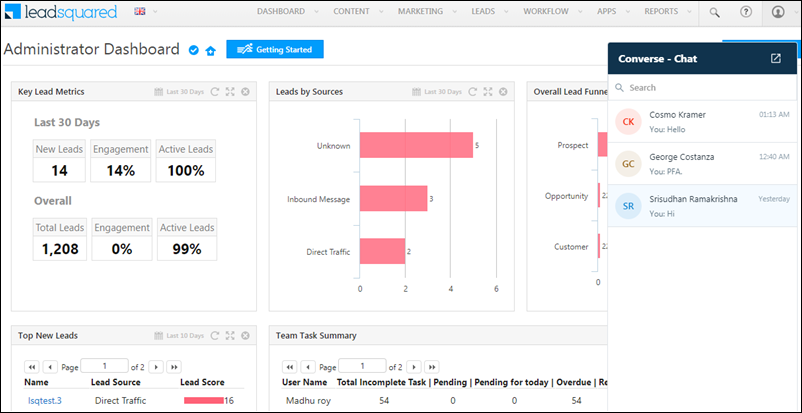
- Log in to your LeadSquared account, and from the main menu, click Converse – Chat.
- On the chat pop-up, search for the lead you want to converse with. You’ll have to type either the lead’s first name or last name, in entirety, for the lead to appear.
- On the chat pop-up, you can begin having a conversation with your lead. After typing your message, hit Enter, or click
 to send the message.
- Once the message is sent, a
 single tick will be visible against the message. Once the message is delivered, it’ll change to
  double ticks.
- Once your lead replies, you can continue the conversation.
Note:
- Conversing with your leads via SMS is currently supported only in the US region.
- Your account plan must support SMS integration.
- You must have either the CTM Texting Connector or the RingCentral Texting Connector installed and configured in your account.

4.1 SMS Templates
You can create customized SMS templates and attach them while conversing with your leads.
- On the chat pop-up, click Select a Template, or click
 .
.
- From the list of existing templates, choose the template you wish to send to the lead.
- Hit Enter, or click to send the message.
4.2 Attach Files
You can send and receive files while conversing with your leads.
- To attach files, on the chat pop-up, click
 .
.
- To download files received from your leads, on the chat pop-up, under the file, click
 .
.
The following file types are supported –
| Connector Type |
Image Files |
Text Files |
Video Files |
Audio Files |
Maximum File Size Allowed |
| CTM Texting Connector |
|
|
NA |
NA |
4MB |
| RingCentral Texting Connector |
- jpeg
- png
- jpg
- gif
- bmp
- tiff
- svg
|
|
|
|
1.5MB |
4.3 Other Actions
The other actions that you can perform from the chat pop-up are –
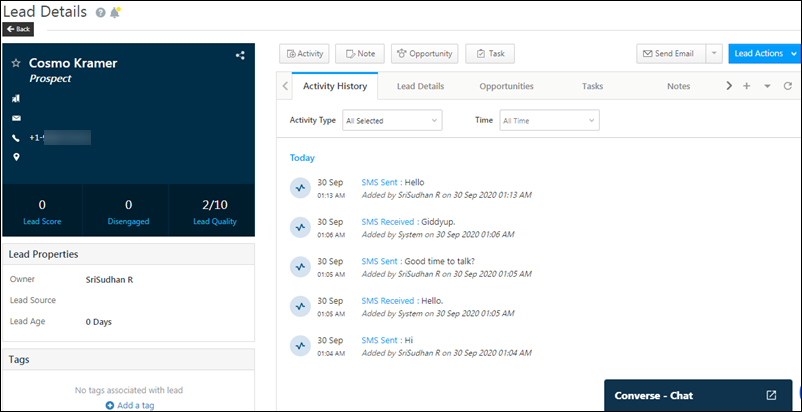
- To navigate to the Lead Details page from the chat pop-up, click on the lead’s name. This will open the Lead Details page on a new tab.
- On the Lead Details page, under Activity History, you can view the conversation you’ve had with the lead.
- If the lead has multiple phone numbers, click
 to select the number you want to send the message.
- To expand the chat window to full-screen mode, click
 .
.
- If there’s an unread message on the chat pop-up, the number of messages will show up on it.

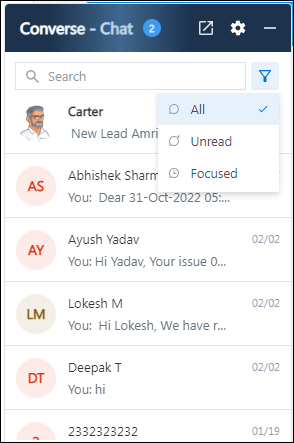
4.4 Chat Filters
The following Converse chat filters are available when you click  –
–
- All – All the messages you have sent and received from leads.
- Unread – All the unread messages you have received from your leads.
- Focused – All the 1-on-1 chats between you and your leads. This filter will exclude conversations with leads that were initiated through bulk messages or automations.
5. Conversing with Leads via WhatsApp
Integrating Converse with LeadSquared’s WhatsApp connector will enable your users to have real-time conversations with your leads via WhatsApp, from your LeadSquared account. Using templatized messages, you’ll be able to attach and send media files (such as images, documents, etc.) and emojis in your conversations. For more information, refer to Integrate Converse with WhatsApp.
Note: WhatsApp messages received from contacts that don’t exist as leads in your LeadSquared account will get created as new leads, and be assigned to your existing Admin users in a round-robin manner. Alternatively, you can assign these new leads in a round-robin manner to your Sales Managers and Marketing Users. To know more, refer to
WhatsApp Message Routing.
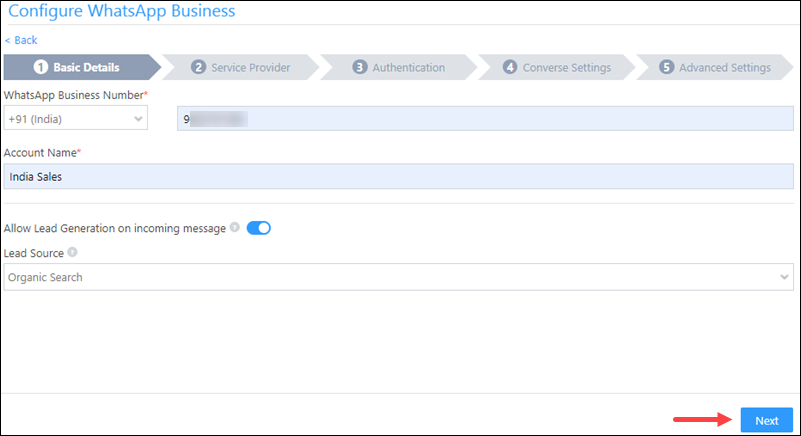
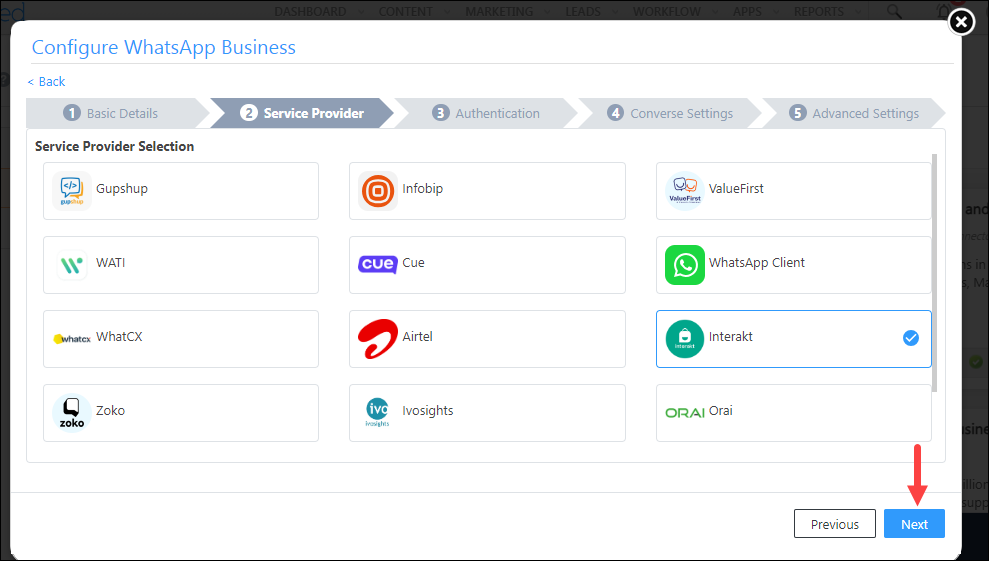
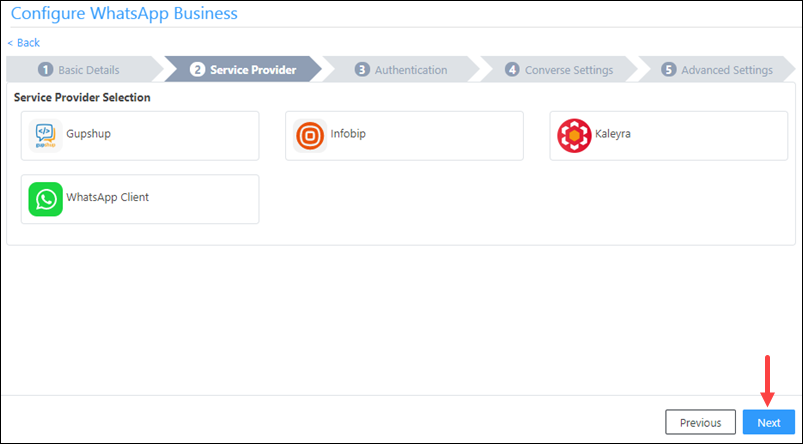
5.1 Set-up
You must install and configure the WhatsApp connector. Once that’s done, you can integrate LeadSquared Converse with the following WhatsApp service providers –
5.2 Create WhatsApp Templates
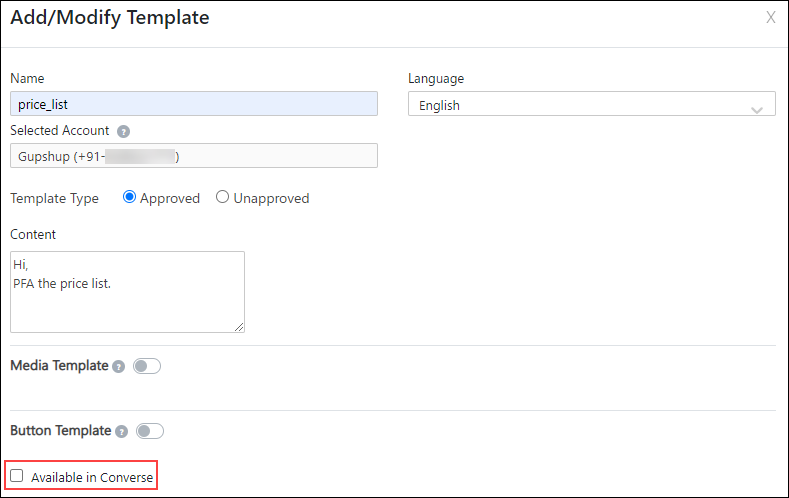
Once the connector is set-up, you must create WhatsApp templates that can be used to converse with your leads. To do this, refer to Create WhatsApp Templates in LeadSquared.
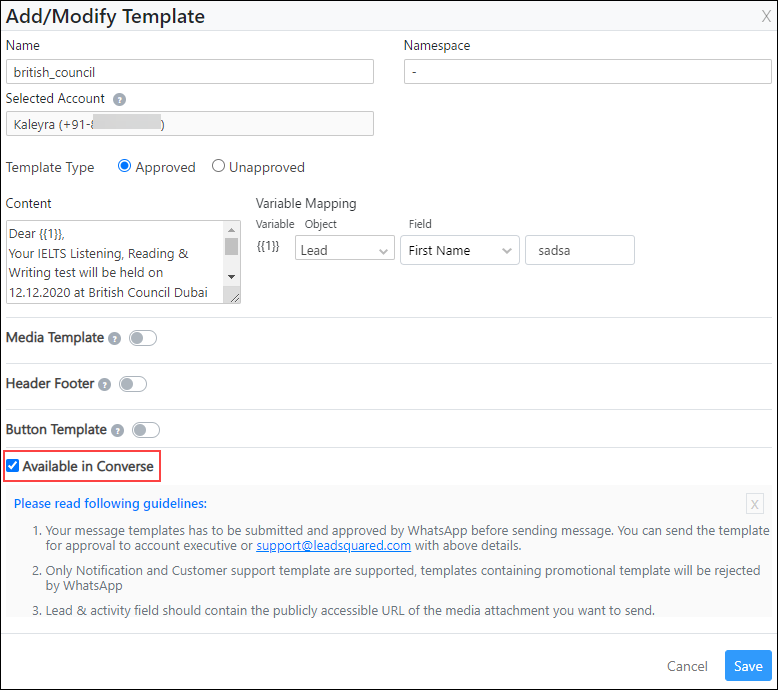
Note: Enable the Available in Converse setting when creating WhatsApp templates.
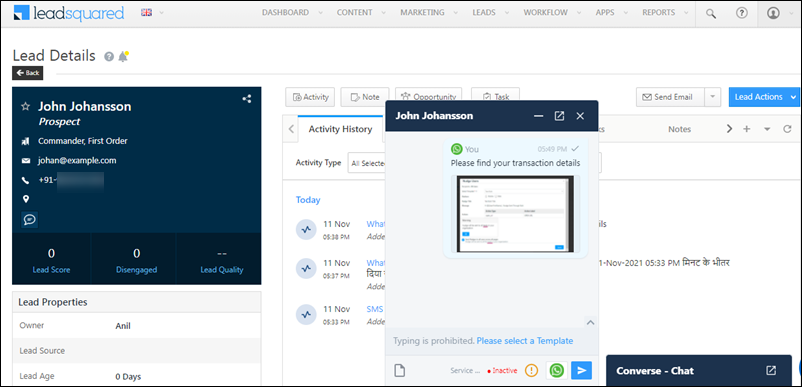
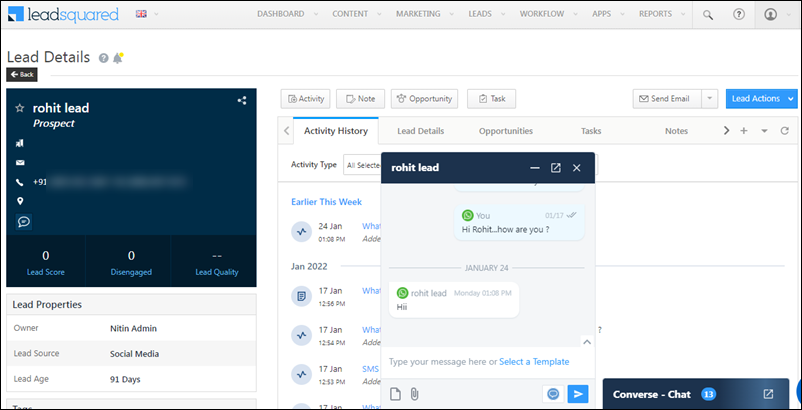
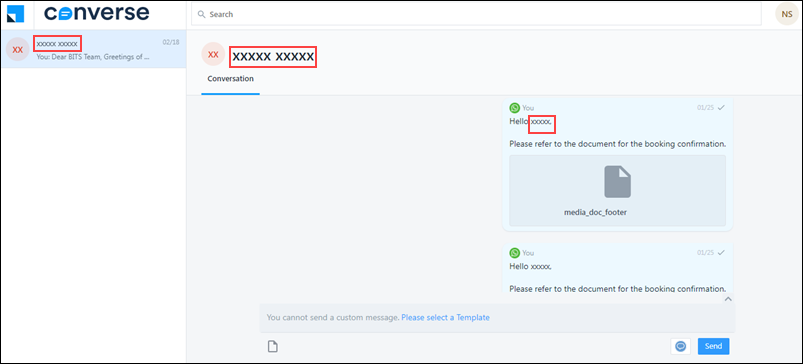
5.3 Messaging your Leads via WhatsApp
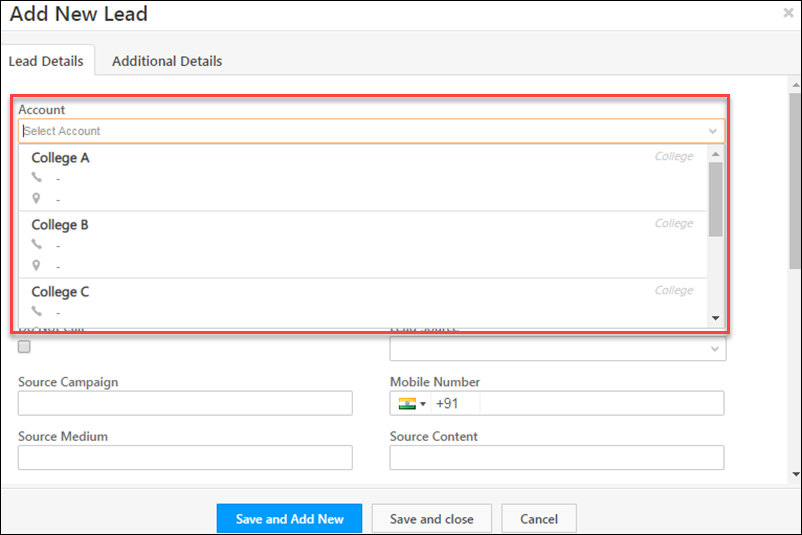
To send WhatsApp messages to your leads through Converse –
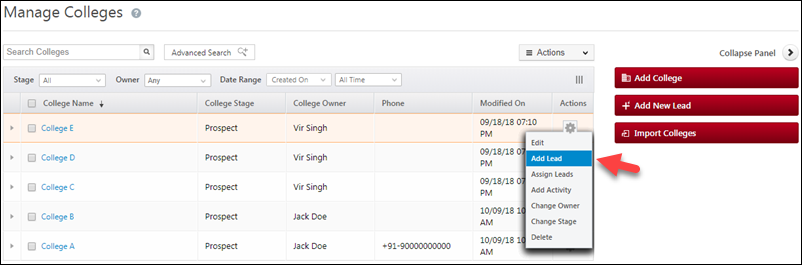
- Navigate to Leads>Manage Leads, and click on the lead you want to message.
- On the Lead Details page, on the Lead vCard, click
 .
.
- On the chat pop-up, select WhatsApp Business.
- From the list of approved templates, select the template you want to send, and click
 .
.
- When the 24-hour service window is active, you can converse with your lead in real-time.
5.4 Attach Files
You can send and receive files while conversing with your leads via WhatsApp.
- To attach files, on the chat pop-up, click .
- To download files received from your leads, on the chat pop-up, under the file, click .
Note:
- The file attachment and emoji banner appears only when the WhatsApp service window is active.
- Sales Users can attach and send one media file at a time.
- Sales Users can add captions only to image & video files.
The following file types are supported when conversing via WhatsApp –
| Image Files |
Video Files |
Audio Files |
Document Files |
Maximum File Size Allowed |
|
|
|
|
|
4MB |
5.5 WhatsApp Message Routing
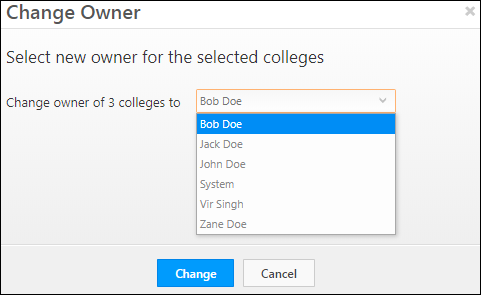
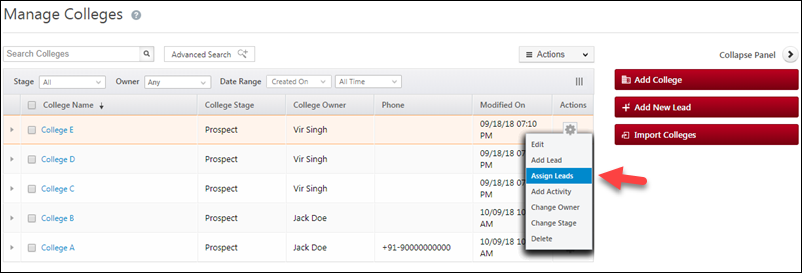
Every time a contact that doesn’t exist as a lead in your account sends a WhatsApp message, this contact is created as a new lead, and this lead is assigned in a round-robin manner to the Admin users in your account. Through this setting, in addition to Admin users, you can choose to assign these new leads to Marketing Users and Sales Managers present in your account. To do this –
- On the Converse chat window, click
 .
.
- Alternatively, on the chat window, click
 , click on the Profile Icon on the top right of your screen, and then click Message Routing.
- On the WhatsApp Message Routing screen, click the Create Support Group button.
- On the Create Support Group pop-up, enter the following details –
- Support Group Details – Enter the Support Group Name and Description. Once you’re done, click Save & Next.
- Support Agents – From the list of Available Users, select the Sales Managers and Marketing Users to whom you want to assign the new leads. Note that the leads will get assigned in the order of the users selected, in a round-robin manner. For e.g., if Abhishek, Amrit and Anil are the selected users, then the first lead is assigned to Abhishek, second to Amrit, third to Anil, fourth to Abhishek, and so on.
- Once you’re done, click Save & Close. The new leads created in your account will now be assigned to the selected users.
- On an existing group, click
 to perform the following actions –
- Deactivate the group. This will stop leads from getting assigned to the selected users, but the group will still be available, in case you want to activate it in the future.
- Delete the group. This will stop leads from getting assigned to the selected users, and the group will get deleted.
Note: At present, you can create only one support group in your account.
5.6 Chat Filters
The following Converse chat filters are available when you click –
- All – All the messages you have sent and received from leads.
- Unread – All the unread messages you have received from your leads.
- Focused – All the 1-on-1 chats between you and your leads. This filter will exclude conversations with leads that were initiated through bulk messages or automations.
6. Quick Replies
Boost agent efficiency with customizable quick replies that save time, ensure consistency, and maintain a professional tone. Admins can create and manage Quick Replies in the Converse settings, organizing them by category and optimizing responses for web, WhatsApp, and SMS.
Agents can access them directly from the chat interface, using intuitive search, category filters, preview options, and on-the-fly editing for personalized customer interactions.
- Navigate to My Profile>Settings>Converse Settings>Quick Replies.
- To create a category, click Categories and add a new one. You can group Quick Replies into different categories, such as Greetings, Thank You Replies, etc., for better organization and accessibility.
- Next, click + Add Quick Reply.
- Enter a name.
- Choose a channel (Web, WhatsApp, SMS).
- Select a Category.
- Enter the Template.
- Click Save And Publish.

On the Converse chat click the  icon to select the quick reply based on the Category.
7. Chat Transfer
Through Converse, Sales Managers and Sales Group Managers can manually assign and transfer chats to other managers, Admins and the Lead Owner. Click Assigned to:
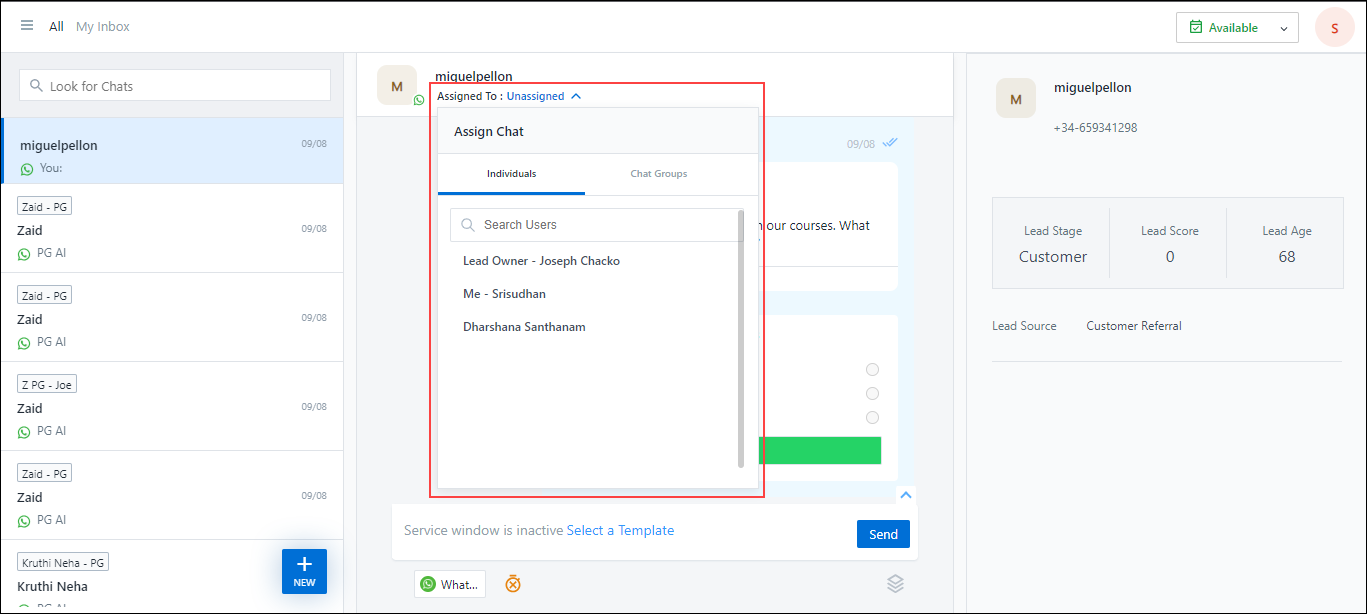
Similarly, for chats tagged to Opportunities, Sales Managers and Sales Group Managers can manually assign the chat to a different opportunity. For e.g., if a chat is tagged to the “Car Loans” opportunity type, Managers can instead tag it to the “Home Loans” opportunity type directly from the Converse window.
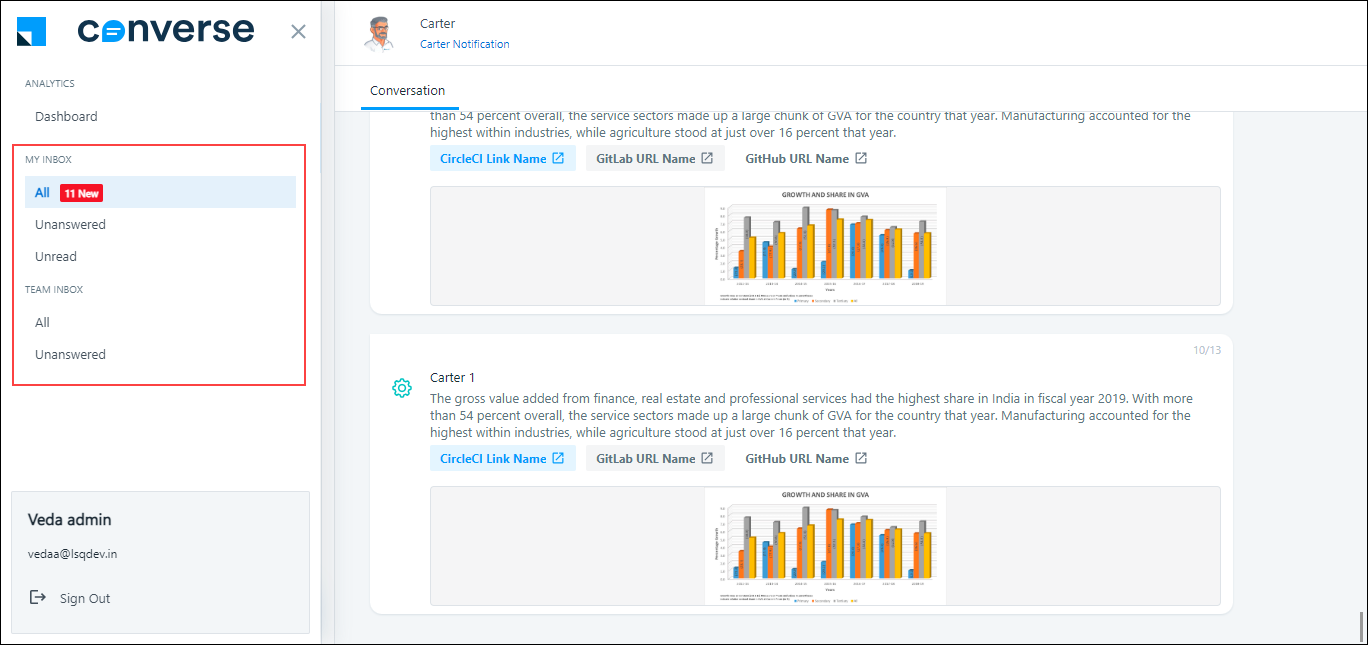
8. Receiving Nudges via Carter
Carter is a desktop application that sends reminders and notifications to your users within the LeadSquared application. You can use Carter to send your Lead’s conversation as notifications to your users. To enable Carter on your account, refer to Configure Carter Settings.

9. Converse Full-Screen Mode
On the Converse full-screen mode users can view their Converse Inbox and reply to messages from leads.
Navigate to full-screen mode –
- Click on the
 icon on the Converse chatbox to open full-screen mode.
- Next, you can click on the
 to open your inbox.
Here, users can view the following Inbox –
- All – All messages the user has replied to, unanswered, and unread.
- Unanswered – Messages the user has read but did not reply to.
- Unread – Messages the user has not read.
9.1 Admin View for Converse
Admins and managers gain a 360-view of all the chats assigned to their team. They can monitor these chats, view unanswered queries, and seamlessly assign chats to their users. Additionally, Admins and Managers can also view their Converse metrics through Analytics.
Admins, Sales Managers, and Sales Group Managers (Sales users who have been made managers through the group) can view the following Team Inbox of their reportees –
- All – All Messages the users have replied to unanswered, and unread.
- Unanswered – Messages the users have read but did not reply to.
If there are unanswered messages in the Team Inbox: Admins, Sales Managers, and Sales Group Managers can reply to these messages. The chat will then show up in the Admins/Manager’s Inbox as well.
10. Hide Lead Fields
While sending messages (via SMS or WhatsApp), you can hide sensitive lead fields (such as Phone Numbers, Lead Name, etc.) from your LeadSquared users.
To hide these fields, you must create and assign Restrict Access – View Lead Permission Templates to your users, and select (configure) the Lead Fields you want to mask.
Note: Details shared over chat messages between users and leads (e.g., when lead’s send their Email Id over chat to users, etc.) will not be masked.
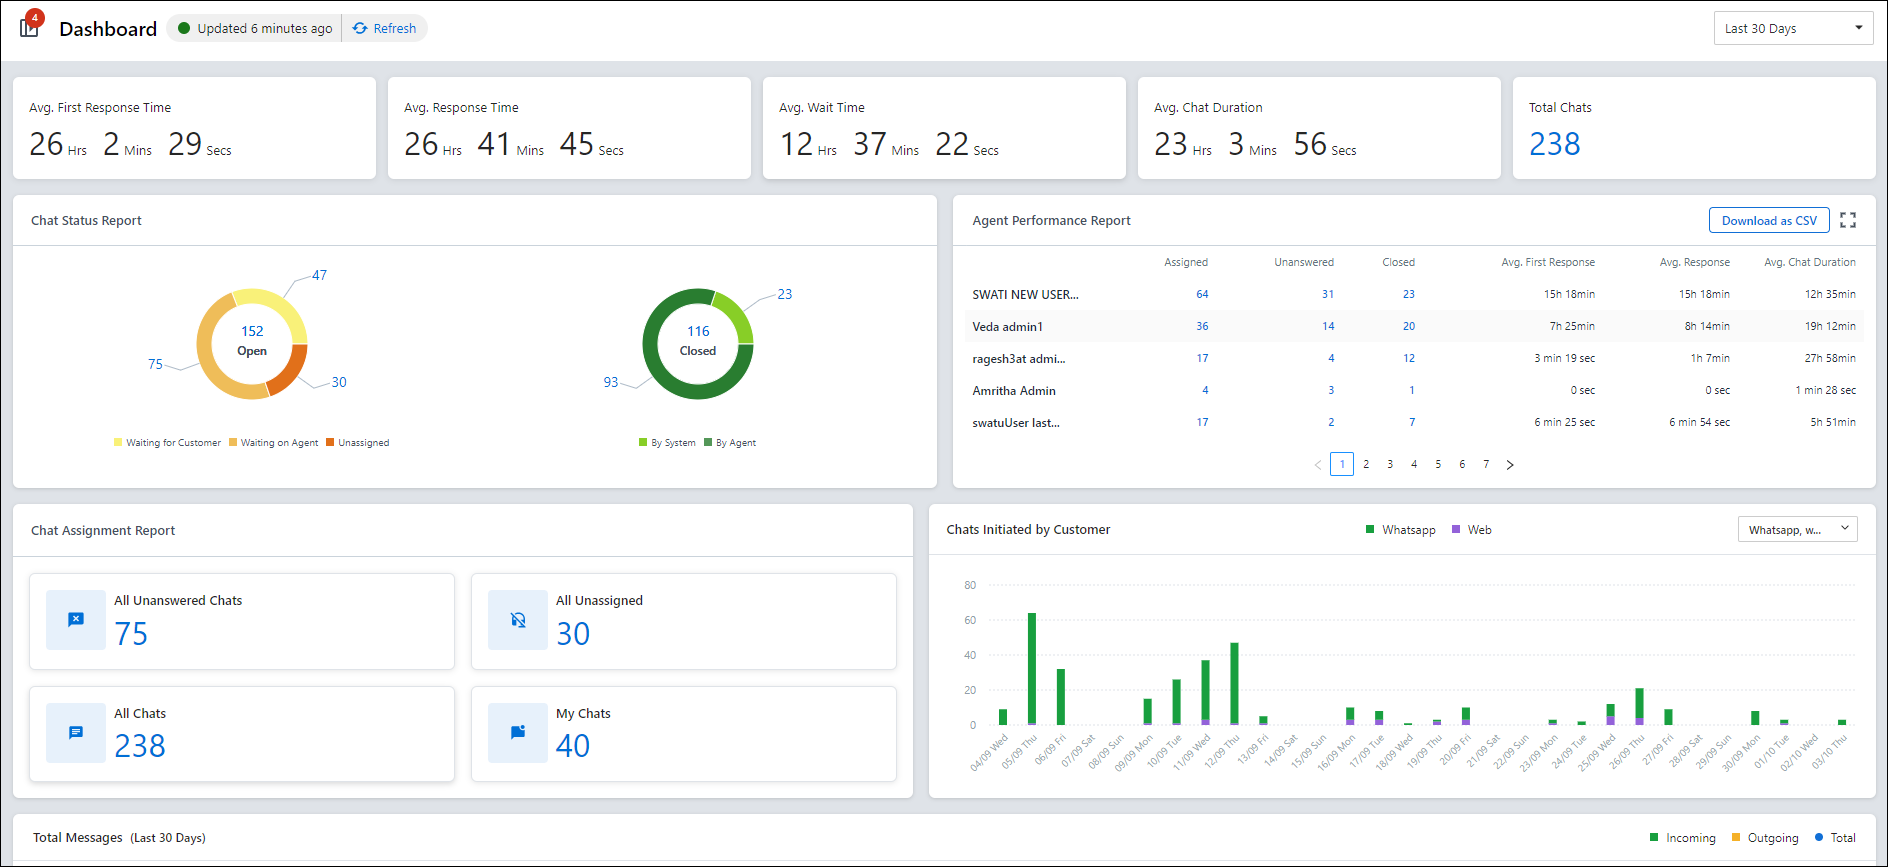
11. Dashboard
Admins, Managers, and Sales Managers can use the Converse Dashboard to track chat statistics, including answered/unanswered chats, response times, chat duration, individual agent performance, etc.
Navigate to the Dashboard
To view the Dashboard, click the  icon, and under Analytics, select Dashboard. You can filter the time frame for the statistics using the dropdown.
The Dashboard contains 10 different widgets that display the following information –
| Widget |
Description |
| Avg. First Response Time |
Average time taken by all agents to send the first response to customers/leads. |
| Avg. Response Time |
Average time taken by all agents to send a response to customers/leads. |
| Avg. Wait Time |
The average wait time refers to how long customers/leads wait for the first response from agents. For example, if a lead sends a message at 12 PM, the chat is assigned to an agent at 2 PM, and the agent responds at 2:05 PM, the average wait time is 2 hours and 5 minutes. |
| Avg. Chat Duration |
The average chat duration between all leads and agents until the chat has ended. |
| Total Chats |
All chats either assigned to the users or those the users have interacted with, even if not directly assigned. |
| Chat Status Report |
This report consists of Open and Closed chats –
Open Chats
- Waiting for Customer: Number of chats where the agent is waiting for the customer to respond.
- Waiting on Agent: Number of chats where the customer is waiting for the agent to respond.
- Unassigned: Number of chats that have been unassigned to an agent.
Closed Chats
- By System: Number of chats closed by the systems.
- By Agent: Number of chats closed by the agent.
|
| Agent Performance Report |
Individual report on each user that specifies the number of assigned, unanswered, and closed chats, and the average first response time, average response time, and average chat duration.
Admins can download this report as a CSV. |
| Chat Assignment Report |
The report provides data on the total number of unanswered chats, unassigned chats, all chats, and the chats specifically assigned to you. |
| Chats Initiated by Customer |
The total number of chats initiated by customers through WhatsApp and the web on a specific day. |
| Total Messages |
The total number of incoming and outgoing messages on a given day. |
Note: You can drill down to specific chats (as highlighted in blue) in the report wherever applicable.
12. End Chat
To end an active (live) chat –
- On the Converse tab, expand the chat window to full-screen mode by clicking .
- On the Converse page, select the chat you want to end.
- Alongside the lead’s name, click End Chat.
13. Configure CSAT Survey
You can collect Customer Satisfaction (CSAT) feedback directly within the Converse chat window once a conversation ends, allowing customers to instantly rate their experience with the agent. This real-time feedback helps you accurately measure customer satisfaction and monitor agent performance.
How to Enable CSAT
Navigate to Settings>Converse>Chat Settings>Customer Satisfaction and click + Create New Survey.
Fill in the following details (fields marked * are mandatory):
Note: As you configure the survey, a preview of the CSAT survey chat will appear on the right, updating in real-time as you modify the fields.
- Name* – Enter a name for the survey.
- Description – Optionally, add a short description of the survey.
- Survey Questions* – Enter the question you’d like to ask the customer.
- Additional Comments – Enable this option if you’d like to allow customers to provide extra feedback. (This option is not available on WhatsApp.)
- CTA Label Text – Customize the call-to-action button text. (Not editable on WhatsApp.)
- Thank You Message* – Enter the message that will appear after the customer submits their feedback.
- Trigger When* – Enable Chat Closed by Agent to trigger the survey automatically when an agent ends the conversation.
Once done, click Save & Publish to make the survey live. Alternatively, click Save if you want to save it as a draft without publishing it immediately.
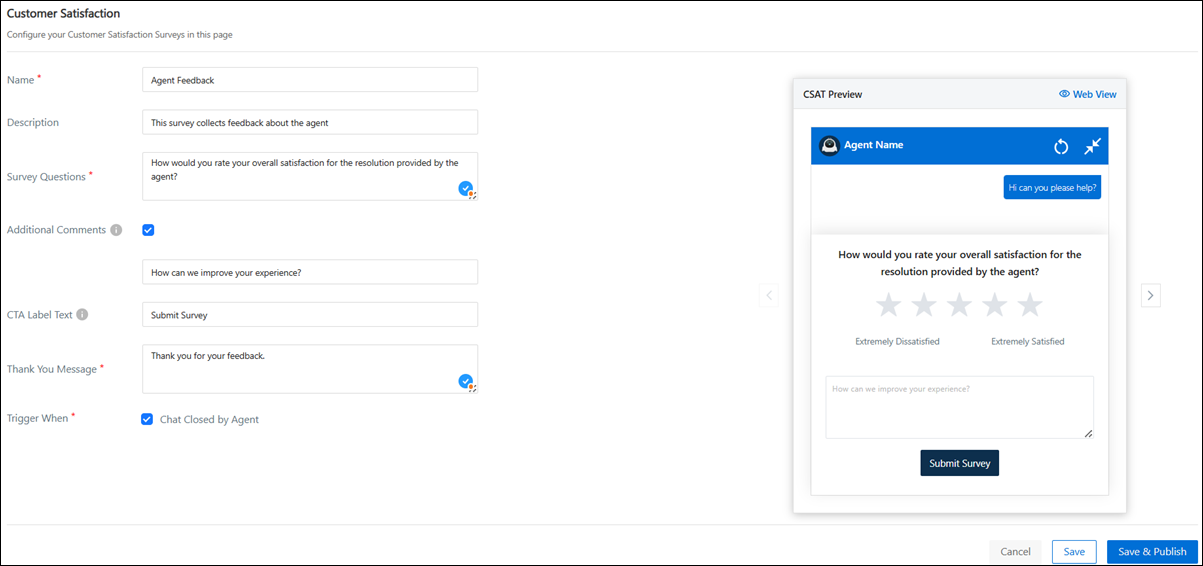
The survey will be presented to the customer once the agent clicks the End Chat button.
14. Troubleshooting
In this section, we’ve listed a few errors you might encounter when using the Converse integrated with WhatsApp feature. For each error, we’ve listed the possible troubleshooting steps. In case it’s unresolved even after you try out the steps listed, contact your account manager or write to support@leadsquared.com, and we’ll resolve the issues immediately.
- No Texting Channel Configured/No WhatsApp number
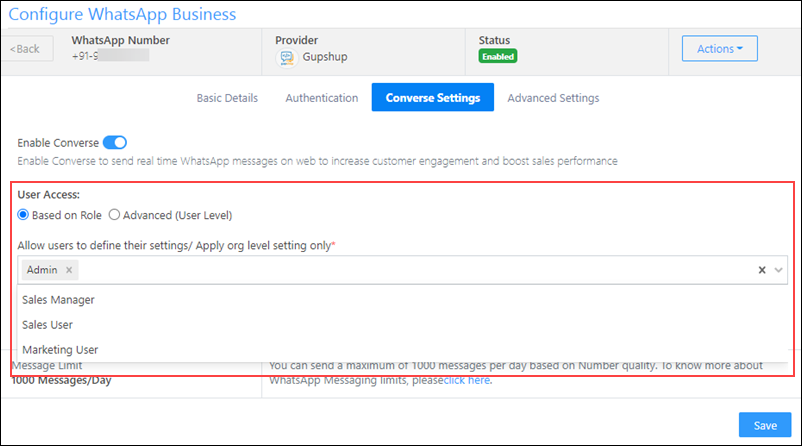
This error is usually displayed when the LeadSquared user doesn’t have permission to access the Converse feature. When Configuring the WhatsApp Business Connector, on the Converse Settings tab, please ensure that User Access has been granted to all relevant users. Once this is checked, Save the configuration, and try sending a message to the lead.
- No Template Found
This error is thrown when WhatsApp Templates are not enabled for Converse. To fix this, navigate to the Add/Modify Templates screen, and enable the checkbox  alongside Available in Converse. Once you save the template, try messaging your lead. This should fix the error.
- Unable to receive inbound messages
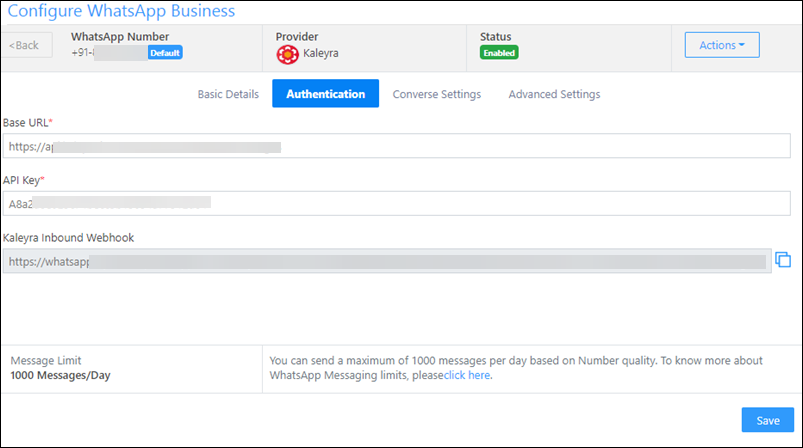
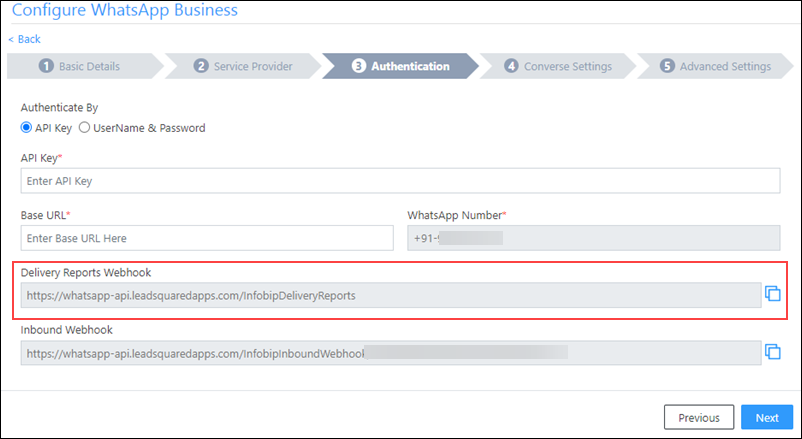
In this instance, you won’t receive any incoming messages (and no error denoting this is displayed). This issue is caused because your WhatsApp connector’s Inbound Webhook is incorrectly configured in your service provider’s account, or incorrect account credentials (present under Authenticate By) are entered on the Configure WhatsApp Business pop-up in LeadSquared, under the Authentication tab. Once you’ve rectified this, try messaging your lead. This should fix the error.
- Unable to receive delivery reports
If you’re unable to view the Delivery Reports under WhatsApp Reports, it might be because the Delivery Reports Webhook was not configured correctly in your service provider’s account. Once you’ve rectified this, try messaging your lead. This should fix the error.
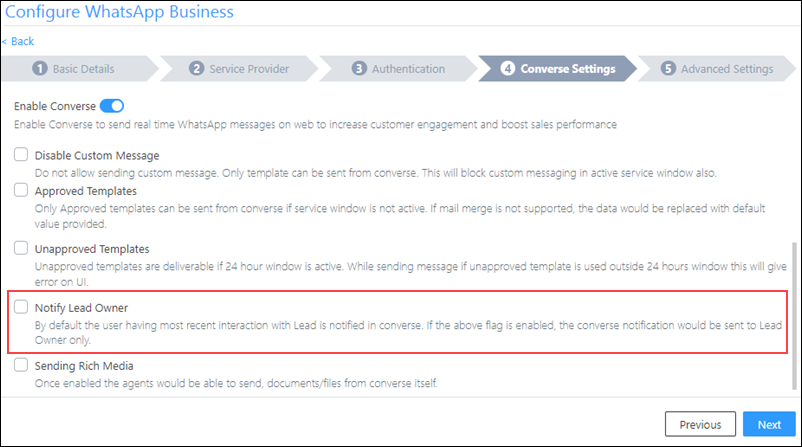
- Notifications not received/Messages not shown in real time until I refresh
Message notifications are only sent to one user, i.e., either the Lead Owner or to the user (other than the Lead Owner) that sent the WhatsApp message to the lead. When the Notify Lead Owner setting is enabled, only the Lead Owner will get notified. When the Notify Lead Owner setting is disabled, the user who was the last one to send a message to the lead will get notified. Depending on which user should receive the notification, on the Configure WhatsApp Business pop-up, under the Converse tab, enable or disable the Notify Lead Owner setting.
- Chat not shown in Recent Contacts
Chats are shown in under Recent Contacts only if you send or receive a message. The list of Recent Contacts is user-specific (and not account specific).
15. Keyboard Shortcuts
Maximize/minimize the Converse chat window –
- On Windows, use alt + m
- On Mac, use option + m
FAQs
1. What is a Customer Service Window?
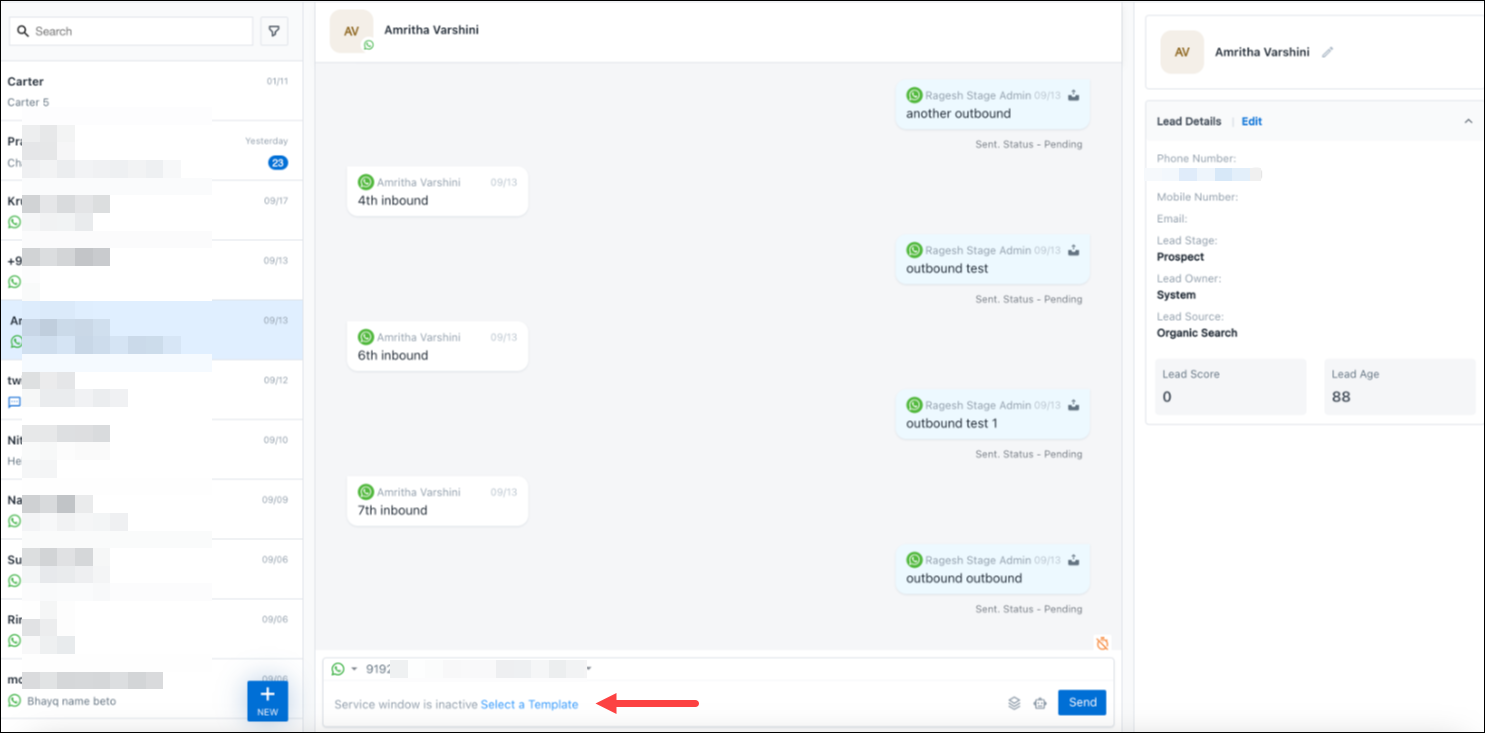
WhatsApp provides a 24-hour customer service window during which you can exchange any number of free-flowing messages with the customer. This 24-hour window is calculated from the time your customer/lead last messaged you. Beyond the 24 hours, you can only send template messages pre-approved by WhatsApp to the customer/lead.
Note: The 24-hour window will open up again for another 24 hours ONLY once the customer responds to you – this is WhatsApp’s policy and LeadSquared has no control over it.
2. How do you send the template message to your customer if the Customer Service Window expires?
Click on the Select a Template button below the message box.
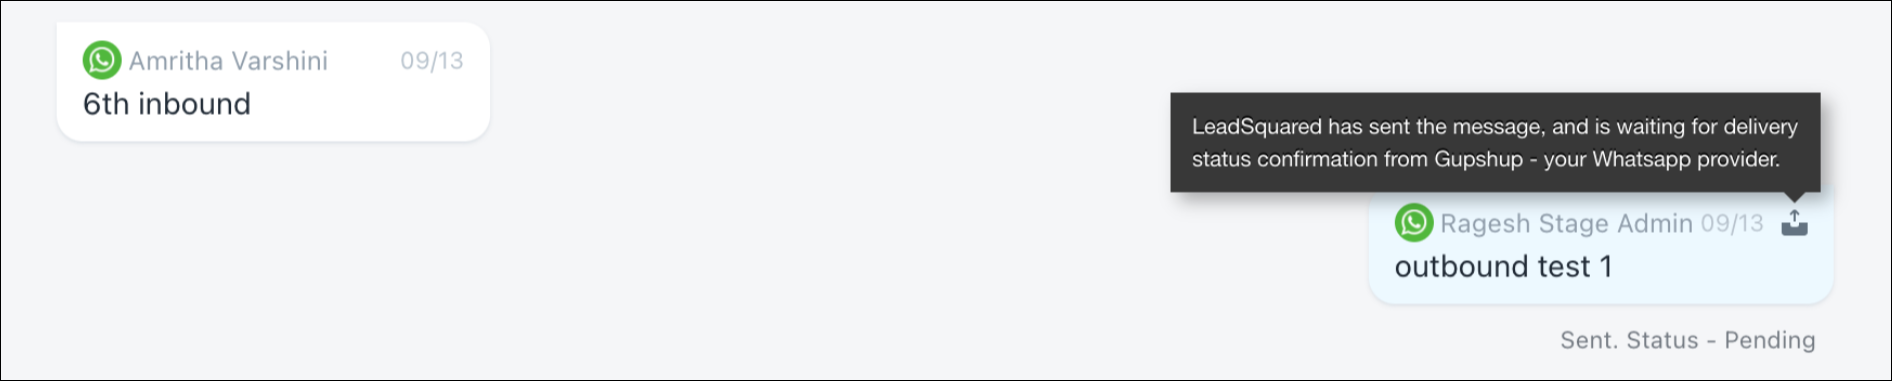
3. Why does my message still show ‘Sent, Status Pending’?
LeadSquared uses the WhatsApp business provider chosen by your organization to send your messages. ‘Sent, Status Pending‘ means LeadSquared has sent the message, and is waiting for your provider to confirm the delivery status confirmation.
4. What is a Conversation?
A conversation is defined as any number of messages exchanged within a 24-hour window between business agent and lead/customer. This means that all messages exchanged within this timeframe will count as a single conversation, regardless of the number of messages sent or received.
5. What is counted as a Conversation for billing?
Any conversation started by the agent in Converse or started by lead/customer is counted as a conversation.
In case a conversation is initiated by the business through a bulk marketing campaign/ automation then once the lead replies to this then only we will count it as a conversation.
6. Why is the Lead Owner not receiving Converse chat notifications?
If a lead sends a new message but the current Lead Owner is not receiving a notification, it’s likely because the previous user (agent or owner) did not end the chat.
- How Converse notifications work:
- Only one user at a time receives chat notifications — the last user who handled the chat. If the Lead Owner changes, the new owner will not start receiving messages until the previous user ends the chat.
- To fix this:
- Ask the previous agent/owner/admin to click the “End Chat” button in the Converse window.
- Once the chat is ended, the new Lead Owner will start receiving notifications.
- Repeat this step every time the Lead Owner changes, to ensure chat notifications are routed correctly.
Any Questions?
Did you find this article helpful? Please let us know any feedback you may have in the comments section below. We’d love to hear from you and help you out!

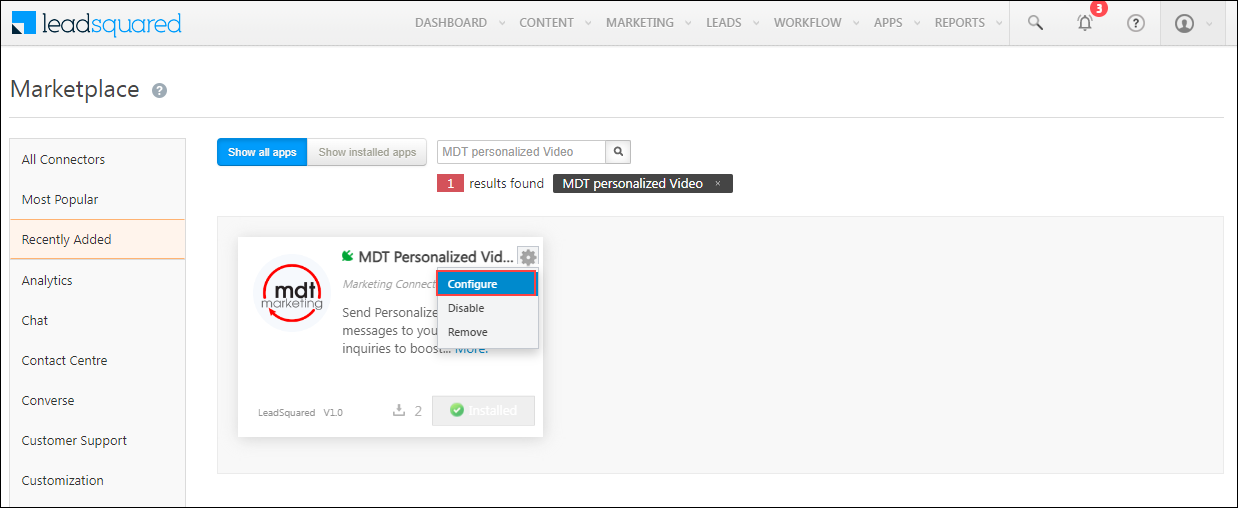
 , and click Configure.


 slider.
 .
. .
. .
.

 .
.