Telephony FAQs & Troubleshooting
1. Feature Overview
This article will help you troubleshoot issues relating to the LeadSquared Telephony feature.
2. Prerequisites
- You must be an Administrator user to access connector configurations and settings.
- Some technical experience is required to understand the format of the data and configure the connector with your telephony provider.
- The table below outlines the distinction between APIs/URLs provided by LeadSquared and those provided by your telephony provider. LeadSquared’s APIs/URLs are accessible through the UTC configuration page, while your telephony provider’s APIs must be obtained directly from them. If you encounter any issues with an API, please get in touch with the respective API owner.
| LeadSquared APIs | Telephony Provider APIs |
| Call Route API (Lead/Opportunity routing) –
The Call Route API directs incoming calls from existing leads to the corresponding Lead or Opportunity owner in your LeadSquared account. Note: LeadSquared does not automatically route calls to owners. Instead, it provides the Lead/Opportunity Owner details to your telephony provider, who then routes the call accordingly
|
Click2Call API – The Click2Call feature allows your sales reps or agents to initiate outbound calls by simply clicking on a lead’s phone number in the Manage Leads or Lead Details pages |
| Agent Popup API – This API logs all inbound and outbound calls made through your telephony account into LeadSquared, ensuring comprehensive call tracking. | Agent Panel URL – Agent Panel URL allows you to embed your provider’s Softphone into LeadSquared. |
| Call Log API – All inbound and outbound calls made through your Telephony account can be logged in LeadSquared by setting up Call Logs | Call Disposition – Call disposition allows users to record specific information related to a phone call once it ends. |
| Single Sign–On API – This API enables embedding LeadSquared within your telephony provider’s portal. |
3. General Telephony Issues
1. Are API rate limits applicable to telephony/UTC?
The V2 API rate limits do not apply to telephony/UTC APIs. However, since telephony is a shared infrastructure between multiple accounts: in case of an extremely high number of concurrent requests, there is a possibility of throttling the requests via rate limiting, please contact support@leadsquared.com for details.
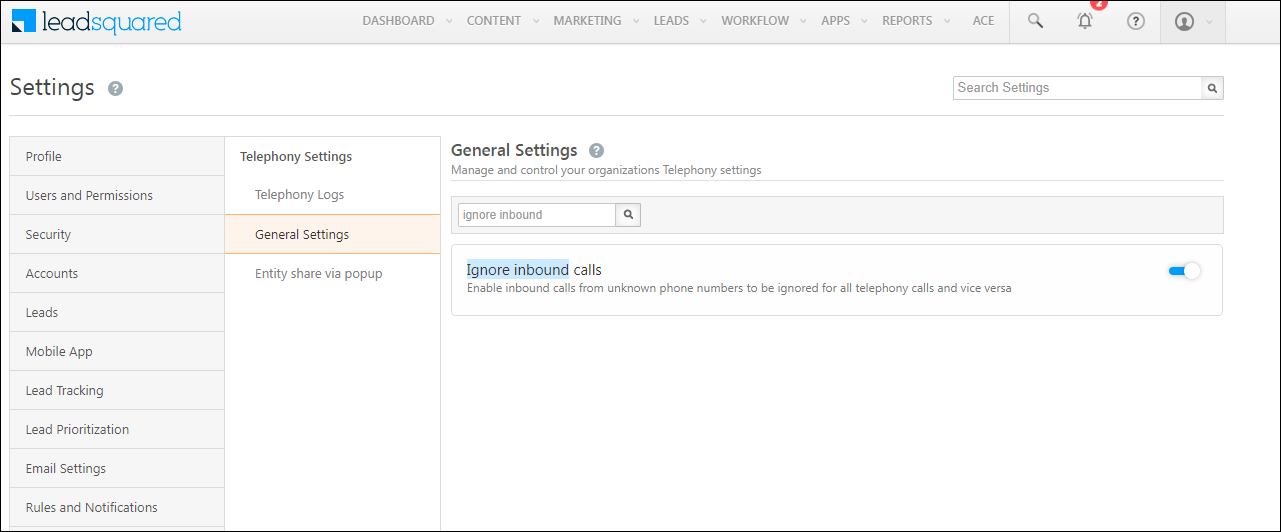
2. Can I restrict leads from being created on inbound calls from unknown numbers?
Yes. Navigate to Settings>Telephony>Telephony Settings>General Settings and enable Ignore inbound calls.
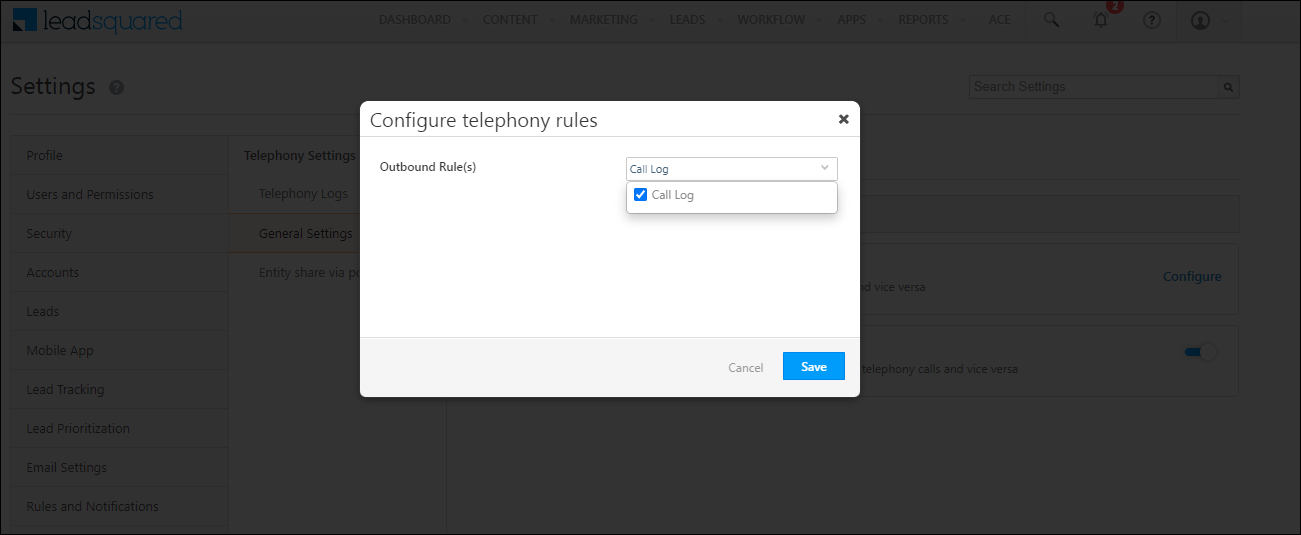
3. Can I restrict leads from getting created on outbound calls to non-existing numbers?
Yes. Navigate to Settings>Telephony>Telephony Settings>General Settings and search for Configure telephony ignore rules. Click on Configure and select Call Log under the Outbound Rule(s) dropdown. Once done, click Save.
4. Why is the Opportunity Route API returning an empty response?
It could be due to one or more of the following reasons –
- Make sure Opportunity is enabled on your account.
- Check if the Opportunity owner is System – in this case, no phone number will be returned.
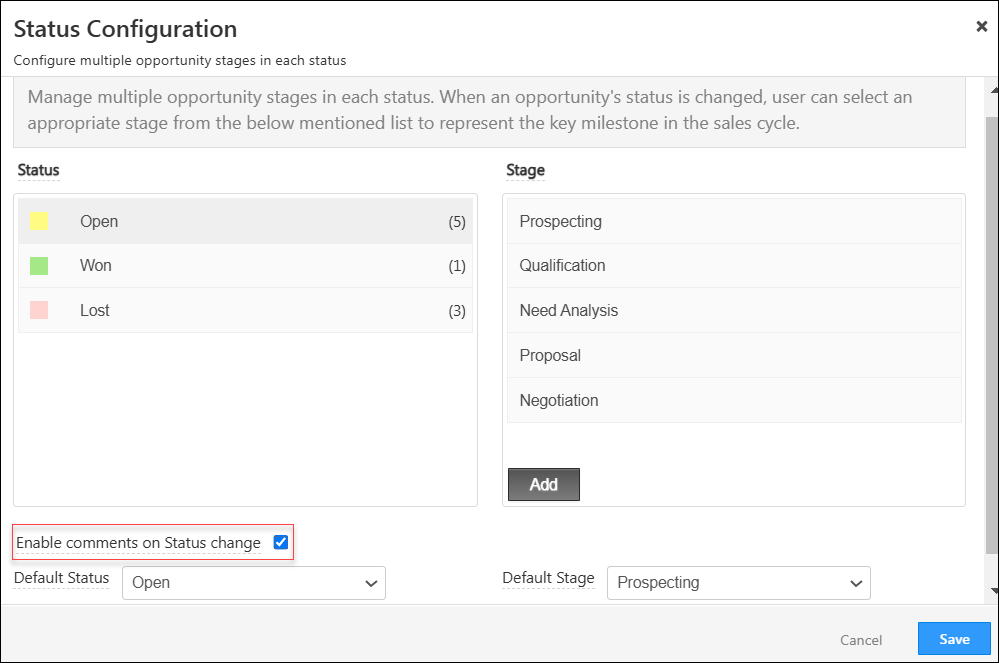
- Opportunity Route works only on Open Opportunities; if the status is Won or Closed, you will receive an empty response.
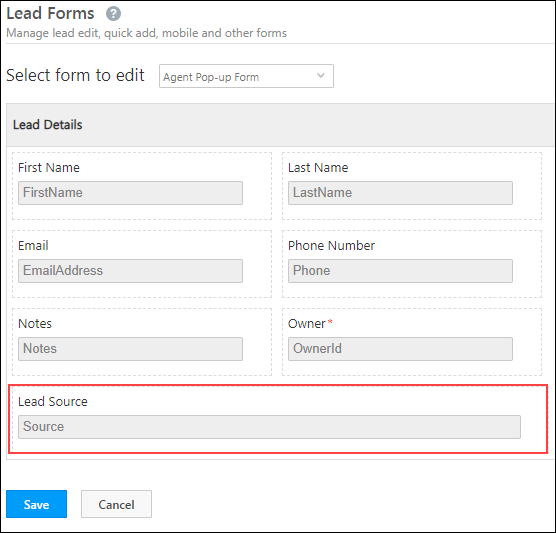
5. Why is the lead source for an inbound call not being reflected?
Verify the entity modifying the lead source: If it is the Agent Pop-up, make sure the Lead Source field is part of the Agent Pop-up Form.
6. Why is my telephony provider not receiving traffic from LeadSquared?
This can happen if the provider has restrictions on incoming traffic in their firewall. The provider must whitelist LeadSquared IPs. Reach out to support@leadsquared.com for the list of IPs.
7. How to enable Opportunities for Telephony?
- To enable Opportunities in your account, please reach out to your account manager, or write to support@leadsquared.com.
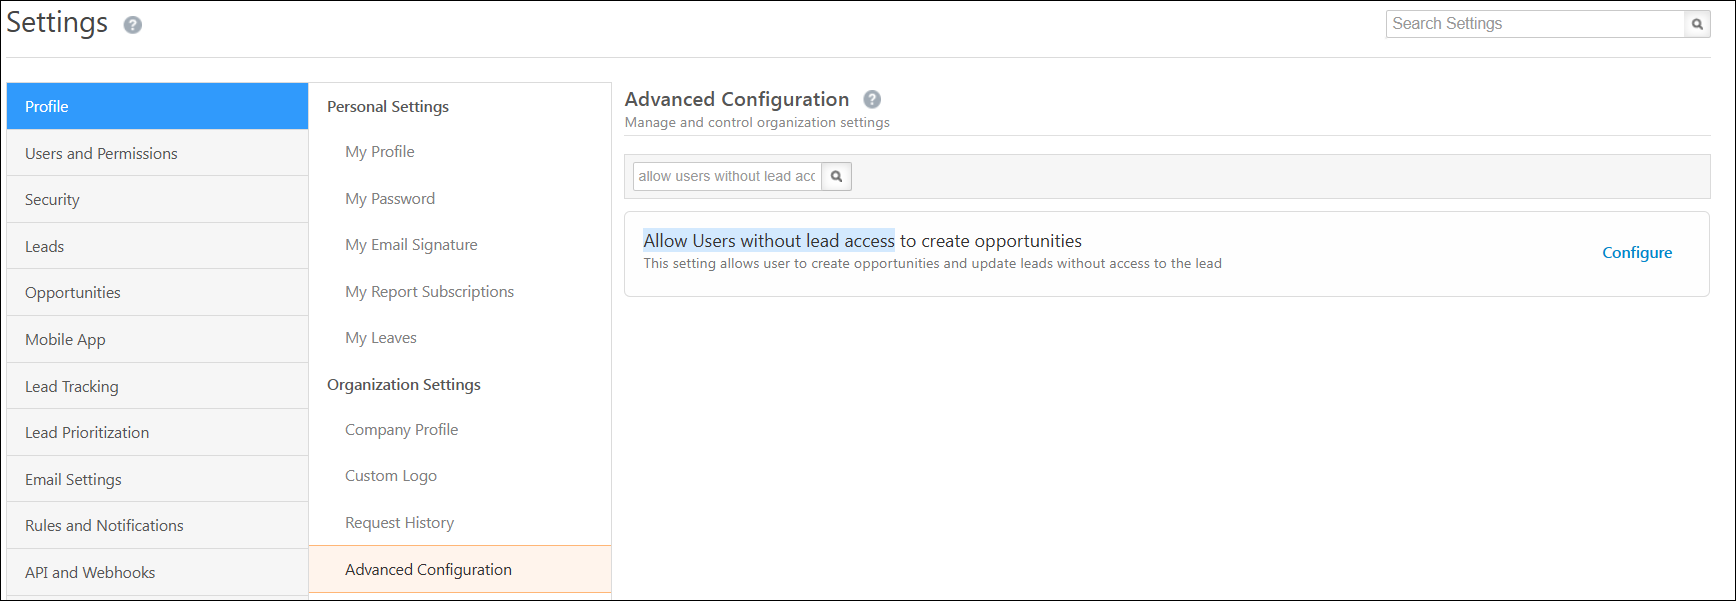
- From the Advanced Configuration settings page, the Enable Opportunity – Telephony setting must be enabled. To know more, please refer to Organization Settings – Advanced Configuration.
For more information, read the article Opportunity Integration in Telephony.
8. In the case of inbound and outbound calls, which number is the lead’s and agent’s?
- Inbound Calls – The Source Number is the lead’s number and the Destination Number is the agent’s number.
- Outbound Calls – The Source Number is the agent’s number and the Destination Number is the lead’s number.
9. What should I do if I experience call drops during a session?
Call drops are typically caused by issues on the telephony provider’s end. Please contact your provider’s support team for more help in resolving the issue.
10. How can I improve call quality during my calls?
Call quality issues are often related to your telephony provider. We recommend contacting your provider’s support team to investigate and address the problem.
11. Why is a Lead First Assigned to “System” and Then Reassigned After a Call? Why is my lead assigned to “System” when captured through a missed inbound call?
When a lead is created via a missed inbound call, it is initially assigned to System because no user was available to answer the call at that moment. The system automatically reassigns the lead to the respective activity owner after a successful inbound or outbound call. This ensures the lead is assigned to the user who last interacted with them.
Also, this is true for both inbound and outbound calls. Regardless of whether the lead calls in again or a user calls the lead, the ownership updates to reflect the latest interaction.
Example Scenario:
- A lead is captured in the system through a missed inbound call and assigned to System.
- The lead places another call, which is answered by User 1.
- The system automatically reassigns the lead to User 1 after the call.
This is the system’s default behavior and ensures leads are assigned to the correct user based on the most recent interaction.
4. Agent Popup
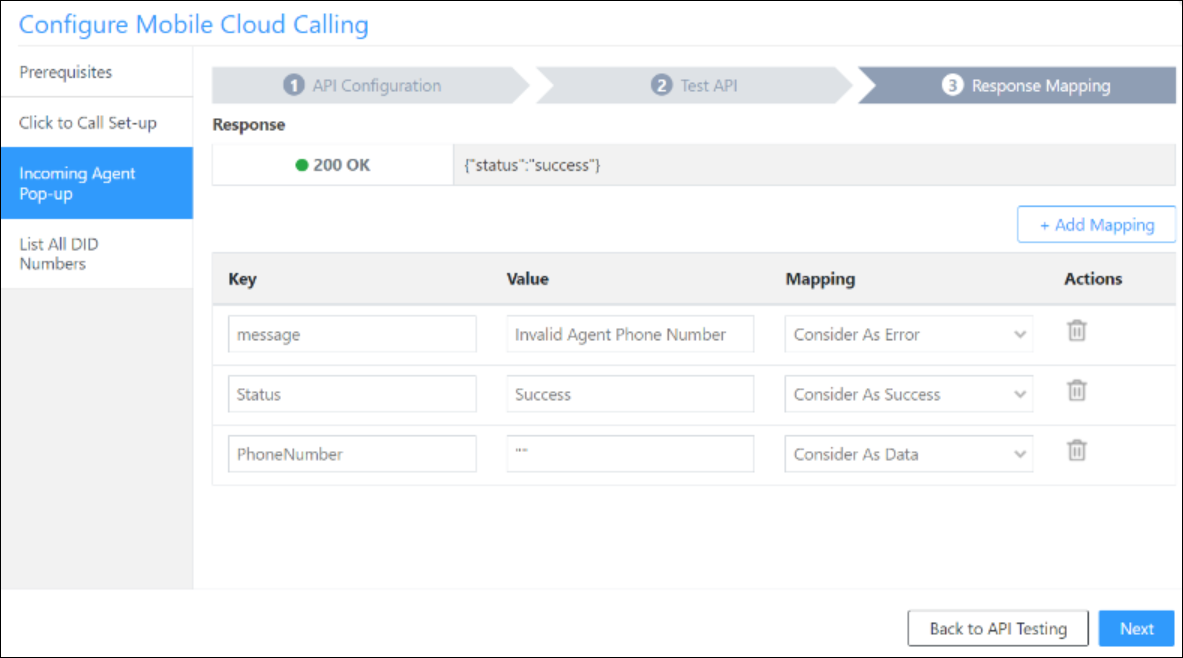
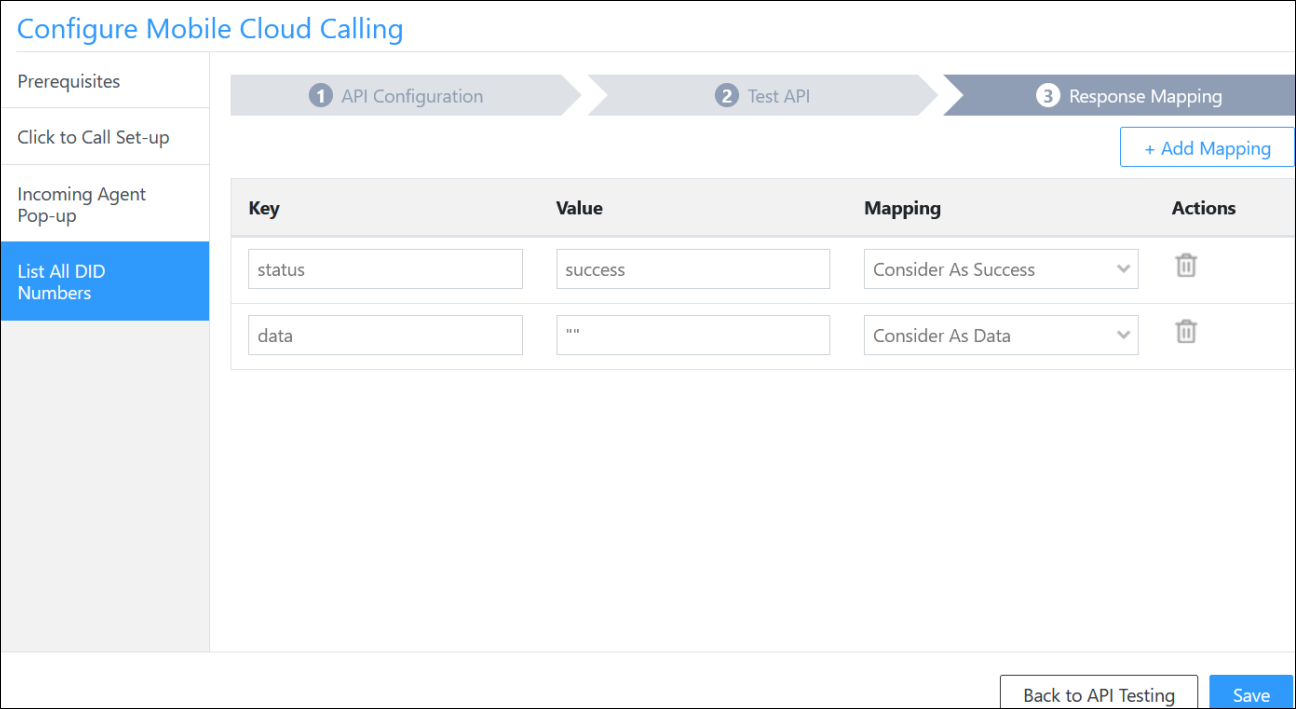
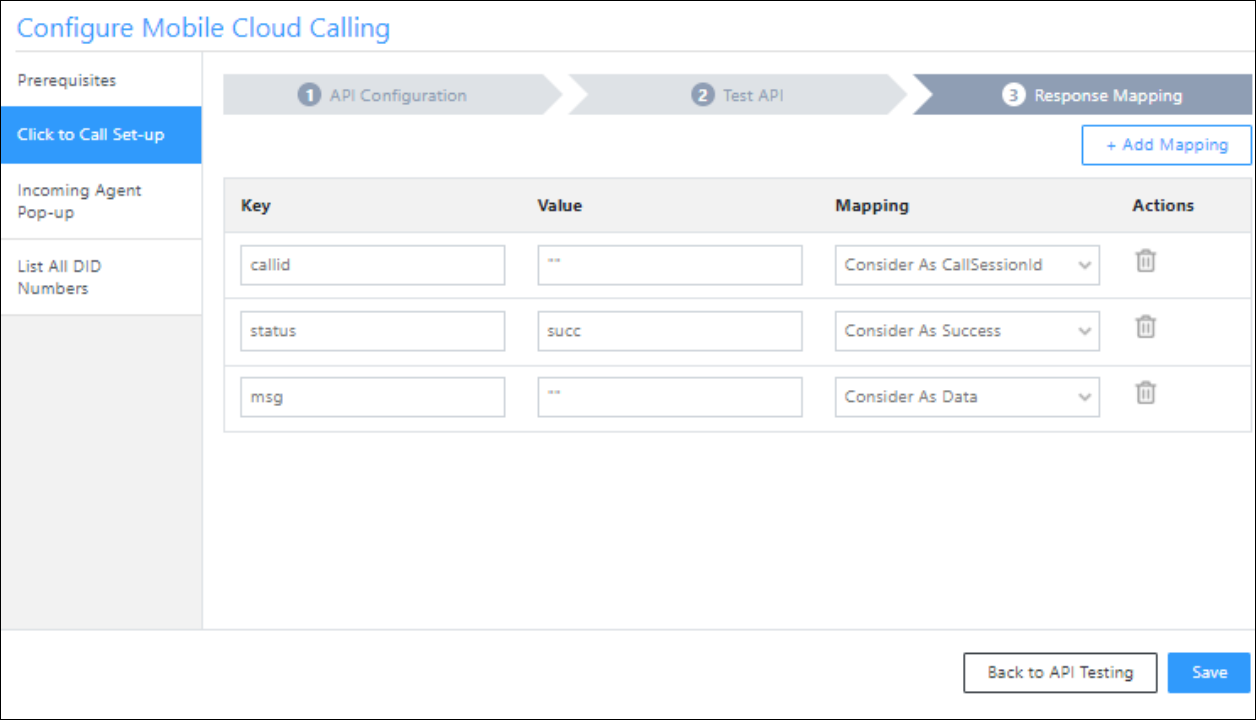
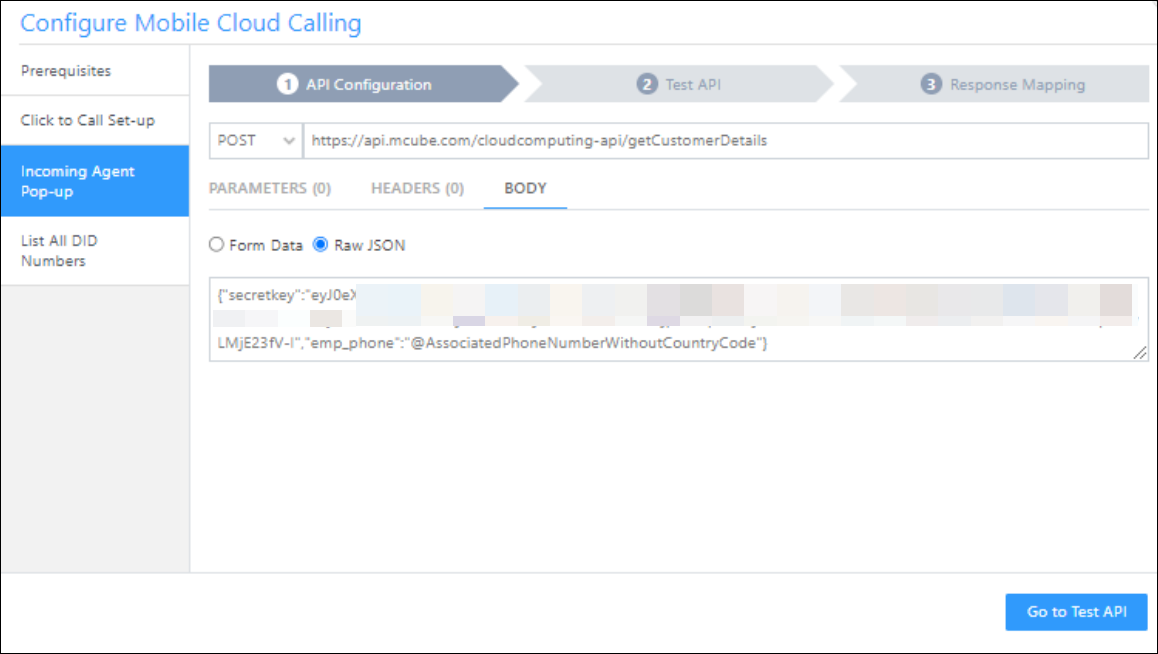
1. Why is the Agent Popup not displayed?
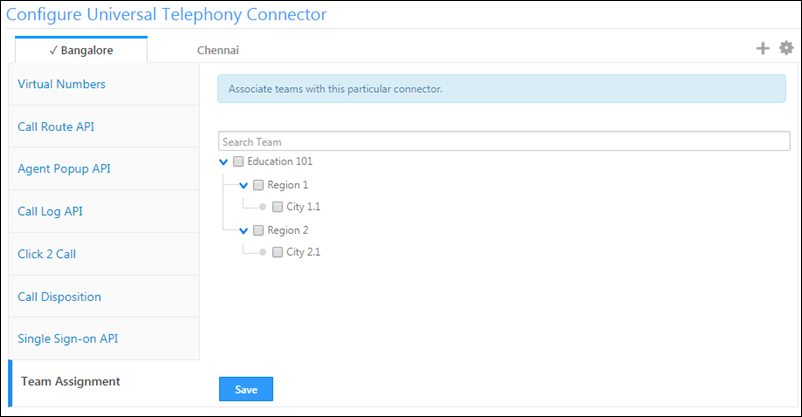
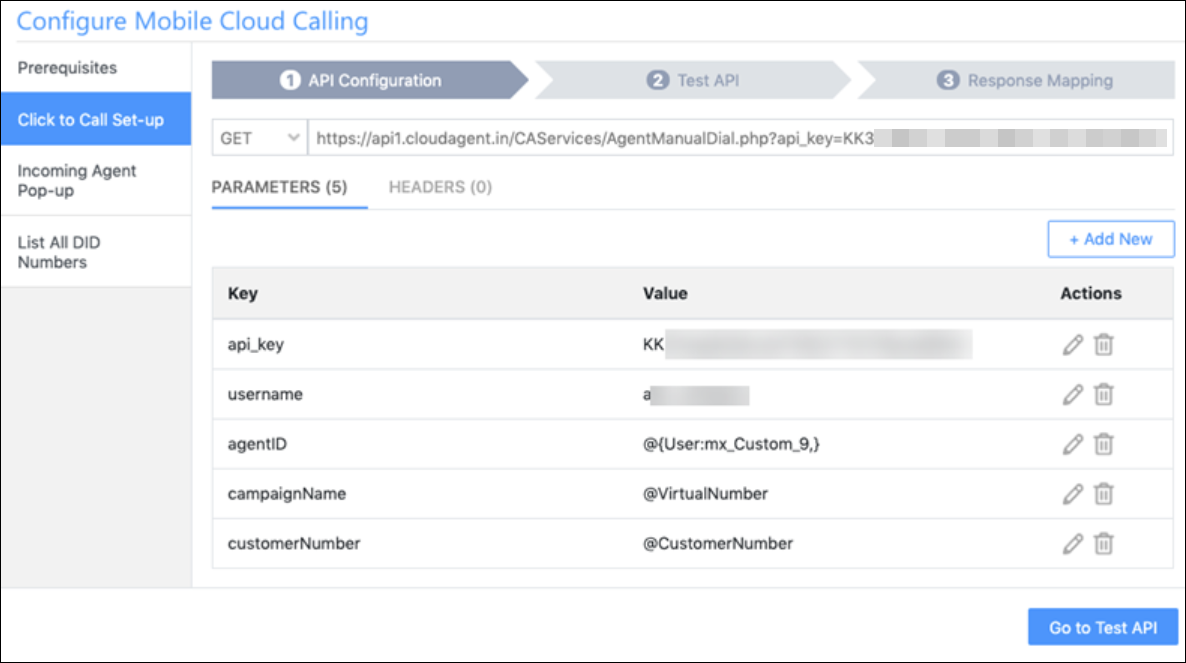
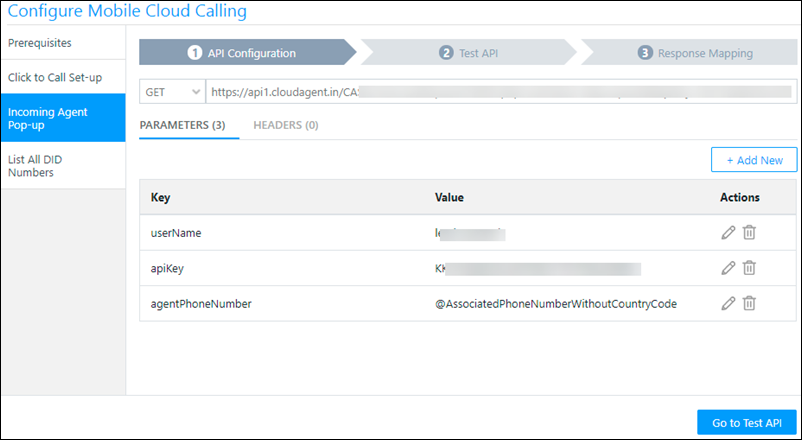
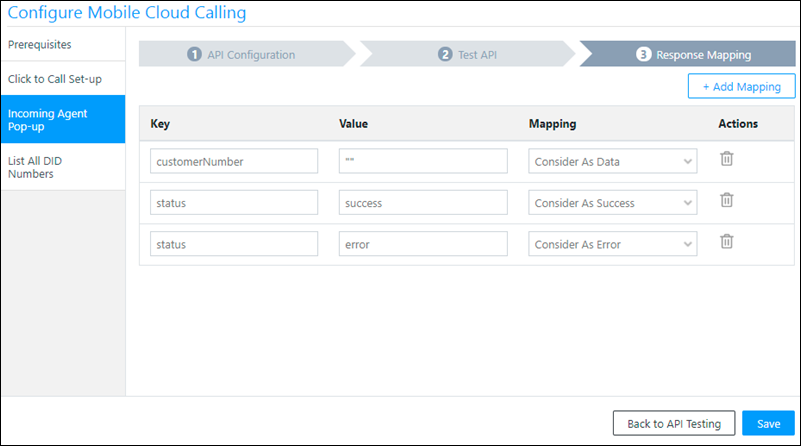
Verify Connector Configuration
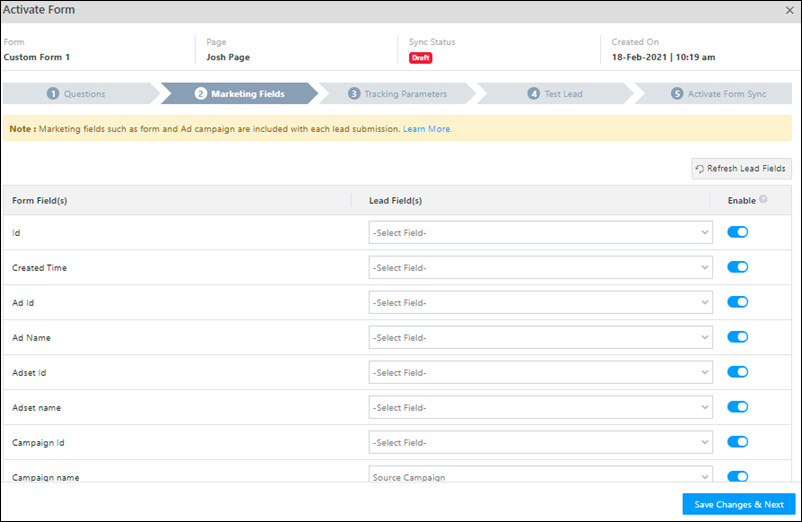
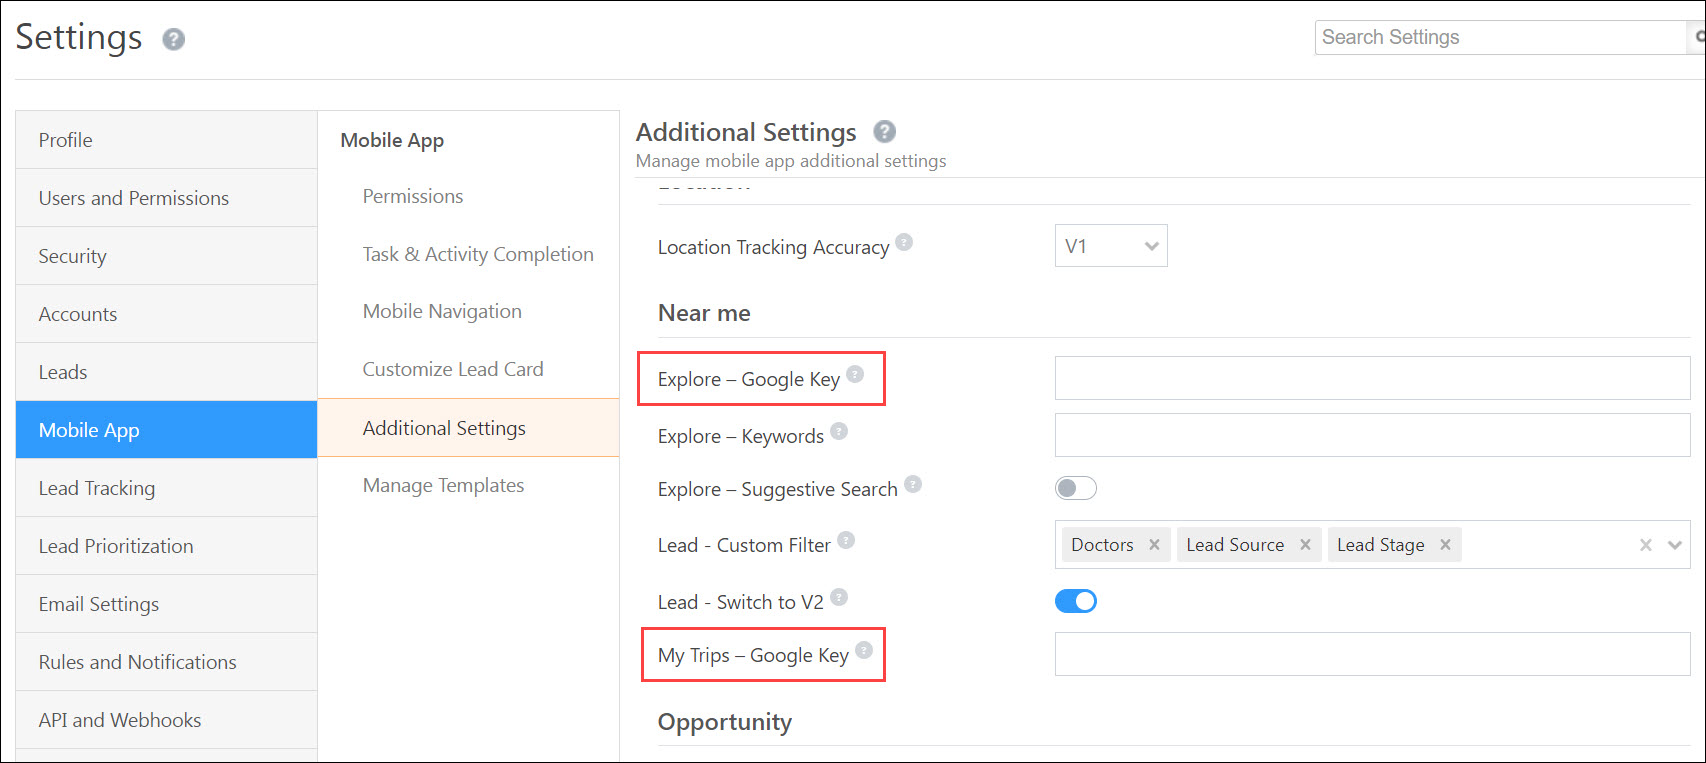
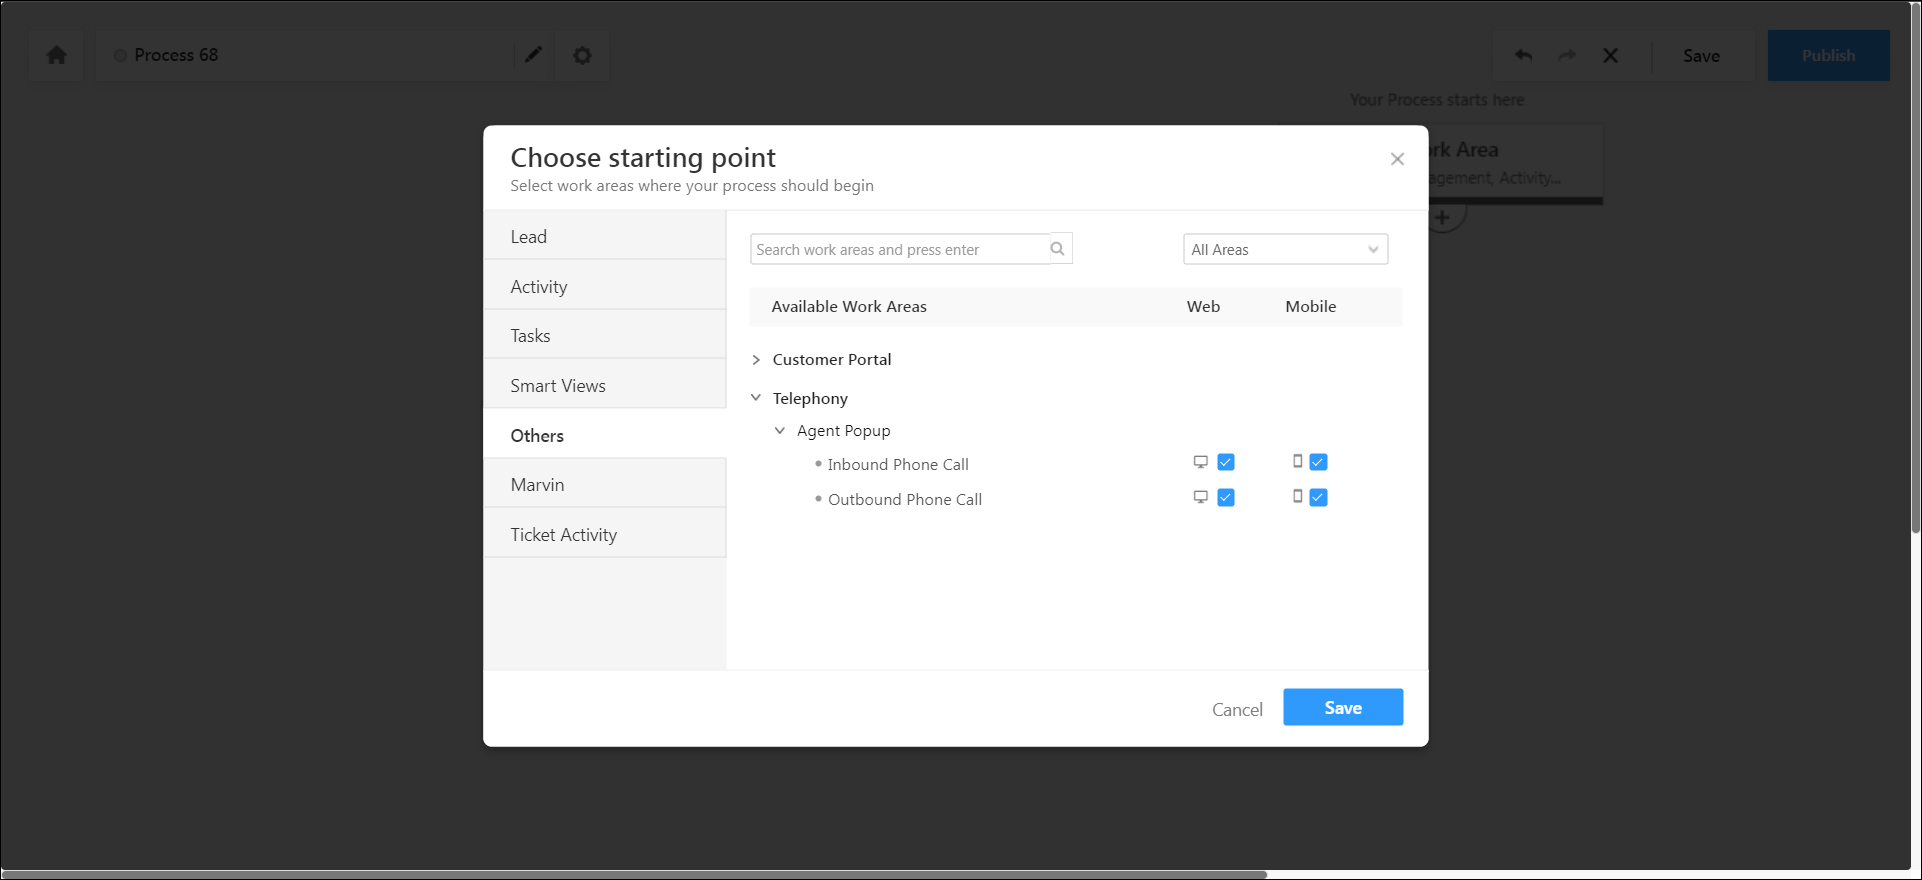
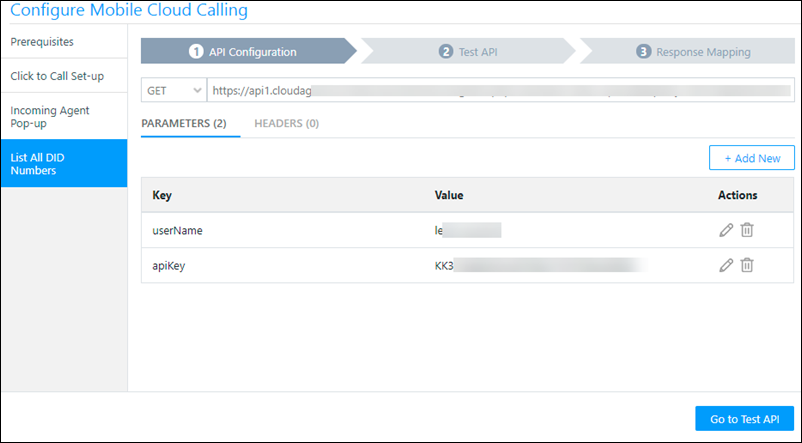
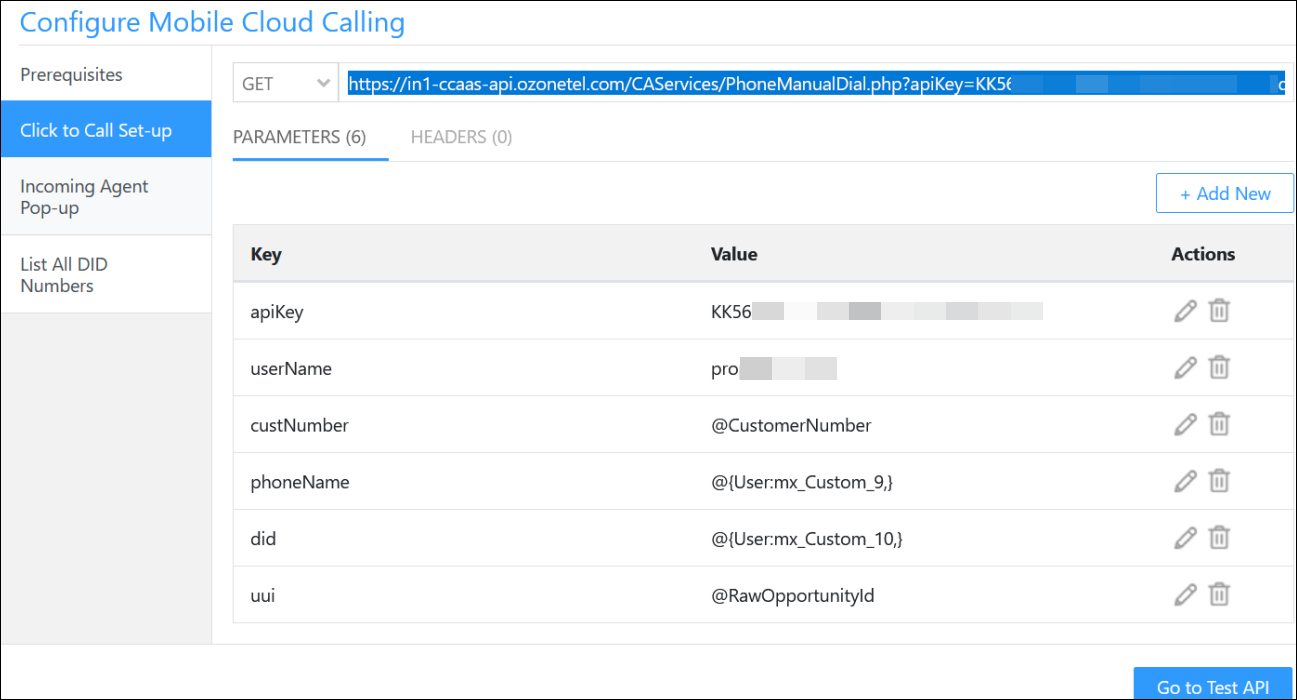
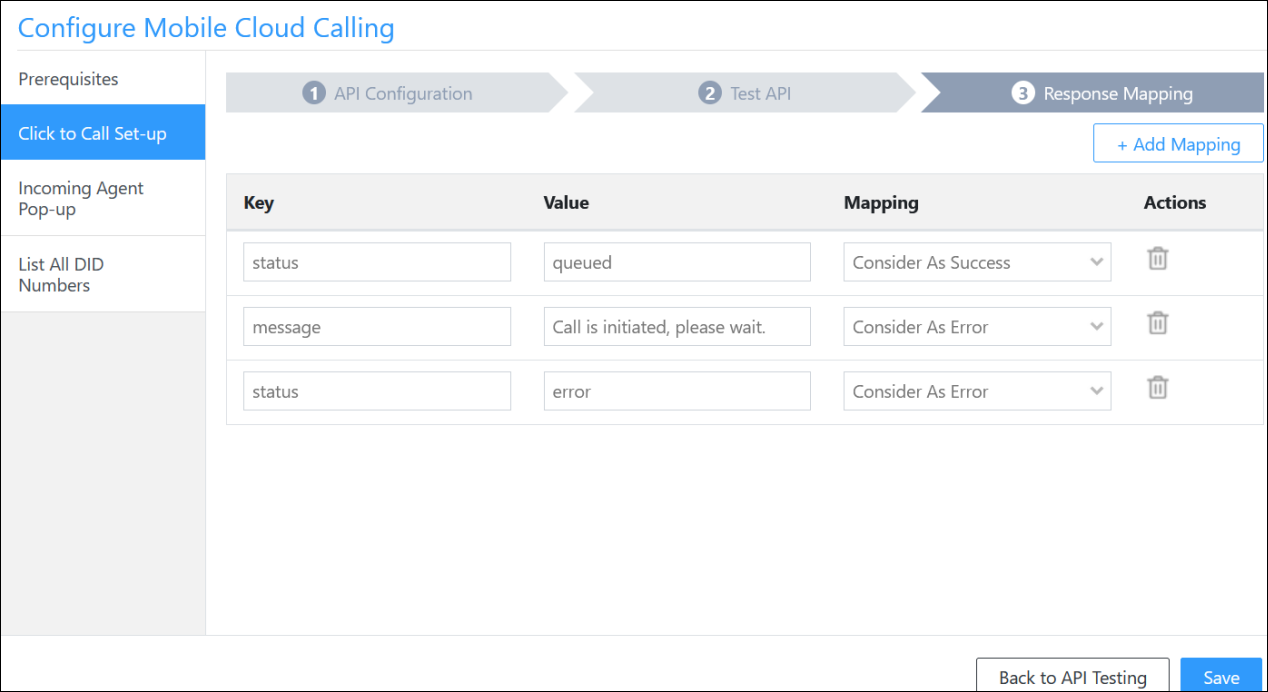
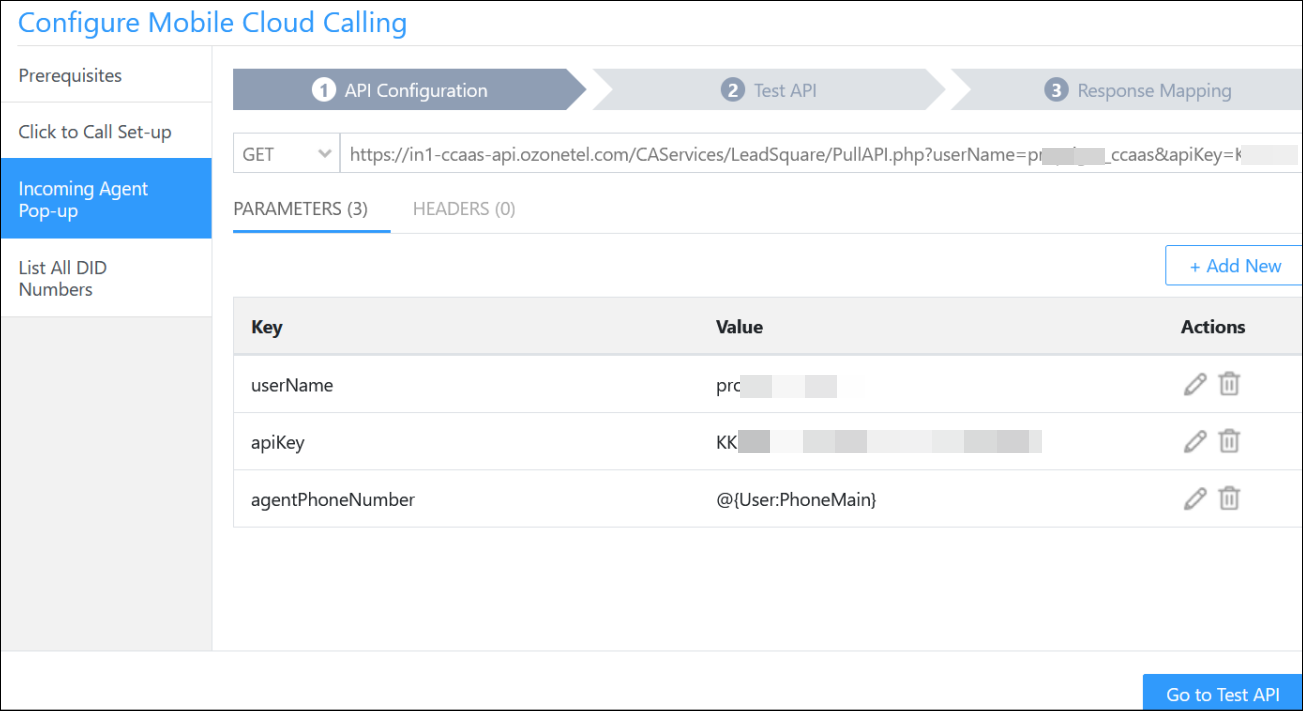
Ensure the Agent Popup is enabled on the connector configuration page. The settings may differ based on your telephony provider. Check that the Agent Pop-up API is correctly configured and activated. This example pertains to the Universal telephony connector –

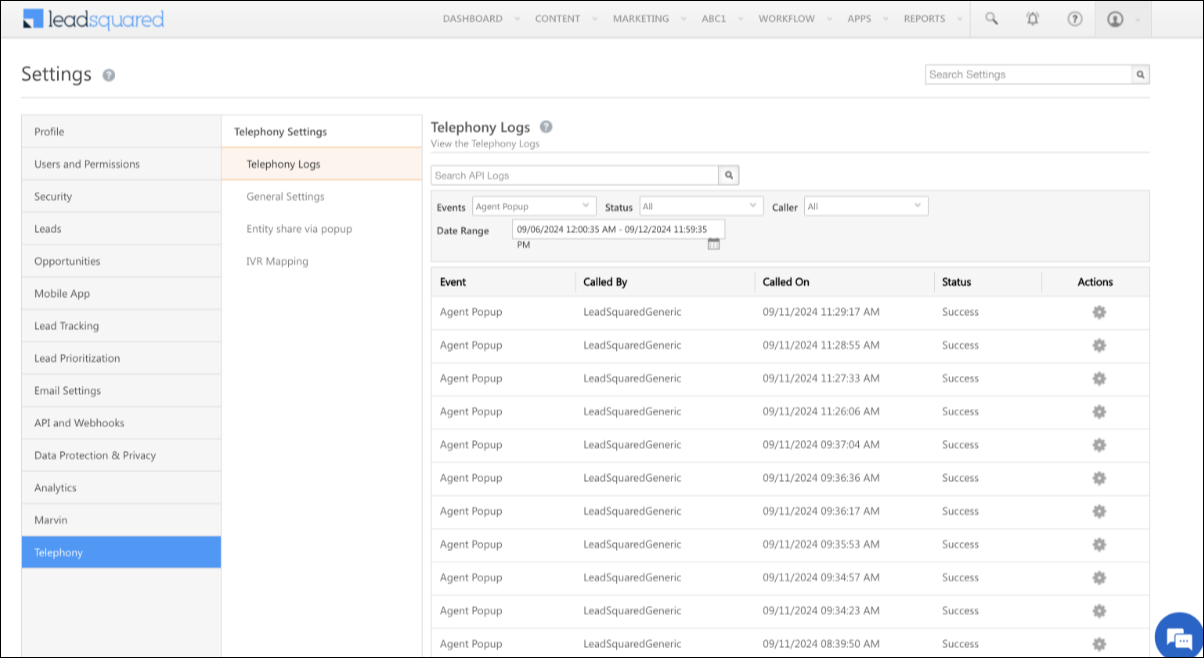
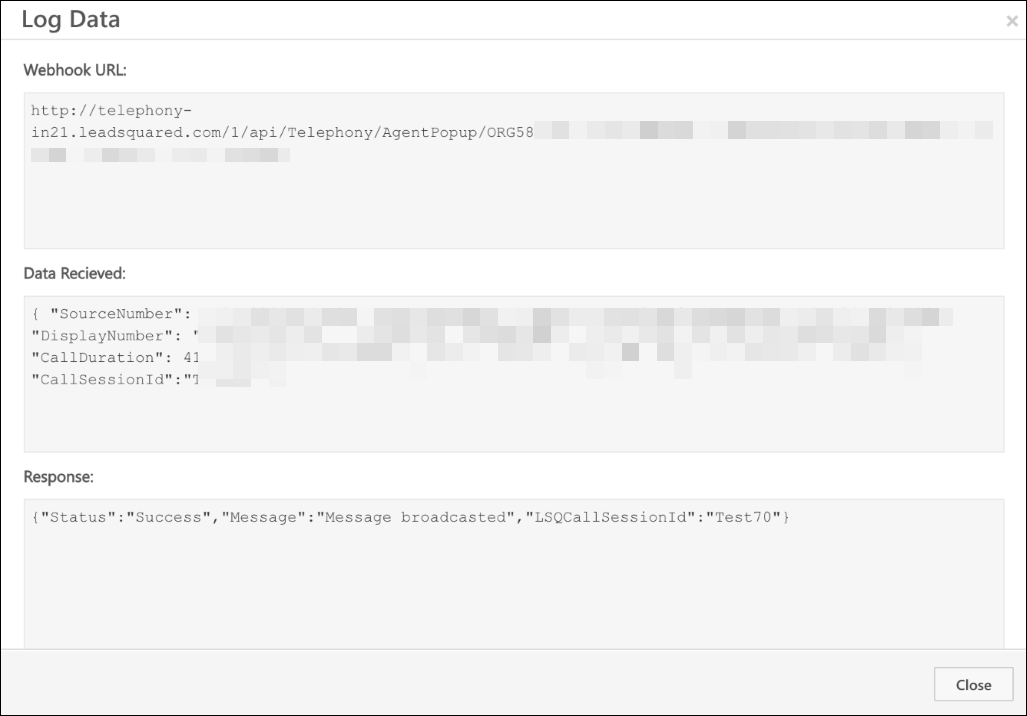
Check API Calls
Verify that your telephony provider is correctly calling the Agent Popup API. If the API is not being called, the popup will not appear. Navigate to Settings>Telephony>Telephony Logs to check the status.
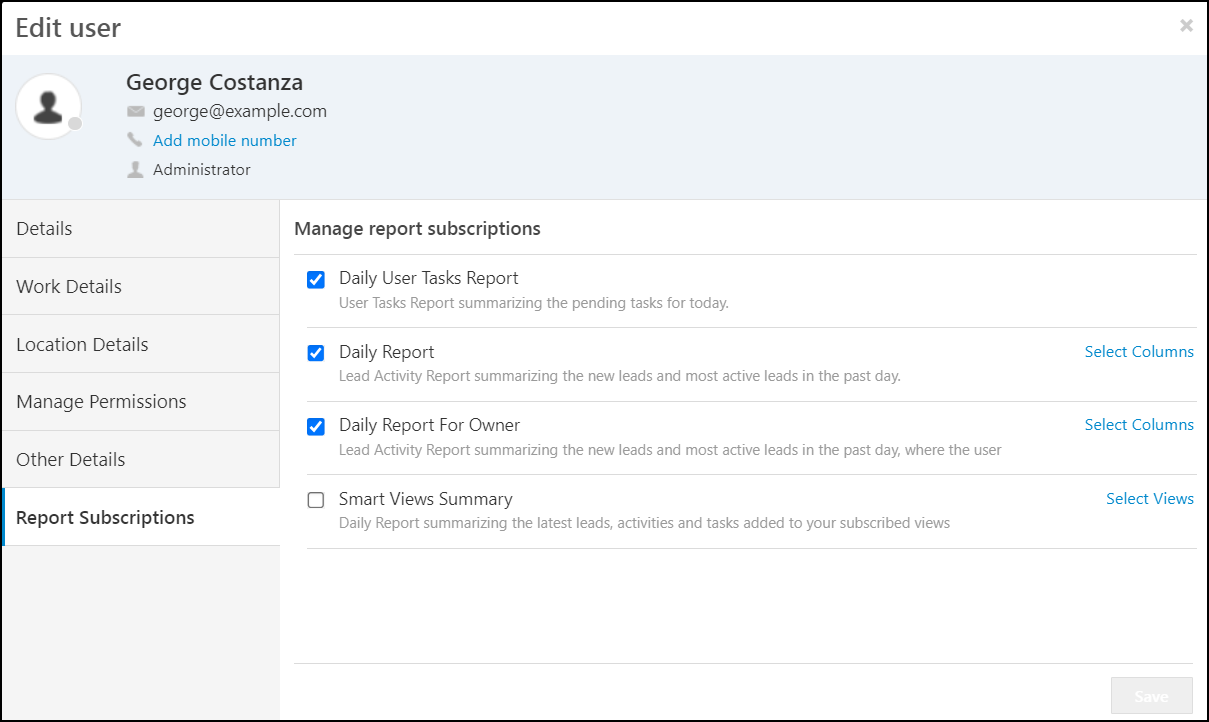
Check User Profile Settings
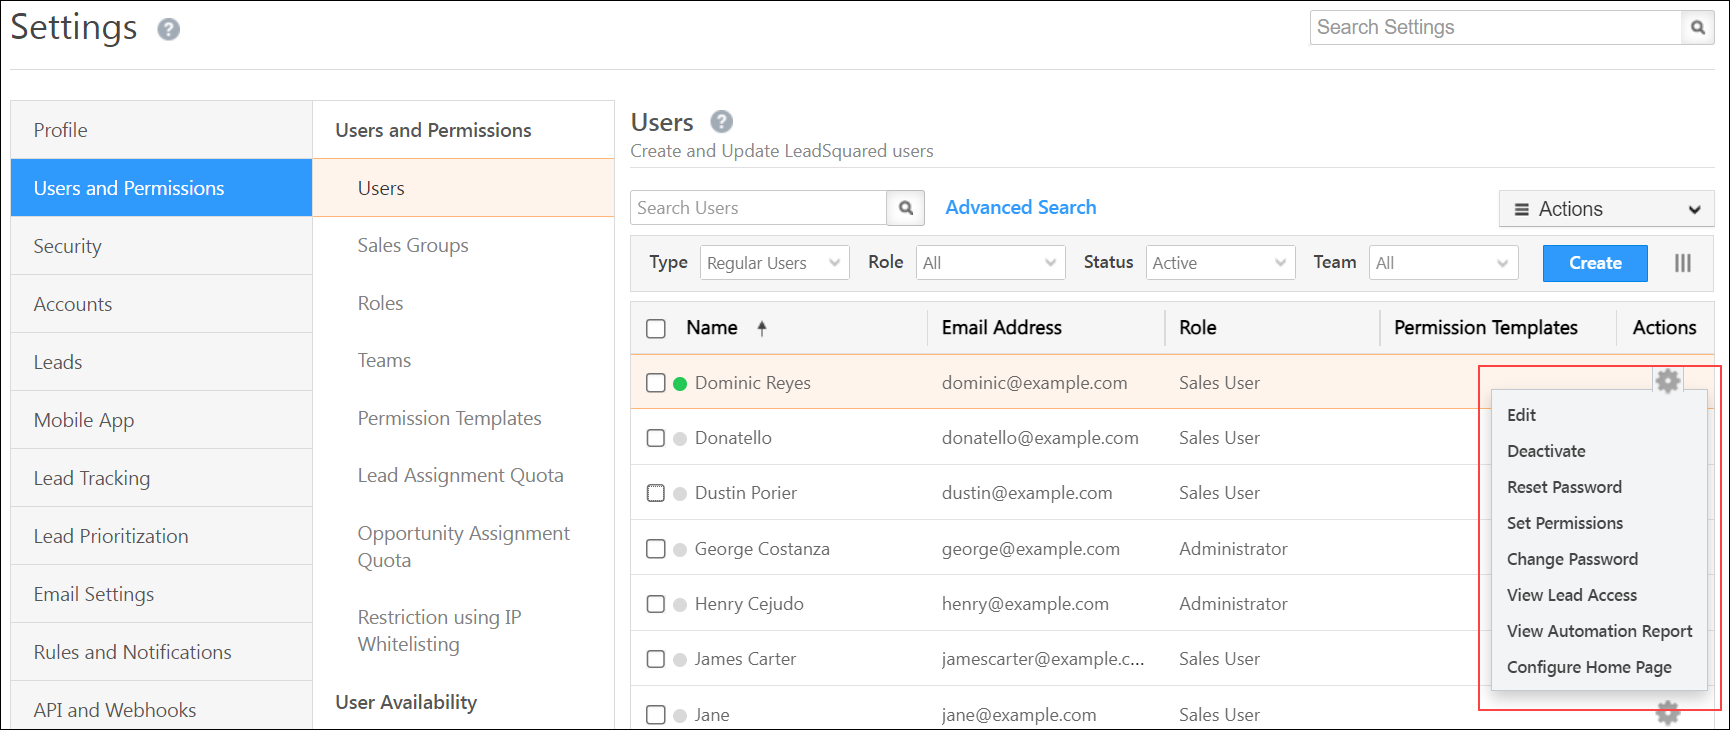
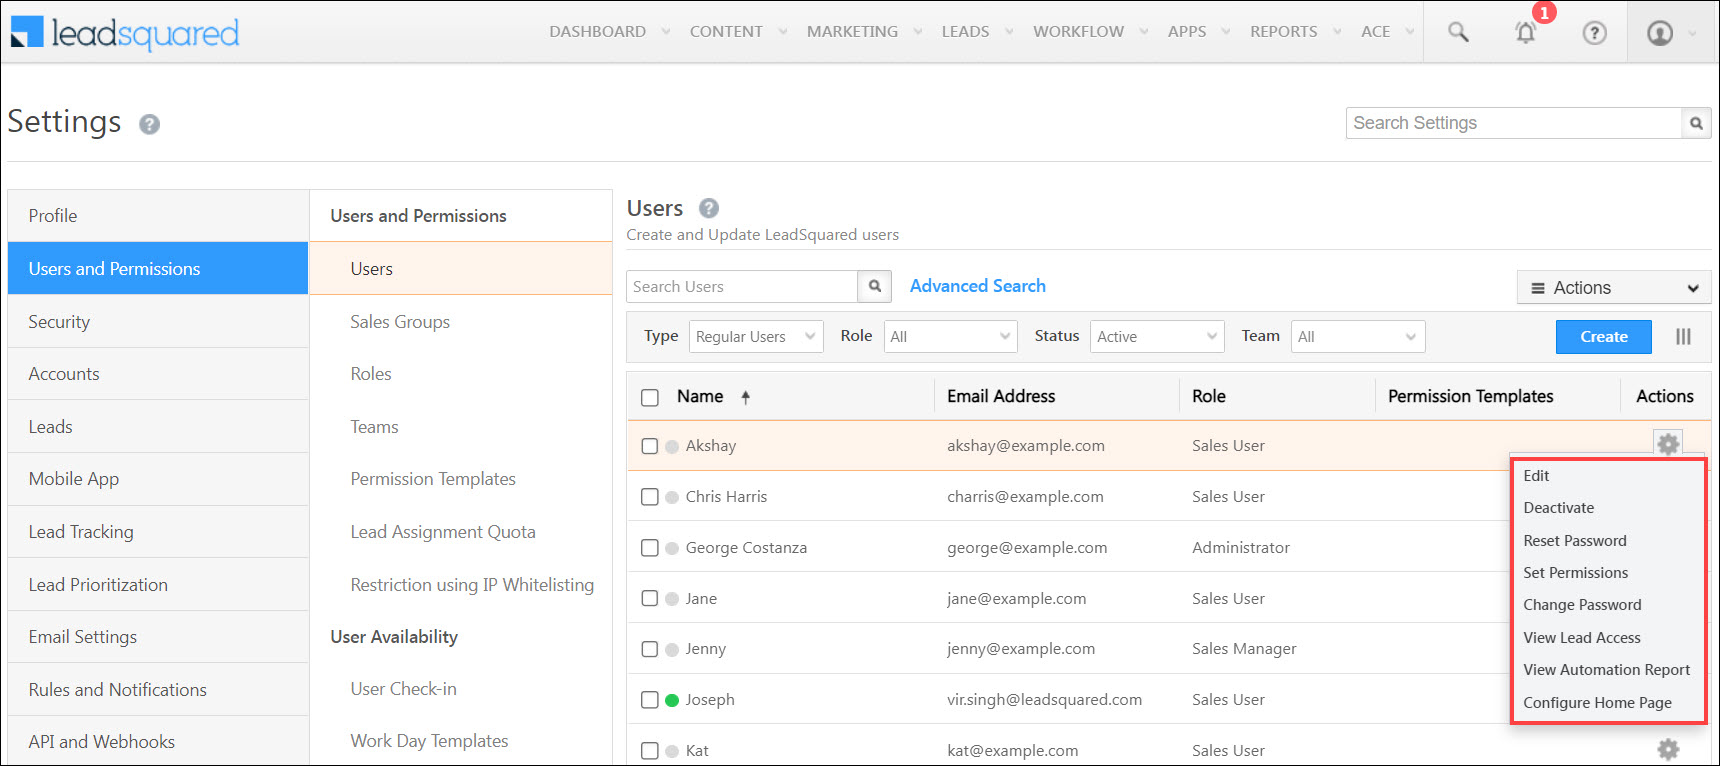
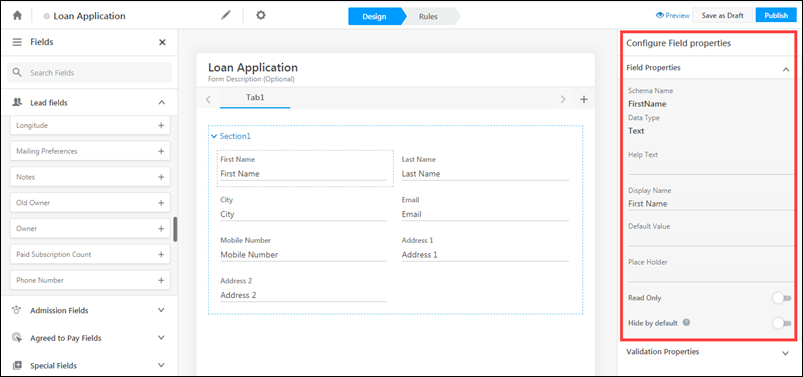
For admin users: Ensure that the Show Phone Call Popup setting is enabled in the user’s profile by navigating to My Profile>Manage Users.
For non-admin users: Ensure that the Show Phone Call Popup setting is enabled in the user’s profile by navigating to My Profile>Personal Details.

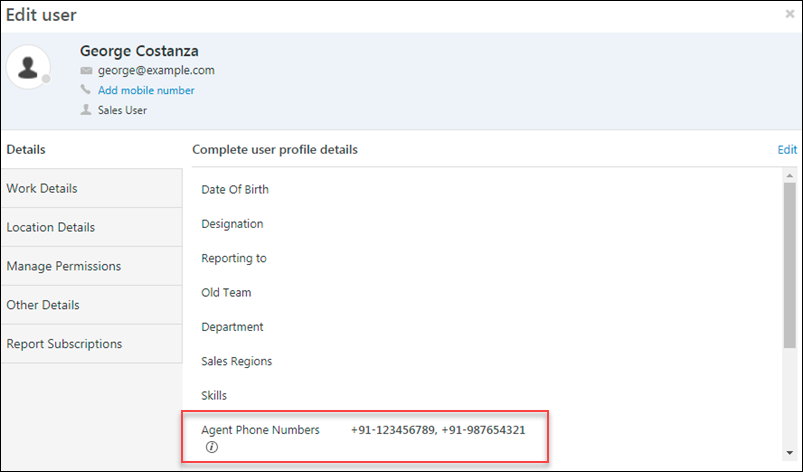
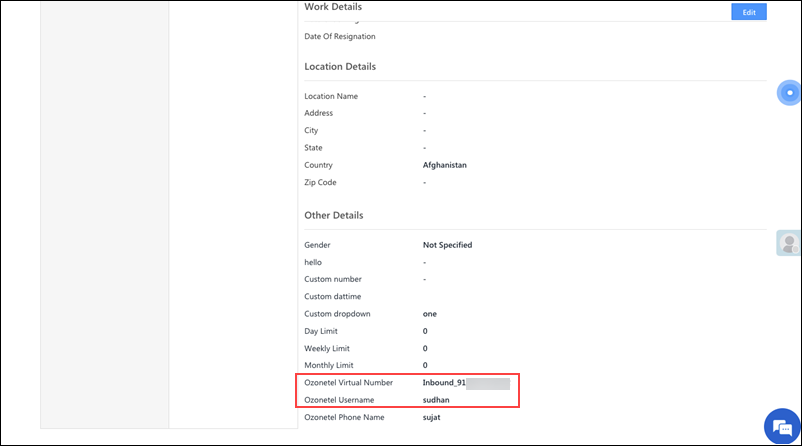
Verify Agent Phone Numbers
Confirm that agent phone numbers are correctly added to their profiles. If the agent’s phone number was changed recently, it could take some time for the cache to be updated, please report to support@leadsquared.com.
Verify Lead Phone Numbers
Check the format of the lead’s phone number to ensure it is correct. If country code is specified, it should be in the +CC-PhoneNumber format. If not using CC, send only the phone number in the request.
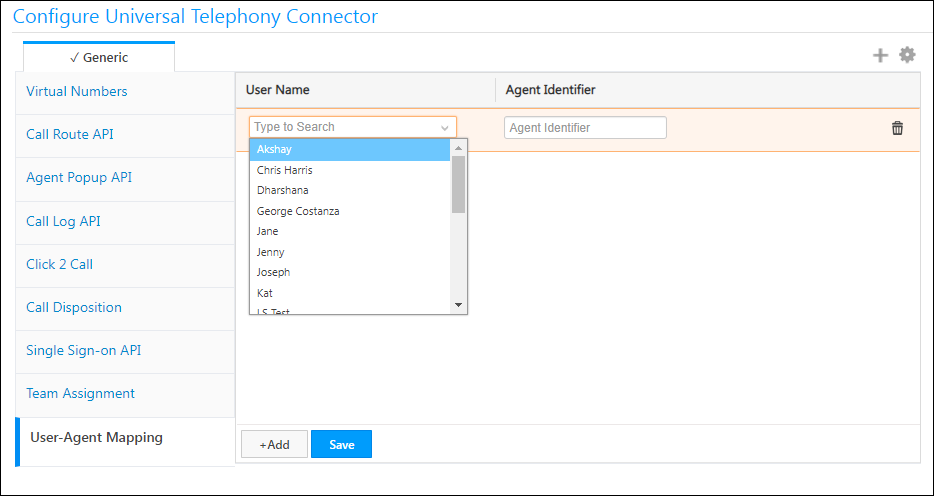
Verify User-Agent Mapping in UTC
Instead of the agent’s phone number, if the agent has to be identified via a unique identifier (email, extension, etc.), please configure user-agent mapping in the UTC connector for each agent. Verify that the value configured for the agent is being sent in the AgentId parameter in the agent popup API requests. This mapping helps identify the correct agent when the Agent’s Phone Number or Source Number is not stored in LeadSquared.
Ensure Dynamic Forms Configuration
Note that opportunity-level agent popup is supported only via Dynamic/Custom Forms. The default agent popup does not support opportunities. Make sure you have set up a Dynamic Form for Opportunity Telephony.
Web Socket Traffic Blocked
The Agent Popup might not be displayed if web socket traffic is blocked by your firewall. Please contact support@leadsquared.com for assistance.
Clear Browser Cache
This issue could also be due to a problem with the browser cache. Clearing the cache should resolve the problem.
If you have checked all possible issues and the Agent Popup is still not displayed, we have an Auto-Retry and Manual Retry mechanism for the Agent Popup. For more information, please reach out to our support team – support@leadsquared.com.
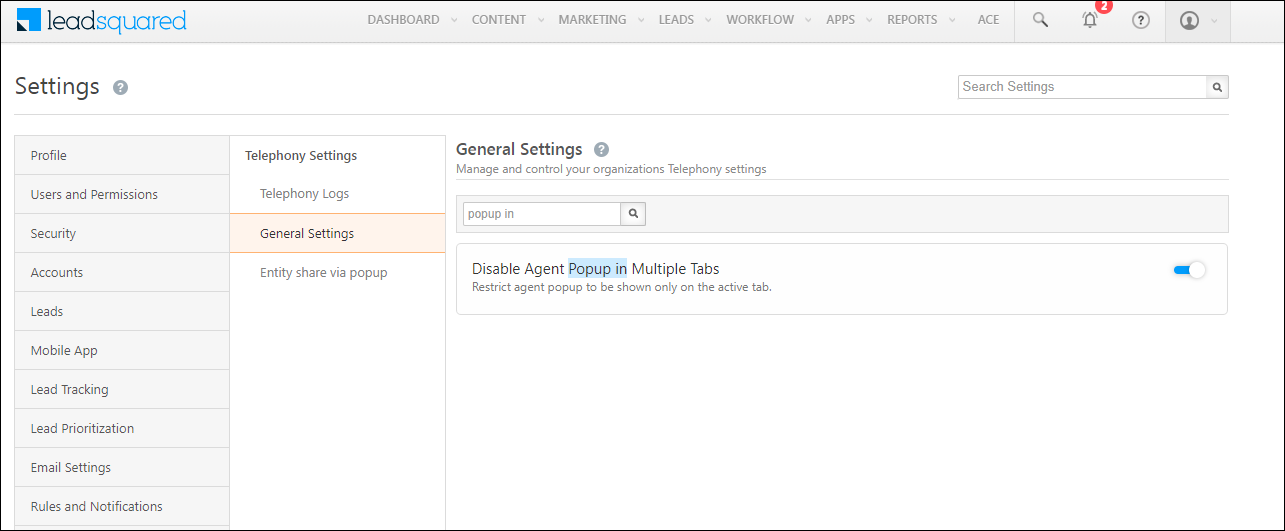
2. Why are multiple Agent Popups being displayed?
By default, the Agent Popup appears on all open browser tabs. To restrict the popup to only the active LeadSquared tab, follow these steps:
- Navigate to Settings>Telephony>Telephony Settings>General Settings and enable the option Disable Agent Popup in Multiple Tabs. Note that this option is not available for users on the legacy Agent Popup. To use this feature, you need to upgrade to the new implementation (shared workers implementation). For assistance with the upgrade, contact support@leadsquared.com.
Ensure that your telephony provider is not calling the Agent Popup API multiple times, as this can also cause multiple popups to appear.
3. Why is there a delay before the Agent Popup appears?
In the API logs, check the timestamp of the agent popup API request to determine if the delay is from the provider’s end.
4. Why is phone number masking not working?
Verify if phone number masking has been applied correctly via permission templates.
5. Does the agent popup support lead ID?
Yes. The parameter to be used is LeadId. Use the parameter @leadId .
6. Does the agent popup support Opportunities?
Yes, Agent Popup supports Opportunities. The configuration may vary depending on the call direction. Refer to Opportunity Integrations in Telephony for details or UTC Feasibility.
7. Does the agent popup support OpportunityID?
No, It supports OpportunityTelephonyMappingId.
8. Why is the agent popup showing lead details instead of opportunities?
- Verify if Opportunity Telephony is enabled for your account.
- Ensure that
@OpportunityTelephonyMappingIdis correctly passed in the request.
9. Can the customer’s telephony provider call LeadSquared’s APIs at particular events? If so, does the provider only support GET requests?
The customer should have a custom code and call LeadSquared’s API to retrieve lead details by phone number. The provider should open the lead details URL when the call connects.
10. Can the customer’s telephony provider call LeadSquared’s APIs at particular events? If so, does the provider only support POST requests?
Yes, And, If the customer wants this ability for both inbound and outbound calling. Then, the customer’s telephony provider should support calling LeadSquared’s Agent pop-up API in case of call events like Call Ringing or Call Connected.
11. Is sharing a lead with another agent (non-lead owner) possible via agent popup?
Yes. To configure this option, read our help article on Entity Share Option for Telephony.
12. How does the customer’s telephony provider identify an agent?
- Through Email/SIP ID/Extension: User-agent mapping needs to be configured. The identifier should be passed in the Agent ID parameter, which takes priority over the agent’s number.
- Through phone number: Pass the agent’s number in the Source or Destination numbers based on the direction of the call.
13. I’m using a custom form for the Agent Popup, but it forces me to create an opportunity before displaying the form. How can I restrict this?
Navigate to Settings>Telephony>Telephony Settings>General Settings and configure the Configure Agent Popup Grid option to disable Opportunity Grid. If you still require assistance, please contact support@leadsquared.com.
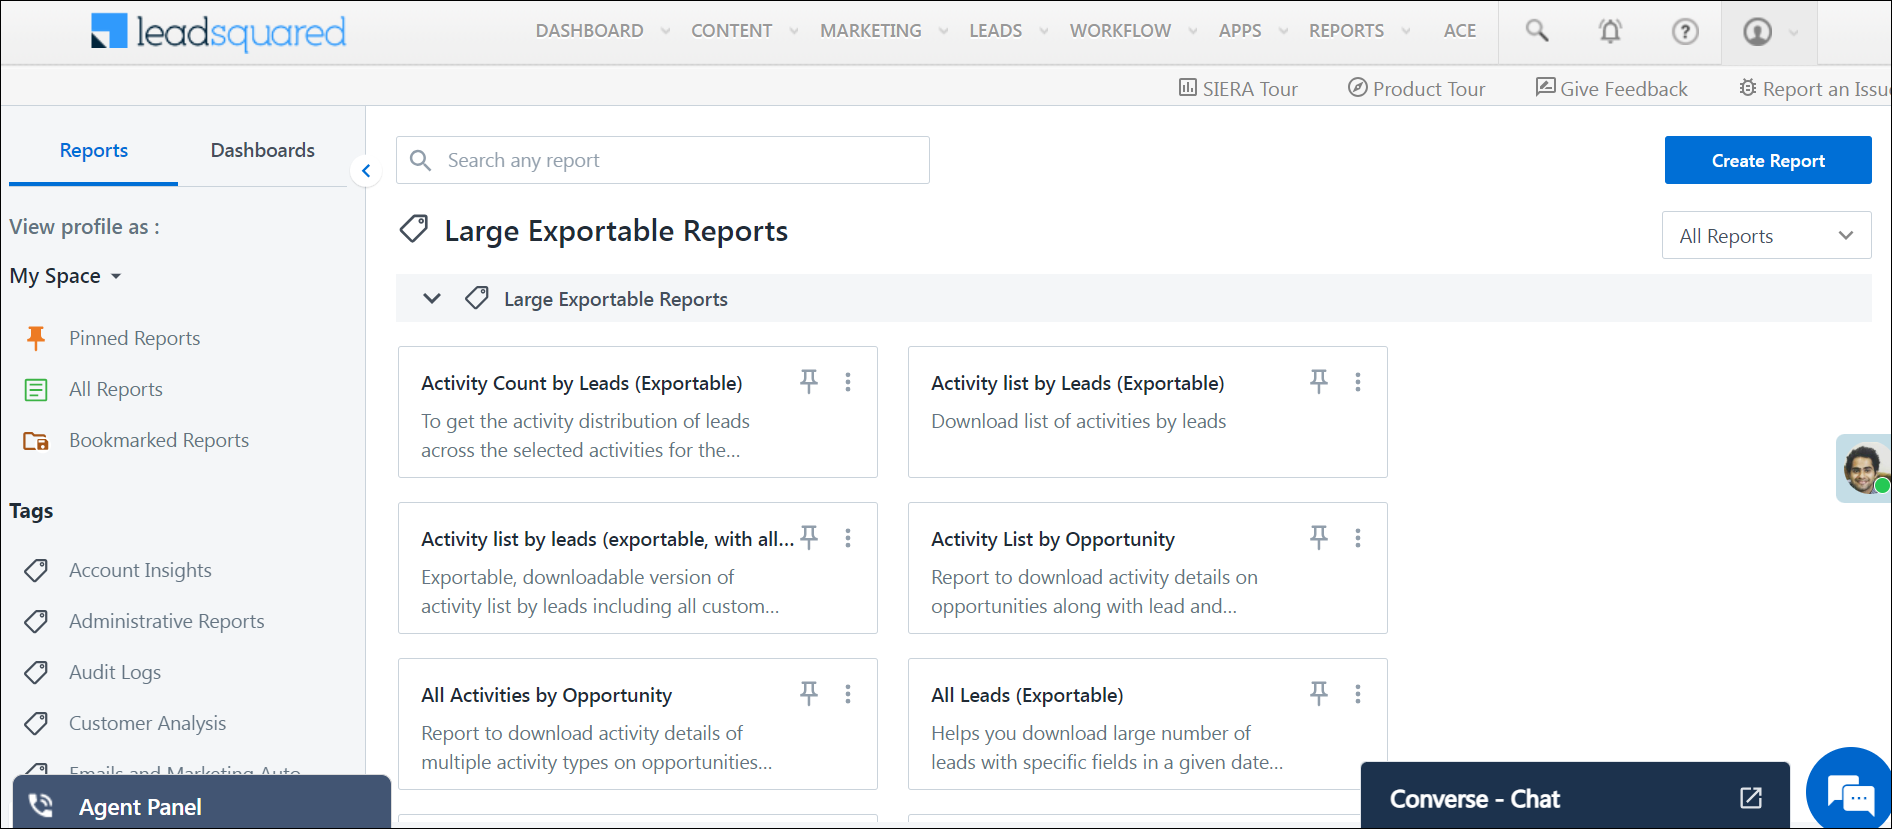
5. Agent Panel
1. Why is the Agent Panel not displayed?
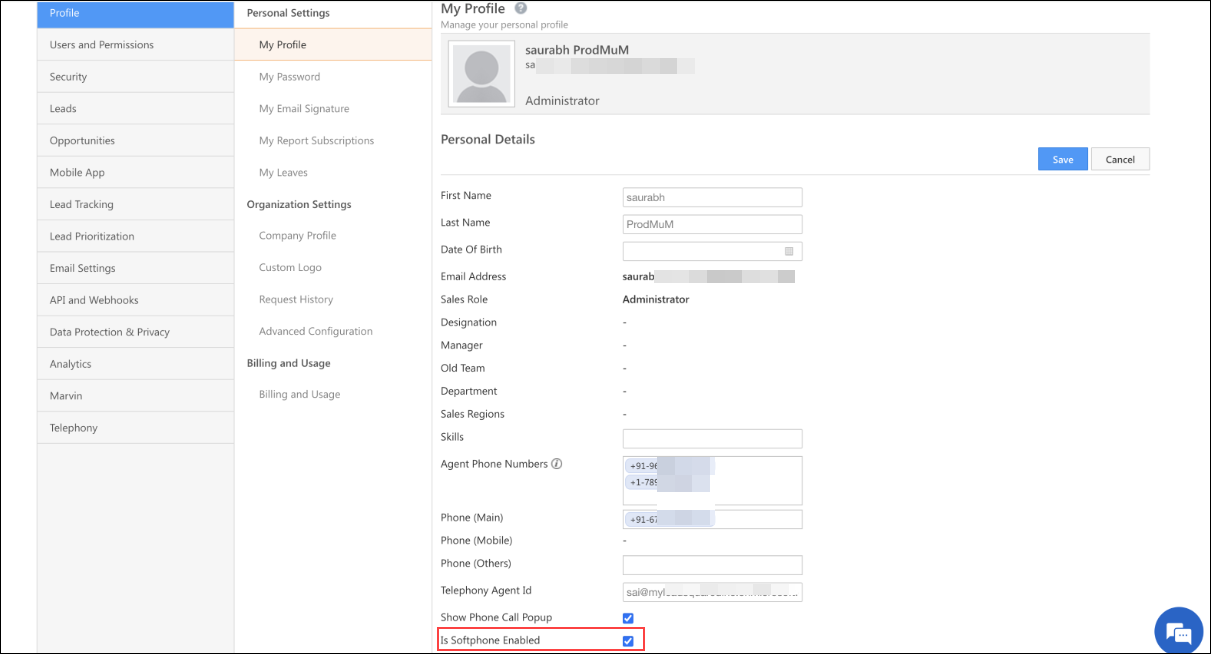
For admin users: Ensure that the Is Softphone Enabled setting is enabled in the user’s profile by navigating to My Profile>Manage Users.
For non-admin users: Ensure that the Is Softphone Enabled setting is enabled in the user’s profile by navigating to My Profile>Personal Details.
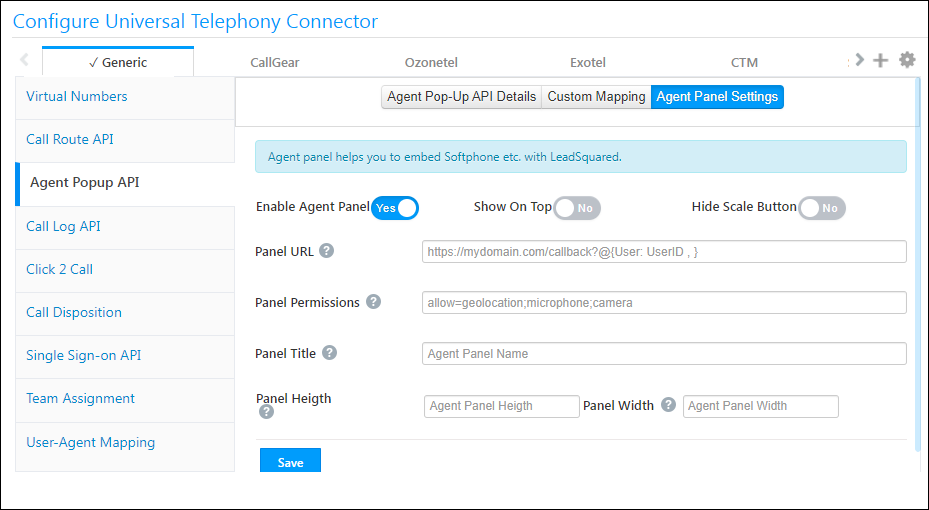
Verify Agent Panel Settings: Confirm that the Agent Panel is enabled in the Agent Panel Settings within UTC.
2. Can we customize the Agent Panel?
Yes, at present, the following customizations are possible:
- Enable Agent Panel – You must enable this option for the Agent Panel to show up.
- Show On Top – The panel will be displayed on top and all other windows will be behind.
- Hide Scale Button – Hides the magnifying option.
- Panel URL – You can configure external URLs.
- Panel Permissions – You must allow at least geolocation and microphone for the panel to work.
- Panel Title, Height, Width – Adjust the panel’s title, height, and width.
3. Why is the Agent Panel not loading?
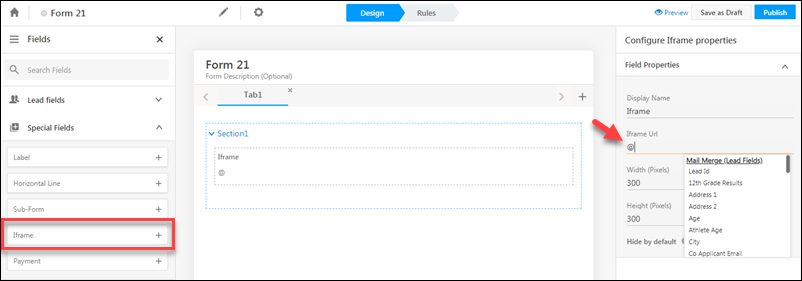
The origin application should allow itself to be embedded within an external iframe. If not, the panel will not load (e.g. google.com). Check if the X-Frame-Options in the provider’s app allows this.
4. Does the Agent Panel URL support mail merge?
Yes, the Agent Panel URL supports standard user mail merge fields. For more details, visit Agent Panel Mail Merge Fields.

5. Why does my VoIP call end when I refresh the page?
When you make a computer-to-computer call (VoIP) and refresh the page, the connection will break – this is a known issue. There are workarounds available for a few connectors like Ozonetel and CTM, for help, contact support@leadsquared.com.
6. Does the customer’s telephony provider have a web app that can be used as a softphone?
Yes, the web app can be used as a softphone, but it needs to be integrated into LeadSquared’s Agent Panel. Relevant permissions for the iframe must be provided under the Agent Panel configuration.
- For Single Sign-On (SSO) or authentication:
- By default, separate logins are required for LeadSquared and the Agent Panel.
- Third-party authentication (OAuth2, etc.) is not available.
- If the telephony provider has user-level tokens for authentication, these can be stored in a user field and mail merged into the iframe URL. The provider will need to handle authentication on their end.
6. Call Log
1. The customer is using international calling. When a call log gets posted, +91 gets prefixed as the country code. How do I ensure the correct country code is prefixed?
For international calling, custom formatting logic needs to be enabled. This can be configured through the backend, please contact support@leadsquared.com.
2. Does call log support opportunities?
Yes. The configuration for this can change based on the call direction. Refer to Opportunity Integrations in Telephony for details or UTC Feasibility.
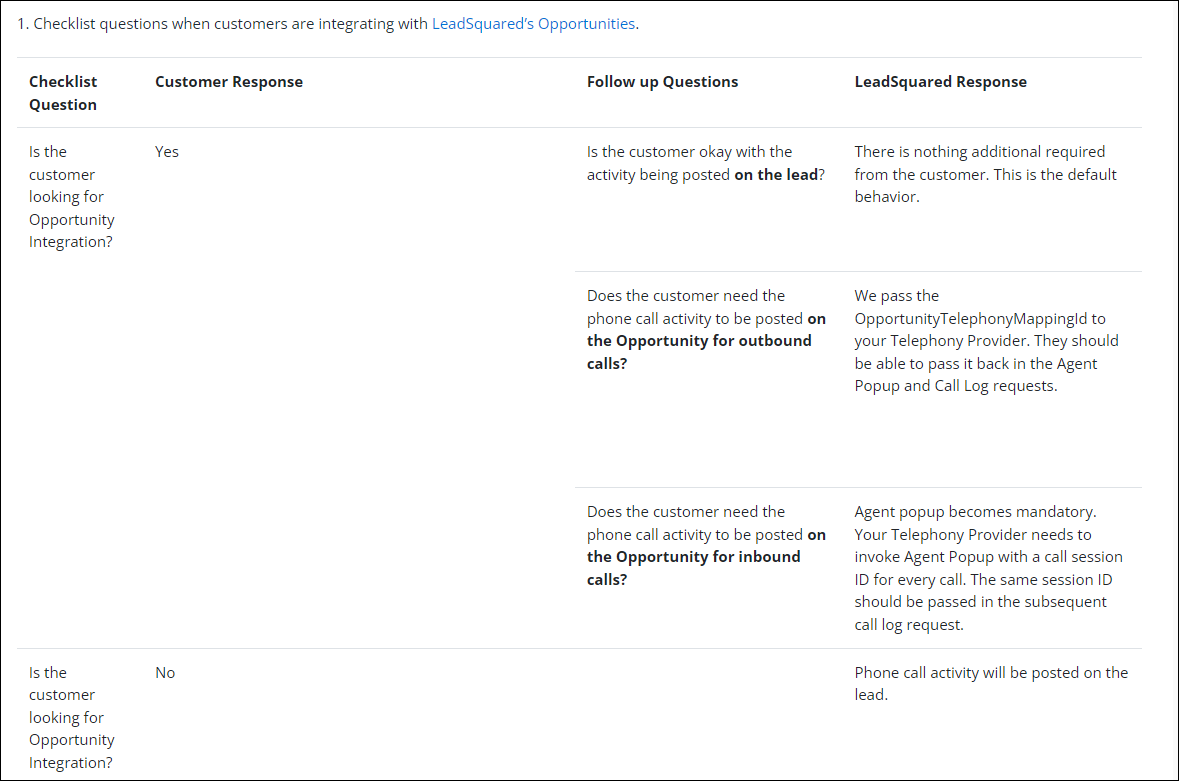
3. When there is an Opportunity, will the call log be posted on the Lead or Opportunity?
- Outbound call – If the provider passes the OpportunityId back to LeadSquared, it will be posted on the Opportunity.
- Inbound call – In this case, the provider must have called LeadSquared’s Agent Popup API with the same Call Session ID for the call log to be posted on the selected opportunity in the popup.
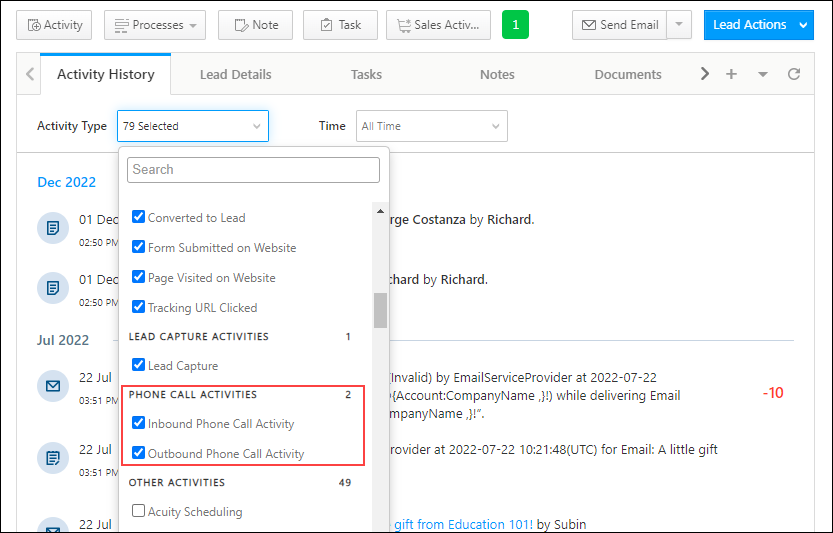
4. Why are calls not being displayed in Activity History even though I can see them in the Manage Activities screen?
- Activity History will only show successful or voicemail calls – failed calls will not be shown.
- Make sure Phone Call Activities are enabled in the Activity History tab on the Manage Leads Details page.
5. Why is the call log missing? I do not see activity being created on the lead.
- Check Telephony Logs: Verify that your telephony provider is correctly calling the Call log API by navigating to Settings> Telephony>Telephony Logs. If the API is not being called, the call log will not appear.
- Validate Request Data: Ensure the request data is valid. Common issues include incorrect Caller ID formats.
- Verify Call Log URL: Ensure the URL for posting the call log is correct.
- Consider Posting Delays: Sometimes, call logs are posted late by the provider.
- Check StartTime: Activity is based on the StartTime value in the API payload, not when the log is received. StartTime should be in IST; use StartTimeUTC for UTC values.
- Validate Phone Number Format: Verify that the telephony provider is passing the phone number in the correct format within the call log. An incorrect format can prevent the log from being recorded. If a country code is included, ensure a hyphen separator is used, such as +91-9611795983.
6. What is the time format of StartTime parameter in Call log API?
Call log API expects StartTime to be in IST by default. If you need to post it in UTC time, please use the StartTimeUTC parameter instead.
7. Does the call log support LeadId, OpportunityId, and OpportunityTelephonyMappingId?
Yes, it supports all three.
8. What is the difference between Raw Call Status and Call Status?
Raw Call Status is the actual value passed by the provider, while Call Status is the converted/mapped value in LeadSquared.
9. Why is an inbound call being displayed as outbound in the activity history?
Verify that the value of the Direction property in the call log request is Inbound. All other values get converted to outbound.
10. The phone number in the customer’s account is not unique. If there is more than one lead with the same phone number, how do I ensure that the call log does not create an activity for both leads?
- The call log will post an activity against the most recently modified lead.
- If the lead ID is passed in the call log request by the telephony provider, then the activity will be created only on that lead. Pass the lead ID as a mail merge parameter in the Click 2 Call URL and the same can be passed back by the provider for outbound calls. There is no way to ensure this for inbound calls.
- You can also set phone control to avoid creating duplicate leads.
11. Why is the call log failing with this error message “Duplicate entry <number> for key ‘UQ_Prospect_Base_Phone'”?
Navigate to Settings>Telephony>Telephony Settings>General Settings and enable Enable leading zeros in phone type lead fields.
12. Why is a missed call being reported as voicemail?
This is dependent on the direction of the call. Verify if the call direction (inbound/outbound) is being sent correctly.
13. Why am I unable to play or download call recordings?
Here are some things to check:
- Access Issues: Confirm that you have the correct permissions and access the recording URL.
- URL Security: Make sure the recording URL uses HTTPS, as some browsers require this for secure access.
- Provider Confirmation: Verify with your telephony provider that the recording was successfully sent.
- Delay in Delivery: Be aware that there may be delays in receiving call recordings from your telephony provider.
14. Why am I not able to play or download call recordings in Chrome and Edge browsers?
Check if the recording has insecure (HTTP) URLs. Google Chrome and Microsoft Edge only support HTTPS URLs.
15. I have sent call notes in the call log request but I am not able to find them in the UI or via the advanced search. Why?
The call/activity notes field is a system field for which the setting to display in the advance search form is restricted. An alternative is to use a custom field with the display name as call notes. This will show on the UI and is searchable as well.
16. Why is the lead getting reassigned to a different agent after an inbound call?
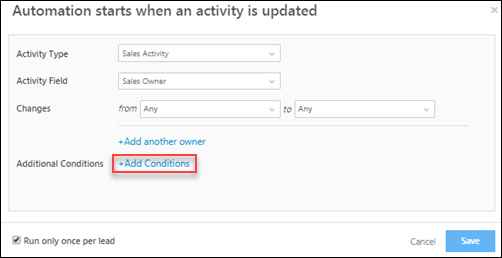
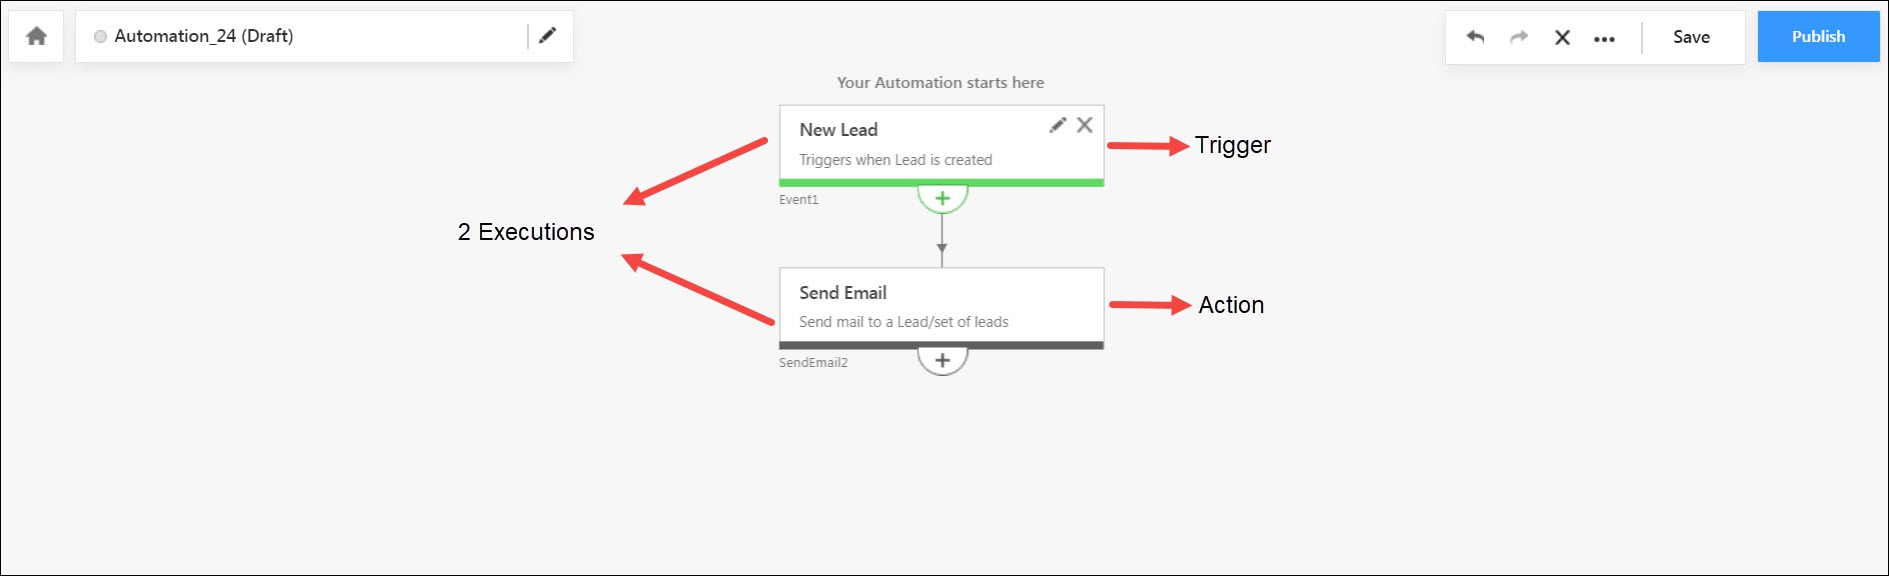
Check if there is an Automation that is triggering this.
17. Can I map the source number in inbound calls to the lead’s mobile number instead of the phone number? I do not want to create a duplicate lead if the source matches the mobile.
By default, we check the lead’s phone as well as mobile numbers before creating a lead
18. Why did the call log API change the owner of the lead when an outbound call was made by an agent?
If the owner of the lead is System and an agent makes an outbound call to this lead, the call log API automatically makes this agent, the new owner of the lead. If you would like to override this default behavior, contact support@leadsquared.com.
19. Why is the call recording duration not matching the call duration in the activity?
Check the Telephony Logs for the call log request. The call duration and the recording are both pushed by the provider. If there is a mismatch, you will need to contact your telephony provider.
20. I need to pass additional data/custom fields in the call log. How do I proceed?
Apart from the defined fields, LeadSquared supports up to five custom fields currently. Telephony providers can use the following parameter names – mx_Custom_10, mx_Custom_11, mx_Custom_12, mx_Custom_13, mx_Custom_14. You can assign Display Names for them, and they are also searchable in advanced search.

21. How does the provider’s call status map to our system’s call statuses?
- When the provider sends “answered”, “answer”, or “received”, it is mapped to Answered status on our end.
- When the provider sends “voicemail”, it is mapped to VoiceMail status on our end.
- When the provider sends “rejected”, it is mapped to Rejected status on our end.
- When the provider sends “cancel” or “missed”:
- For inbound calls, it is mapped to Missed status.
- For outbound calls, it is mapped to NotAnswered status.
- For all other statuses, we show CallFailure on our end.
22. Why is the outbound call activity shown as “system”?
When a lead is created through a missed call activity and no users are available at the time, the system automatically marks the activity as “system”. This is the default product behaviour.
23. How to Capture DTMF and IVR Digits Pressed by Callers in LeadSquared?
- Scenario: You want to capture DTMF values (digits pressed by callers in the IVR) and store them in the Phone Call Activity for leads.
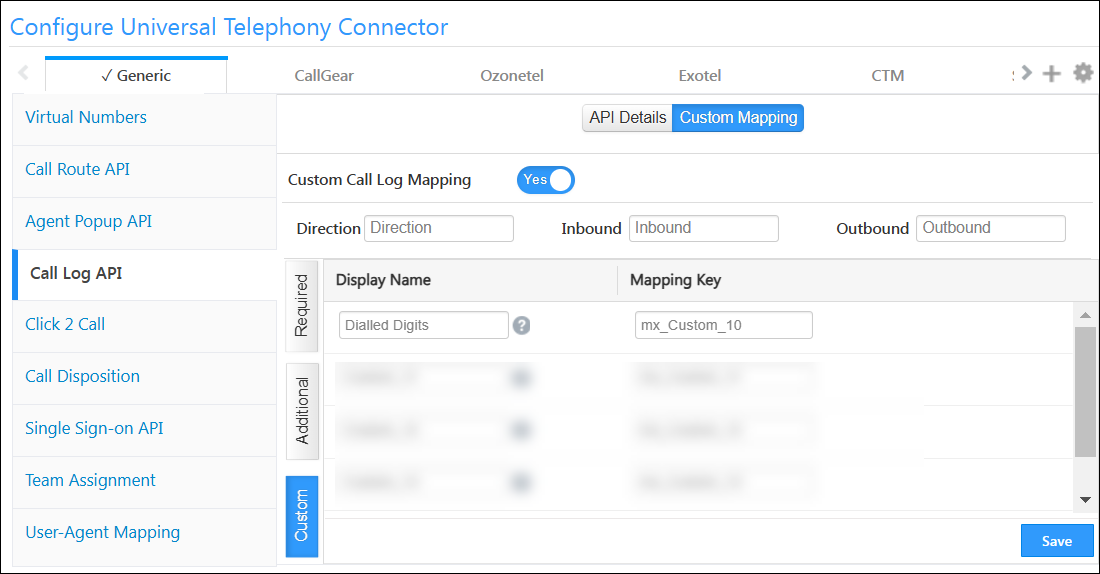
- Solution: You can achieve this by enabling Custom Call Log Mapping through the UTC Connector. Follow these steps to configure it:
- Navigate to UTC Connector in LeadSquared. You must set this up in the default instance.
- Locate the Call Log API section and enable Custom Mapping.
- Under Custom Mapping, select the Custom option to capture additional data provided by your telephony provider.
- You can use the fields
mx_Custom_10up tillmx_Custom_14as these are activity fields reserved for telephony data. Add an appropriate display name, e.g., “Dialled Digits”. - Now your telephony provider can provide the data through the schema name you’ve used.
- You can use the fields
Mapping Data to Lead Fields:
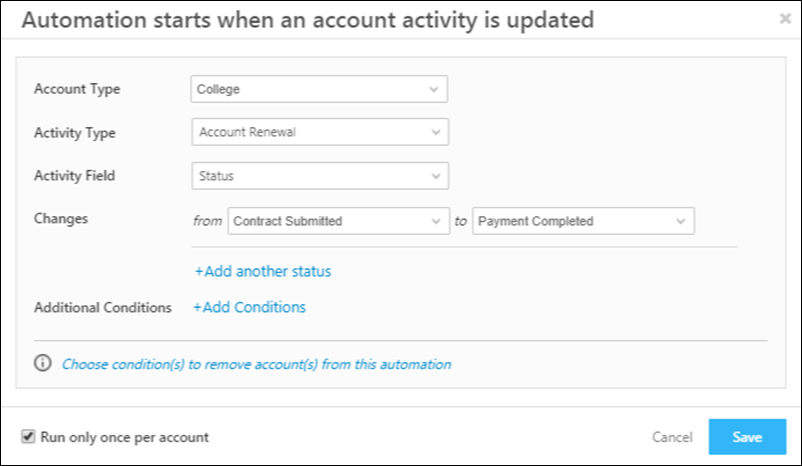
If you want to capture this data in a Lead Field, you can use Automation. Set up automation to transfer data from the activity field to the lead field using the Mail Merge option.
7. Click 2 Call
1. Does the Click2Call URL support the passing of custom headers in the request?
Yes, as long as they are not part of the standard browser HTTP headers list.
2. Does Click2Call support mail merge parameters?
Yes, Click 2 Call supports mail merge for standard user and lead field parameters. For more information, read, Click 2 Call Mail Merge Fields.

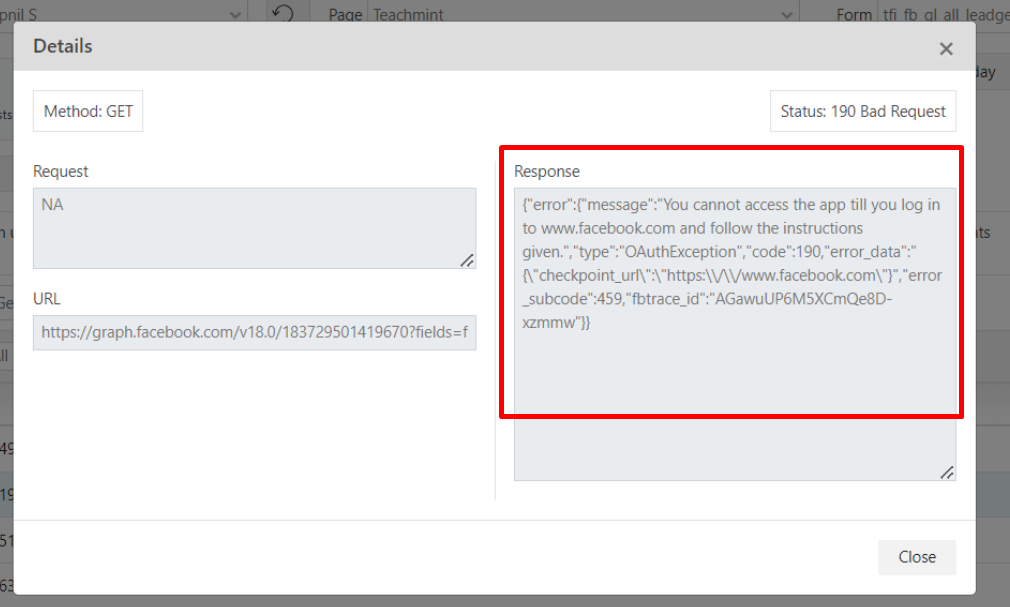
3. Why does Click 2 Call show an error?
- Check Telephony Logs: Review the Telephony Logs for details.
- Verify Provider Response: The Click2Call APIs are managed by your telephony provider. Ensure that the response message from the provider matches the expected configuration keyword.
4. Why am I seeing “Failed to initiate call” or “Call not connected” errors?
Here are some things to check:
- Permissions: Verify that you have the required permissions set up with your telephony provider.
- Login Status: Ensure you are logged into the telephony provider’s portal.
- Agent Phone Number: Confirm that your agent phone number is correctly added and configured.
- Availability Status: Check that your status is set to “Available” in the telephony provider portal.
- Mapping Accuracy: Ensure that the phone number and email are correctly mapped in the telephony provider’s system.
- API Issues: Investigate potential issues with the telephony provider’s API that might affect call initiation.
- Duplicate Calls: Avoid making multiple calls to the same lead, as this can cause errors.
- DND Status: Verify that the lead is not marked as Do Not Disturb (DND).
- Number Restrictions: Note that calls to Alaska numbers may be blocked by CTM.
- Virtual Number: Ensure the virtual number is correctly mapped in the connector, functioning as expected, and has not expired. If the number has expired or is not working as expected, contact your telephony provider for further assistance.
5. Why does the Click 2 Call feature show a blank screen?
If you are using UTC, check if the instance for which Click 2 Call is configured has been set as the default instance.

6. Why is Click 2 Call not picking up the old virtual number and not the updated one?
After updating and saving the virtual number, save the Click 2 Call configuration. You might also need to log out and log back in.
7. Is it possible for Click 2 Call to support both Indian and international numbers in the same account?
Yes, contact support@leadsquared.com to enable formatter logic. Click 2 Call will then use the format +CC-PhoneNumber for calling.
8. Can I filter virtual numbers?
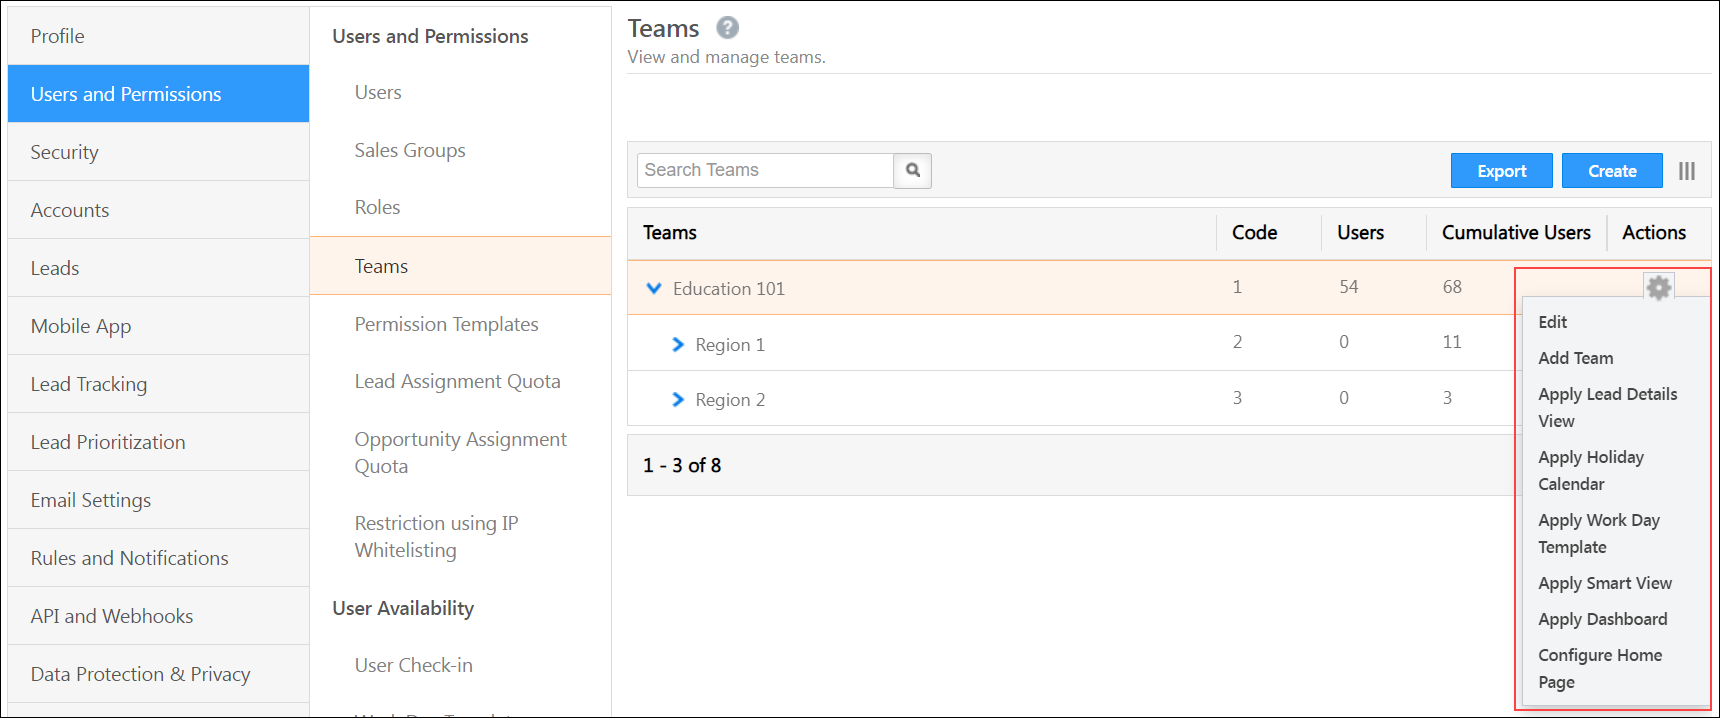
Yes, it can be done through Team Assignment.
8. Call Disposition
1. Why is the agent email address not being mail merged?
It is not supported by default. To enable it, contact support@leadsquared.com.
9. Call Route
1. Can the Call Route API return additional details of the agent and not just the phone number?
Yes, pass agentInfo=true in the Lead Route V2 API. This will return additional details of the agent.
2. Why is the sticky agent feature not working as expected?
The sticky agent issue may arise due to several factors related to the provider’s workflow. Below are some potential reasons:
- The provider’s workflow is not handling empty responses properly.
- The originally assigned agent was busy, so the call was redirected to another agent according to the workflow.
- An incorrect phone number (8-digit) was sent by the provider, causing the routing to fail.
- The provider is routing calls to the wrong agent.
We recommend reviewing the provider’s workflow and ensuring the correct parameters are being sent and handled
10. Ozonetel Telephony Connector
1. Is bulk add-to-campaign action supported (for over 200 numbers)?
Yes, this is supported.
2. I need to support opportunities. How do I proceed?
- By passing OpportunityMappingId in the UUI parameter. Prefix OM$ before the value.
- By passing OpportunityId in the UUI parameter. Prefix O$ before the value
Refer to Opportunity Integrations in Telephony for details.
3. How do I pass lead ID?
Pass the lead ID in the UUI parameter. Prefix L$ before the value.
4. I want to add custom mail merge parameters to my Click 2 Call request. Is it possible?
This can be done through the backend, please contact support@leadsquared.com. Please note that any change made via the backend would be lost if the configuration is saved in the connector UI.
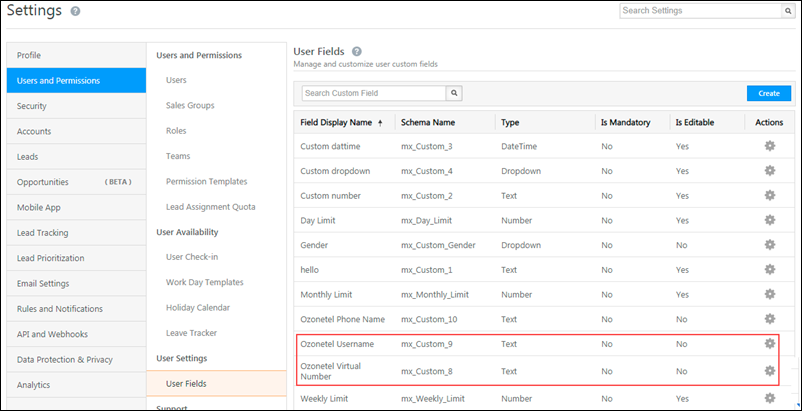
5. I want the agents to see only the virtual numbers (campaigns) assigned to them when making calls. Is this possible?
Yes, the campaign needs to be saved in one of the user custom fields. The connector Click 2 Call setting then needs to be updated to enable the filtering of virtual numbers by this field.
6. Ozonetel says that an older call disposition API is no longer supported after Aug 2021. Will the customer be affected?
We support the latest version of the Call Disposition API.
7. Why did my automation card for “Send to campaign” fail?
Please check the response from Ozonetel, this should mostly be an error from their API.
8. Why is the call log being posted multiple times?
Please check if Ozonetel is pushing this more than once. There is also a backend flag to restrict multiple requests with the same UCID, please contact support@leadsquared.com.
9. I have multiple automation cards pushing the lead to the same campaign. How do I ensure that there are no duplicates?
- Make sure that the “Check Duplicate” flag in the connector configuration is on.
- If this has been enabled recently, the changes may not have been reflected because of caching issues. Please log out and log in.
10. Why did the lead owner get changed automatically after an inbound call?
Check the telephony logs. There have been instances where Ozonetel has passed some data in the call log with a lot of arrows to indicate call transfers. You will need to get in touch with Ozonetel.
11. Exotel Telephony Connector
1. Why don’t I see call logs in LeadSquared even though Exotel has posted them from their end?
Exotel has a client-side timeout limit for API requests. Many of their requests time out even before reaching our load balancer. We have discussed this with them and they have increased this limit on their end.
2. Is there an async version of the call log API available?
Yes, the Exotel call log API supports this. To use the async version, the Enable Async APIs for Telephony (Capras) setting needs to be enabled in the Telephony General Settings. For more details, see Post a Call Log Async API.
3. Can I use international numbers in the CallerId (Virtual number) field?
Yes, Allow International formats for Exotel Virtual Numbers is an opt-in feature in the Telephony General Settings.
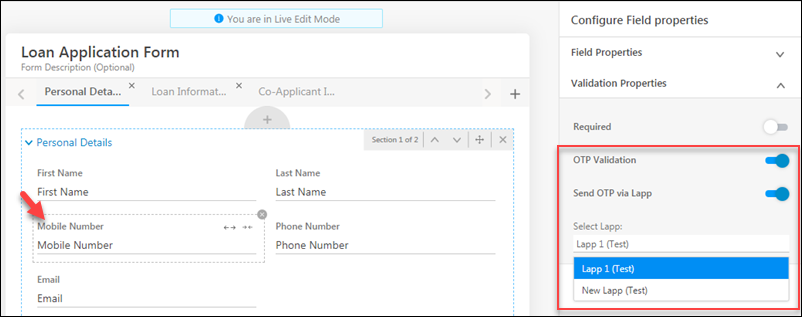
4. Why is the agent popup failing with this message “Agent Popup Not broadcasted”?
Check the call status. For the Agent Popup to work, the call status should be busy.
Any Questions?
Did you find this article helpful? Please let us know any feedback you may have in the comments section below. We’d love to hear from you and help you out!


 .
.